; ?>>

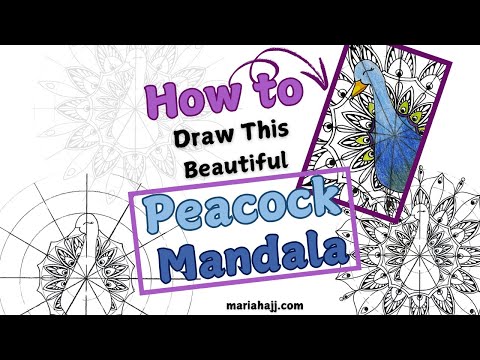
How to Draw This Beautiful Peacock Mandala

this is an image of a peacock mandala half colored

Welcome to this fun and relaxing tutorial on creating a Peacock Mandala! At first glance, drawing mandalas might seem overwhelming. However, with a little guidance and practice, you’ll see how simple and enjoyable it can be. In fact, this tutorial is designed to make mandala art possible for everyone, even if you’ve never drawn before.

So, why a peacock? Well, its elegant feathers and intricate patterns make it the perfect inspiration. And the best part? You don’t need any special tools. All you need is a sheet of paper, a pen, and a willingness to try. First, we’ll start with a basic structure. Then, step by step, we’ll add the details that bring your design to life.

Moreover, I’ve made sure each step is easy to follow. In other words, you’ll never feel lost or stuck. As you move forward, you’ll notice how everything comes together. And even if your lines aren’t perfect, that’s totally okay. After all, mandalas are about creativity, not perfection.

Additionally, feel free to pause and take breaks. The beauty of this tutorial is that you can go at your own pace. By the end, you’ll have created a unique masterpiece that you can proudly show off.

So, go ahead, grab your supplies, and let’s begin. Before you know it, you’ll discover just how fun and relaxing drawing mandalas can be. Let’s get started!

Let’s Start This Beautiful Peacock Mandala Project!

Are you ready to dive deeper into the art of drawing mandalas? This Peacock Mandala tutorial is just the beginning! You’ll find a complete video version of this tutorial on my YouTube channel, along with many other step-by-step guides designed to make mandala drawing easy and enjoyable for everyone.

To help you get the most out of this experience, I’ve included the video link at the end of this written tutorial. By combining both the written instructions and the video, you’ll have everything you need to create your own stunning mandala with confidence.

So, don’t stop here! Head over to my channel for more inspiration, tips, and tutorials. And while you’re there, be sure to SUBSCRIBE and turn on notifications to stay updated with all my latest content. Let’s create beautiful mandalas together—one design at a time!

The Materials You Need

Drawing a mandala doesn’t have to be expensive. Instead, you can use simple materials.

Moreover, you don’t need fancy paper. Instead, you can use recycled paper or pages from an old notebook. Furthermore, household objects like cups or bowls can be used to draw circles.

In addition, coloring tools don’t have to be costly. For instance, crayons, markers, or colored pencils work perfectly.

In conclusion, creating mandalas is more about creativity. Therefore, start with what you already have!

this is the image of drawing materials
  • Compass
  • Protractor
  • 12″ Ruler
  • Pencil
  • Eraser
  • Coloring pencils
  • Fine drawing pen 0.2
  • A4 white sheet

Directions

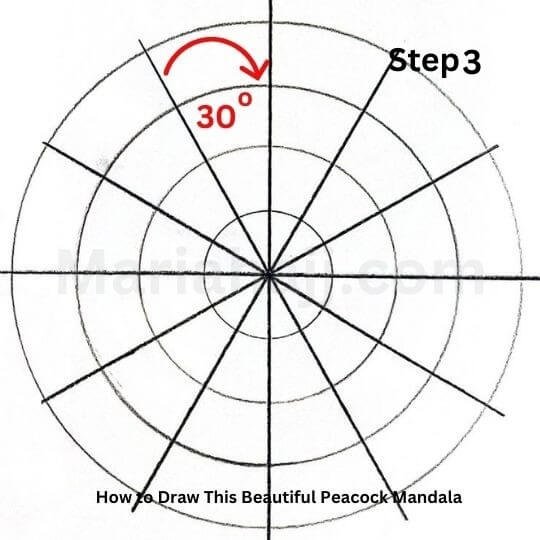
Prepare the Grid for the Peacock Mandala

A mandala grid is essential for creating balanced designs. First, it helps you organize your patterns. Additionally, it ensures symmetry in every section. You can CLICK HERE to check my video tutorial about Mandala Grids.

Moreover, the grid acts as a guide. For example, it shows where to place shapes and lines. Furthermore, it helps avoid mistakes by providing structure.

In addition, a grid allows you to experiment. For instance, you can try different designs while keeping everything aligned. Similarly, it makes your mandala look professional.

In conclusion, a mandala grid is a valuable tool. Therefore, using one ensures your artwork is neat, balanced, and visually appealing.

First, find the center of your paper, then, trace two straight lines cutting the paper in quarters.
Since the essence of a mandala are the circles, trace 5 different circles (2, 4, 6, 8, 10 cm) that have the same center.
Using the protractor, mark a dot every 30 degrees, then, trace the lines as shown above.

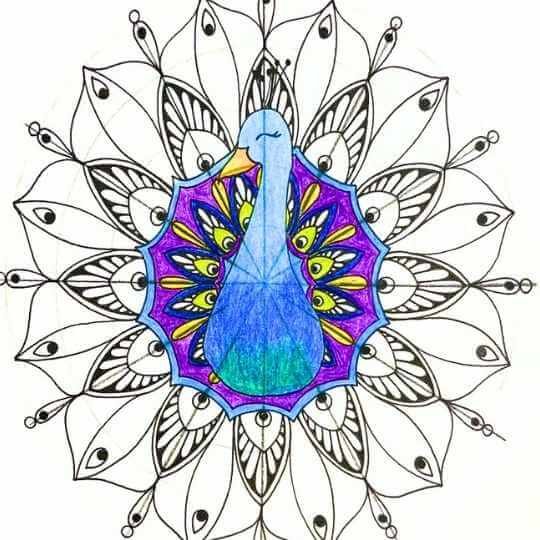
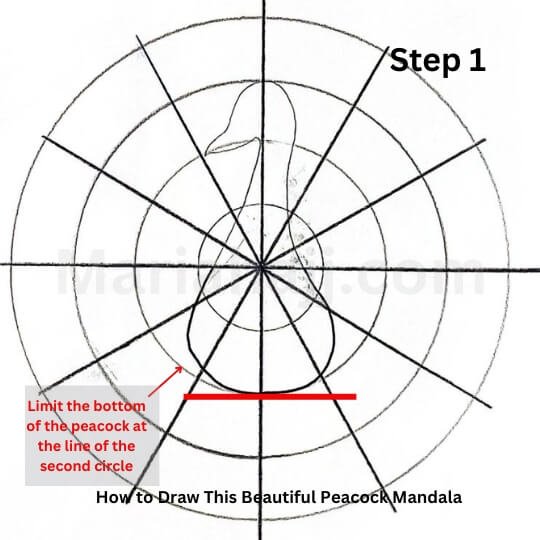
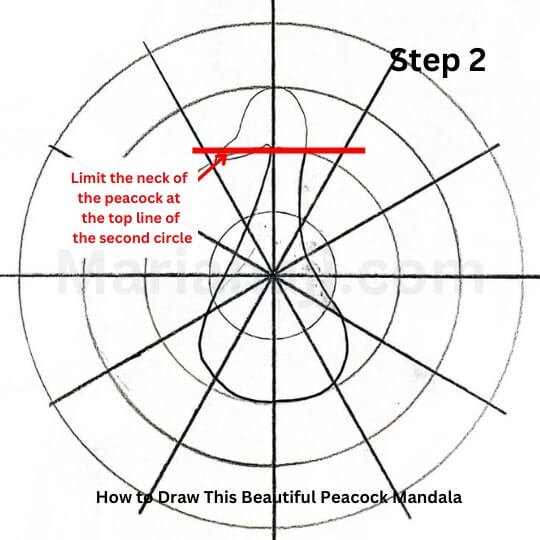
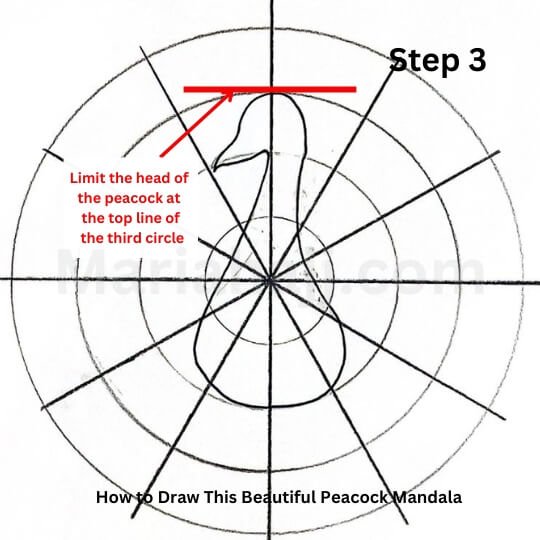
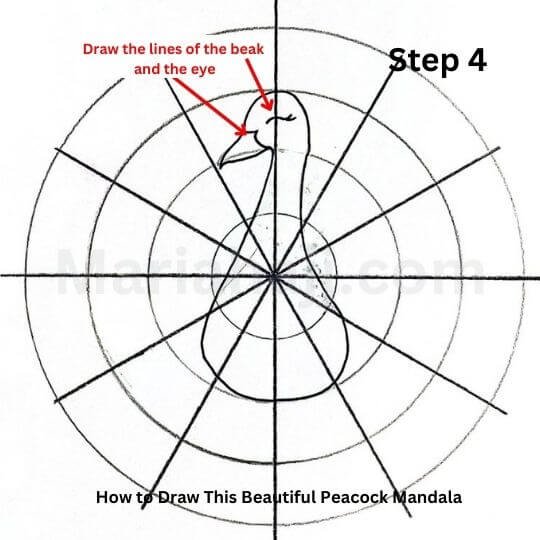
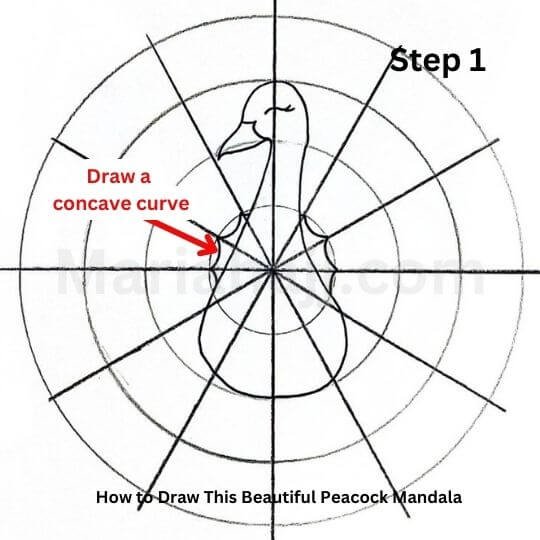
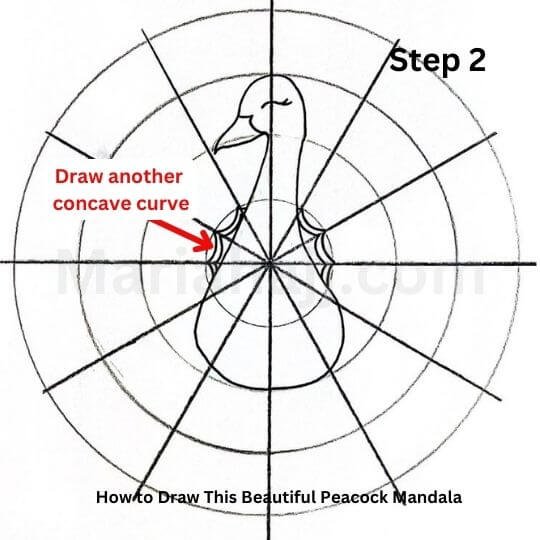
Draw the Peacock Body at the Center of the Mandala Grid

an image showing a mandala grid, and drawing tips
Start by drawing the bottom of the peacock between the center line of the grid and the bottom line of the second circle.
this is the image of a mandala grid with a peacock in the center
Trace the neck of the peacock between the center line of the grid and the upper line of the second circle.
this is the image of a mandala grid with a peacock in the center and writings to explain how to draw
The head of the peacock must be limited between the upper lines of the second and third circle.
this image shows a mandala grid and a peacock at the center with descriptions
Add a line for the beak and an eye.

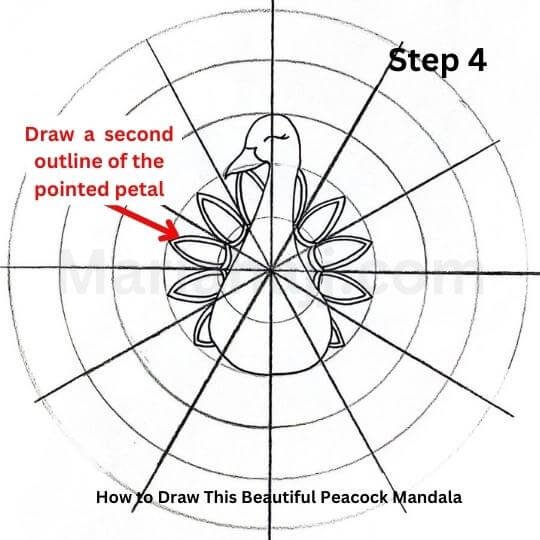
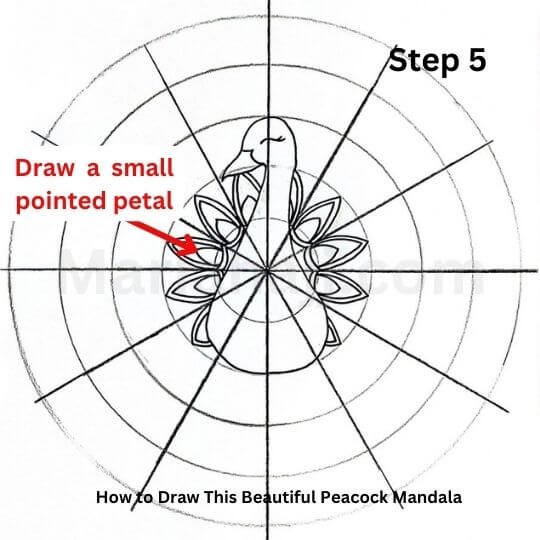
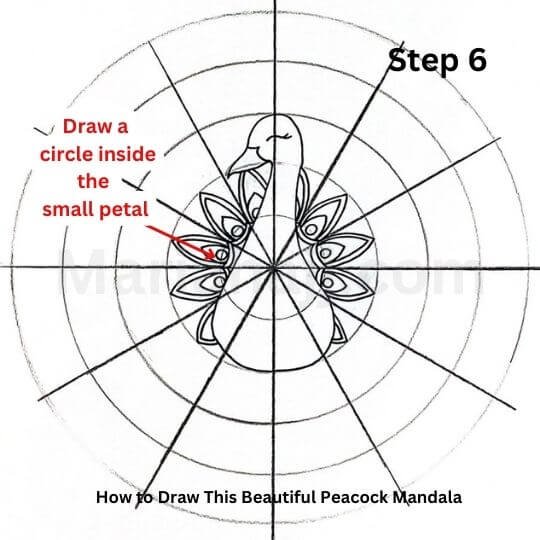
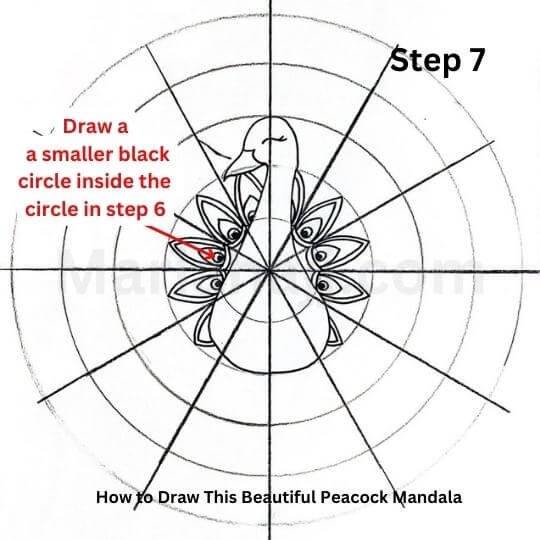
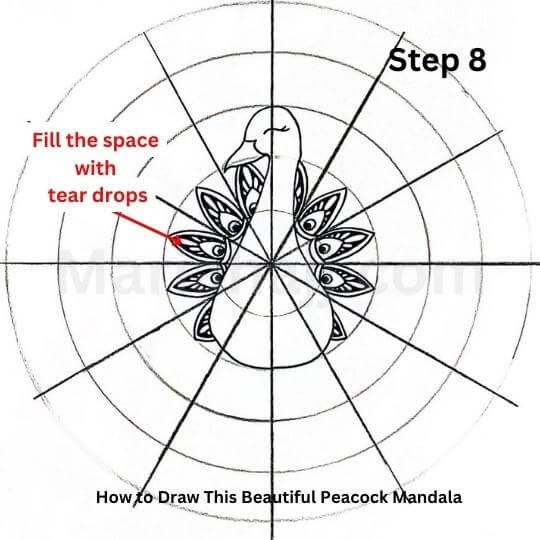
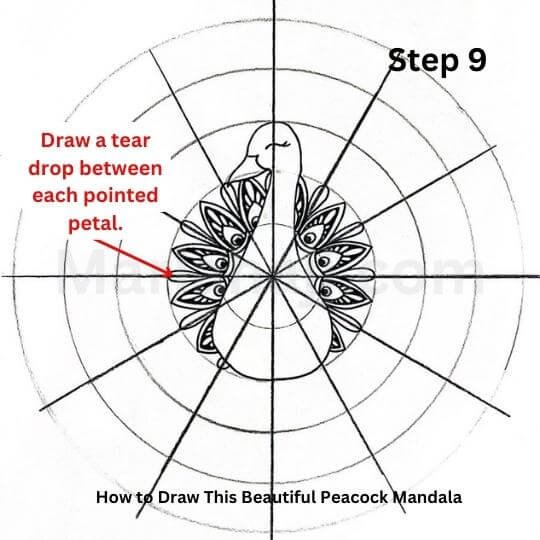
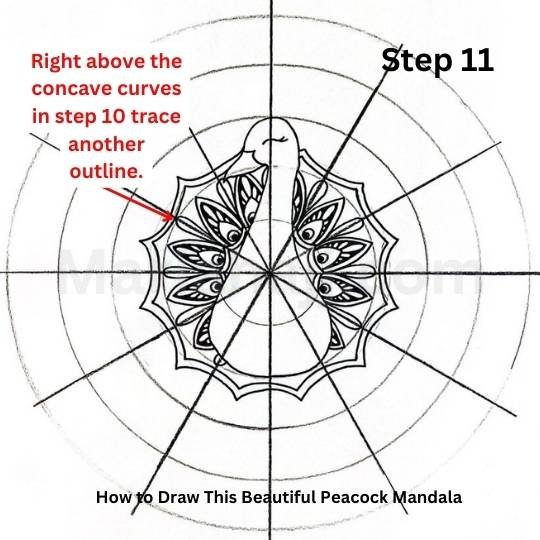
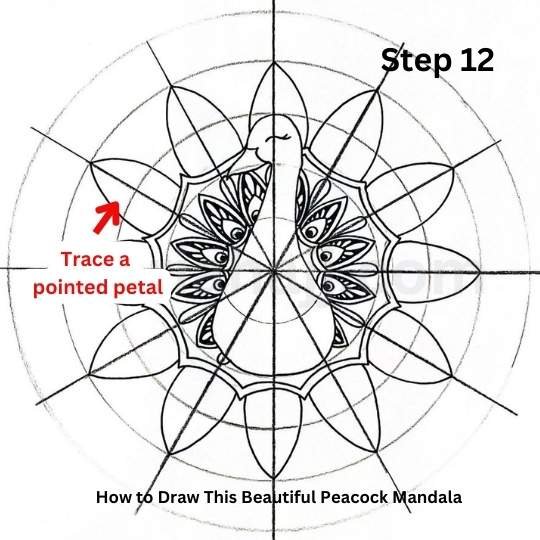
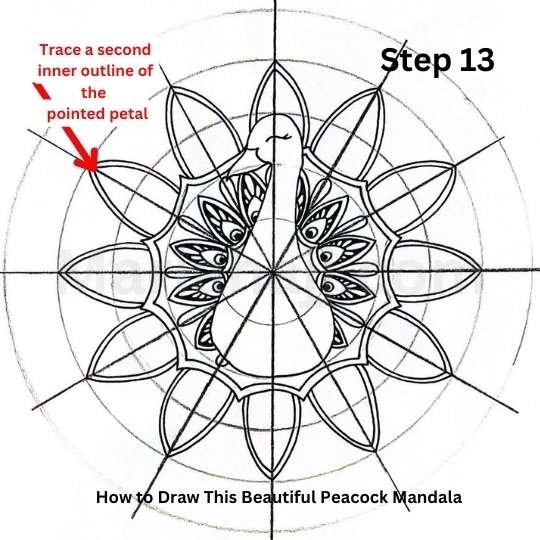
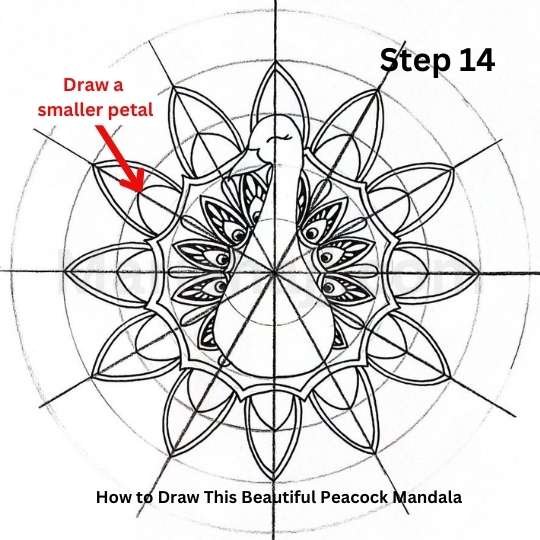
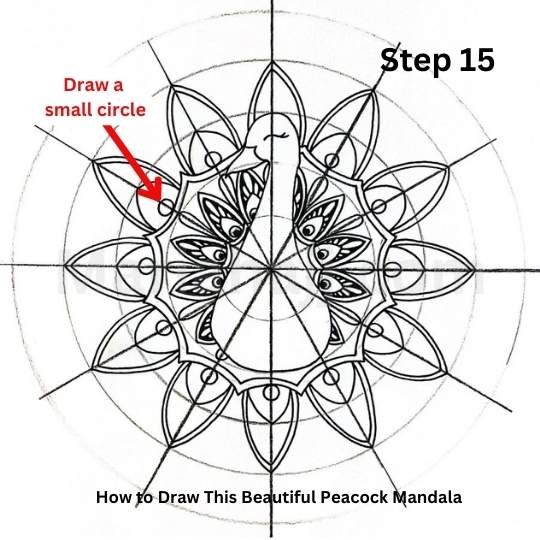
Let’s Fill the Peacock Mandala Grid with Patterns!

an image showing a mandala grid and a peacock
On the space created between the peacock and the first circle, draw one concave curve on each grid section.
this image shows a mandala grid with a peacock in the center
Trace another round of concave curves directly above the ones you draw in step (1)
this image shows a mandala grid with a peacock mandala in the process
Then, in the space between the first and second circle, draw one pointed petal on each grid section.
this is the image of a mandala grid with a peacock mandala in the process
Now trace an inner outline inside each petal you trace in step 3.
this step shows how to draw a peacock mandala
Inside of each petal you drew in step 3, draw a smaller pointed petal .
this image shows the steps of a mandala peacock
At the bottom of each small, pointed petal, draw a circle.
this image shows a mandala grid with a peacock mandala in the process
In this step, draw a small black circle inside of the circle of step 6.
this image shows a mandala grid with a peacock mandala in the center
In the space created between the small petal and the bigger one, draw tear drops and color the blank space in black.
This image shows a mandala grid with a peacock mandala in the center
Now that we finished the petals, and gave them a beautiful pattern, add between each two of them, a tear drop, as shown in the illustration above.
this image shows a mandala peacock on a mandala grid
Draw concave curves like in step 1
this shows instructions, a mandala grid and a peacock mandala
Then, trace a double outline.
this image shows instructions on how to draw a peacock mandala
Now draw a pointed petal on each 2 grid sections.
this image shows a tutorial of how to draw a peacock mandala
Then, trace an inner outline.
it shows a mandala grid and a peacock mandala
Draw a small, pointed petal inside the large, pointed petal.
this image shows a mandala grid and a peacock
Trace a small circle at the bottom of the small, pointed petal.

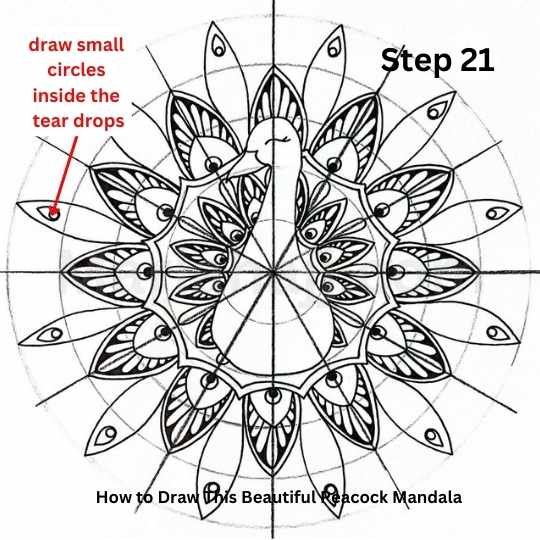
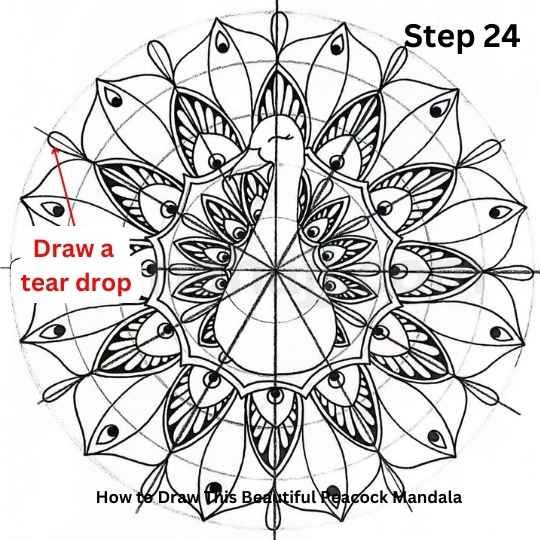
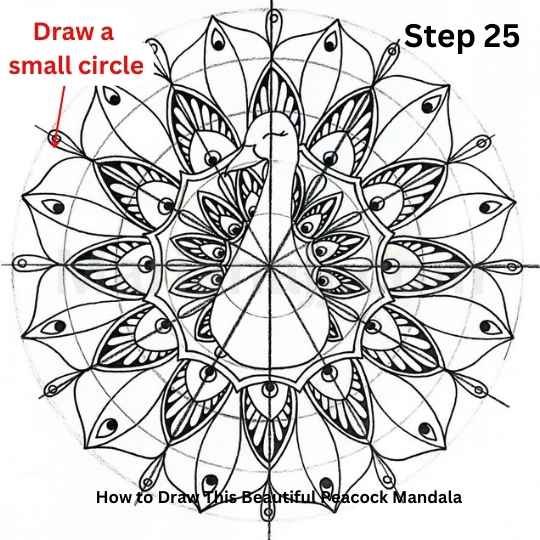
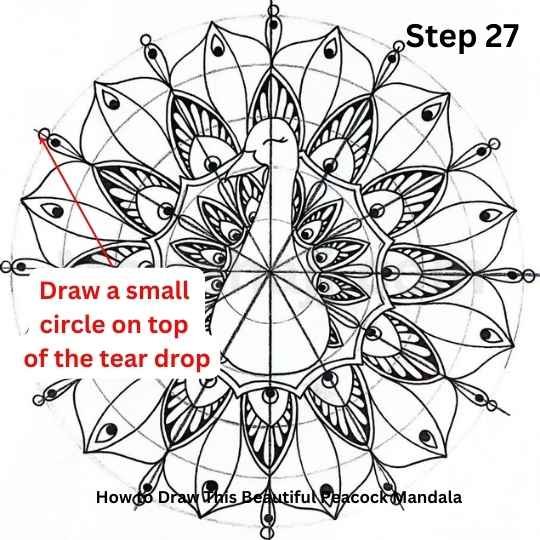
The Final Steps of The Peacock Mandala

this image shows the instruction to draw a peacock mandala
Between each two big, pointed petal, draw one, double-pointed petal.
this image shows instructions on how to draw a peacock mandala
At the exterior end of the double-pointed petal, trace a small tear drop.
this is the image of a peacock mandala
Now, draw a tiny circle at the bottom of the tear drop.
a peacock mandala
Color the circle in black.
a peacock mandala with instructions
Draw a curved line on each side of the double-pointed petal.
a peacock mandala with instructions
Between each two opposite curved line draw a tear drop.
a peacock mandala with instructions
Draw a small circle in the tear drop.
a peacock mandala with instructions on how to draw it
Color the circle in black.
a peacock mandala
Draw a small circle on top of the tear drop.

The Video Tutorial:

Here’s the video tutorial, but as you see, the peacock mandala is slightly different than the one above. So, let your creativity flow and remember to SUBSCRIBE to my channel!

MANDALA PEACOCK / STEP BY STEP TUTORIAL / BEGINNERS/ MANDALA ART (Art Lesson 82)

Leave a Comment

Your email address will not be published. Required fields are marked *