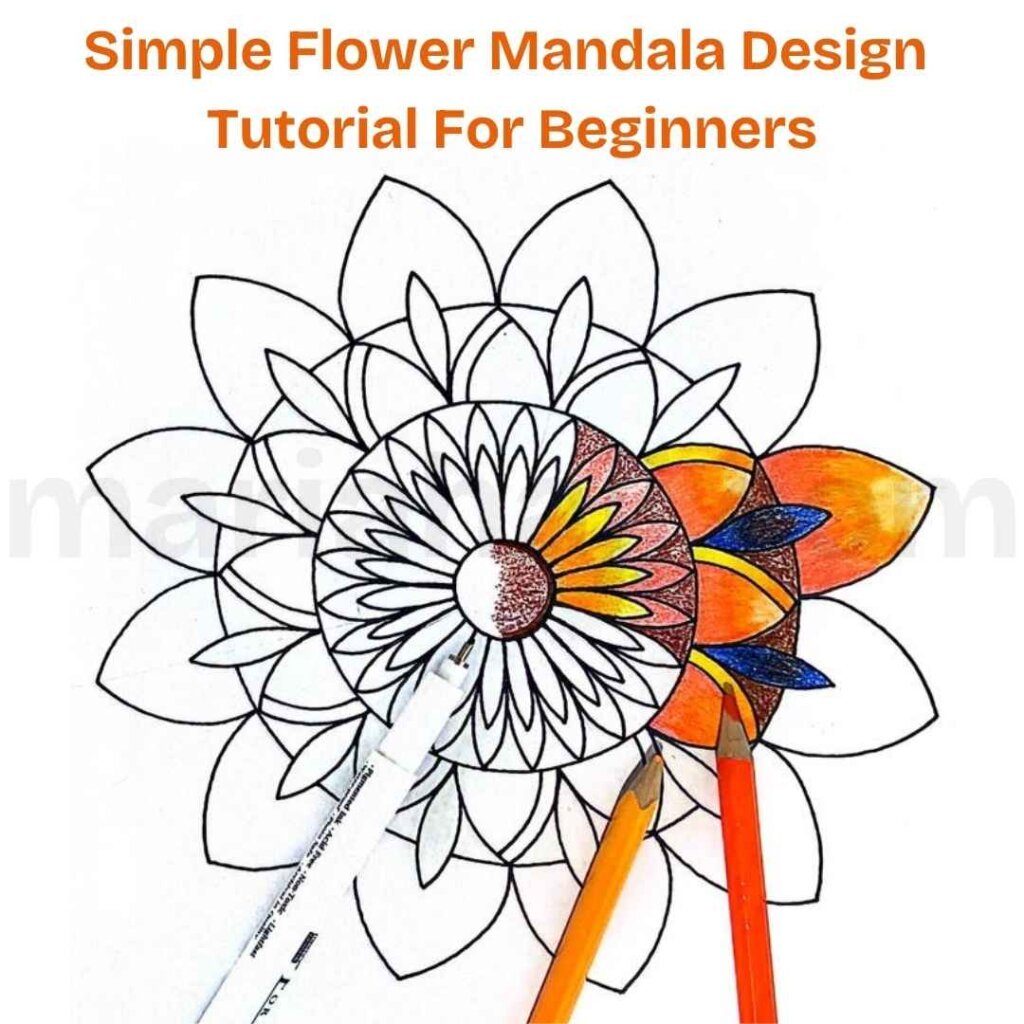
Looking for a relaxing and creative activity? Drawing a flower mandala design is a perfect way to unwind while exploring your artistic side. Whether you’re a complete beginner or just looking for a simple yet beautiful pattern to try, this tutorial will guide you step by step. Grab your pen and paper, and let’s create a stunning floral mandala together!
Prepare the Mandala Grid of the Flower Mandala Design
A mandala grid serves as the foundation for creating balanced and harmonious designs. It helps maintain symmetry, ensuring that each element aligns beautifully within the circular form. For beginners, using a grid simplifies the process, providing guidance for placing patterns evenly. By following a structured layout, artists can focus on creativity while achieving a visually pleasing and well-proportioned flower mandala design. I invite you to check the video I made uniquely about Mandala grids on my YouTube page.
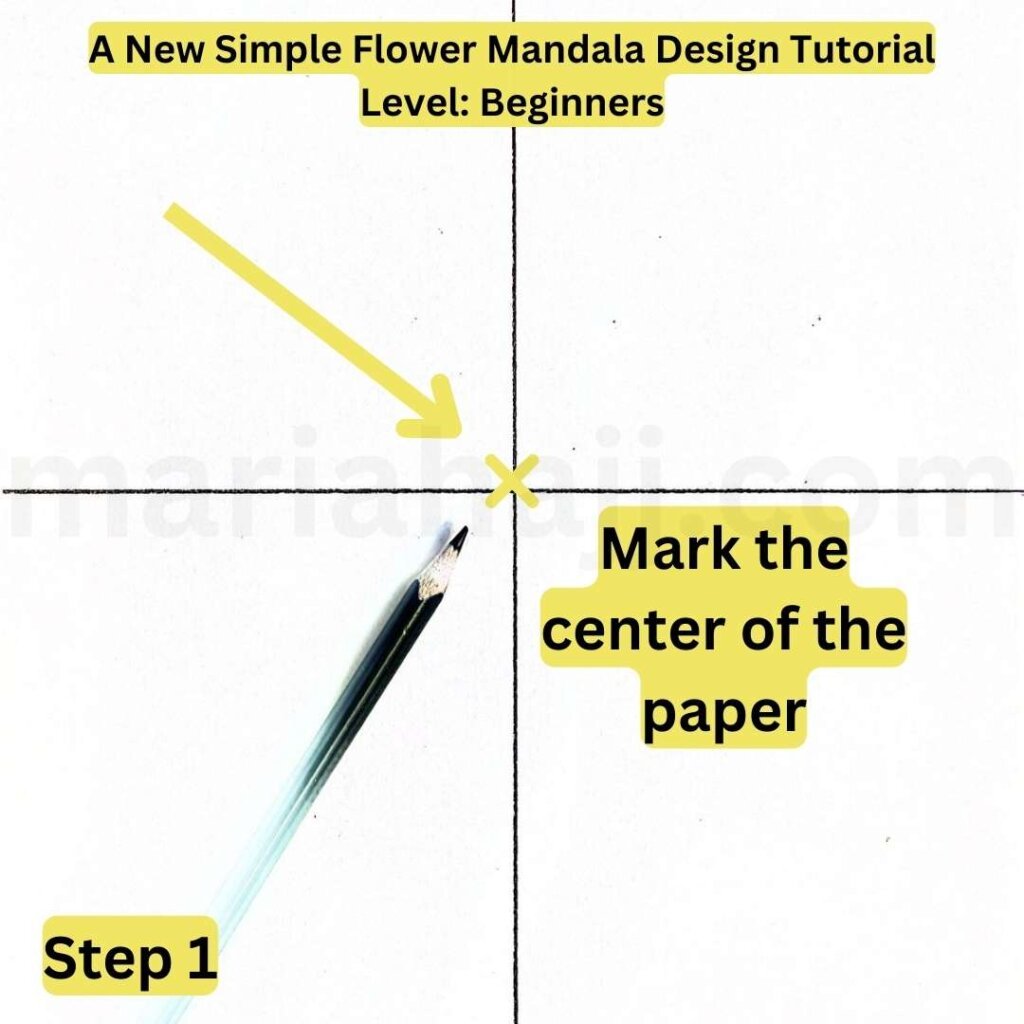
As a first step, find the center of your paper, and trace two lines as shown in the illustration above.
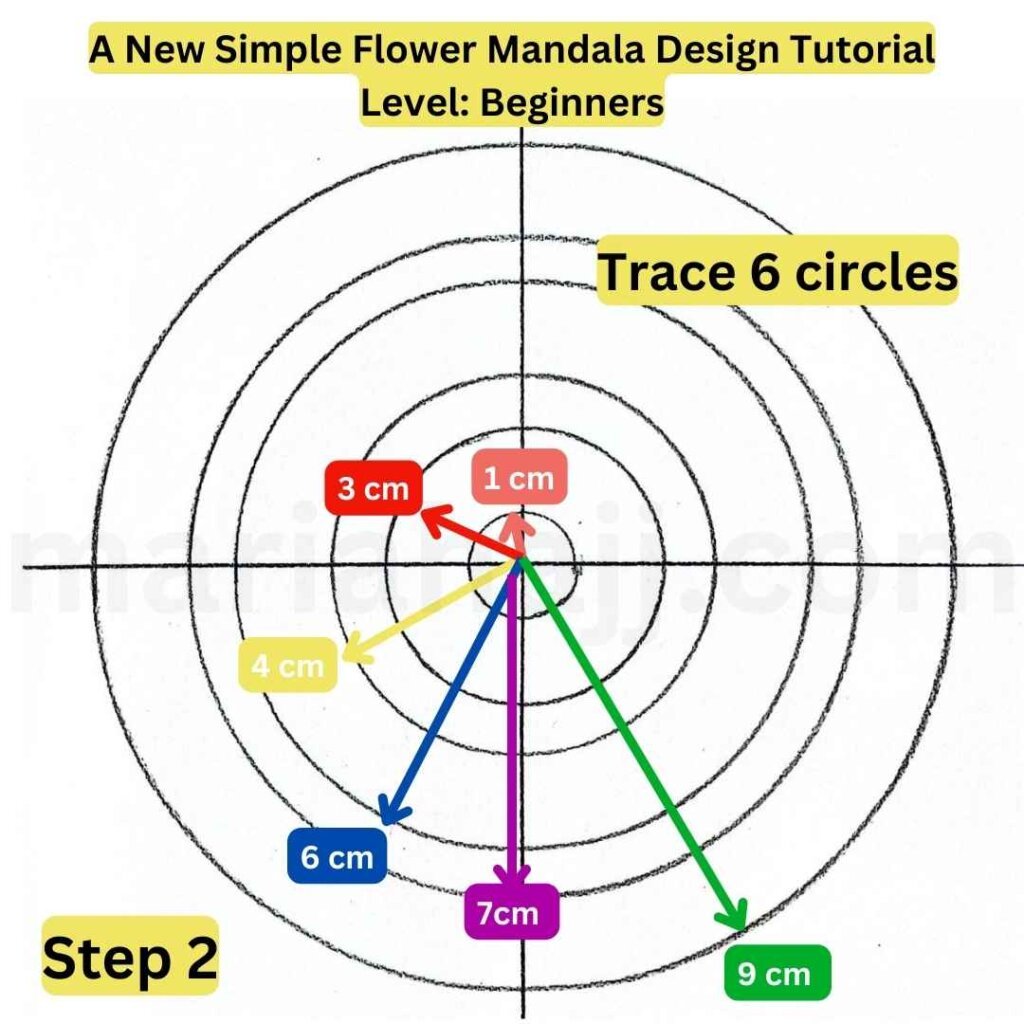
Now, and starting from the center previously marked, draw 6 circles of the following radii: 1 cm, 3 cm, 4 cm, 6 cm, 7 cm, and 9 cm.
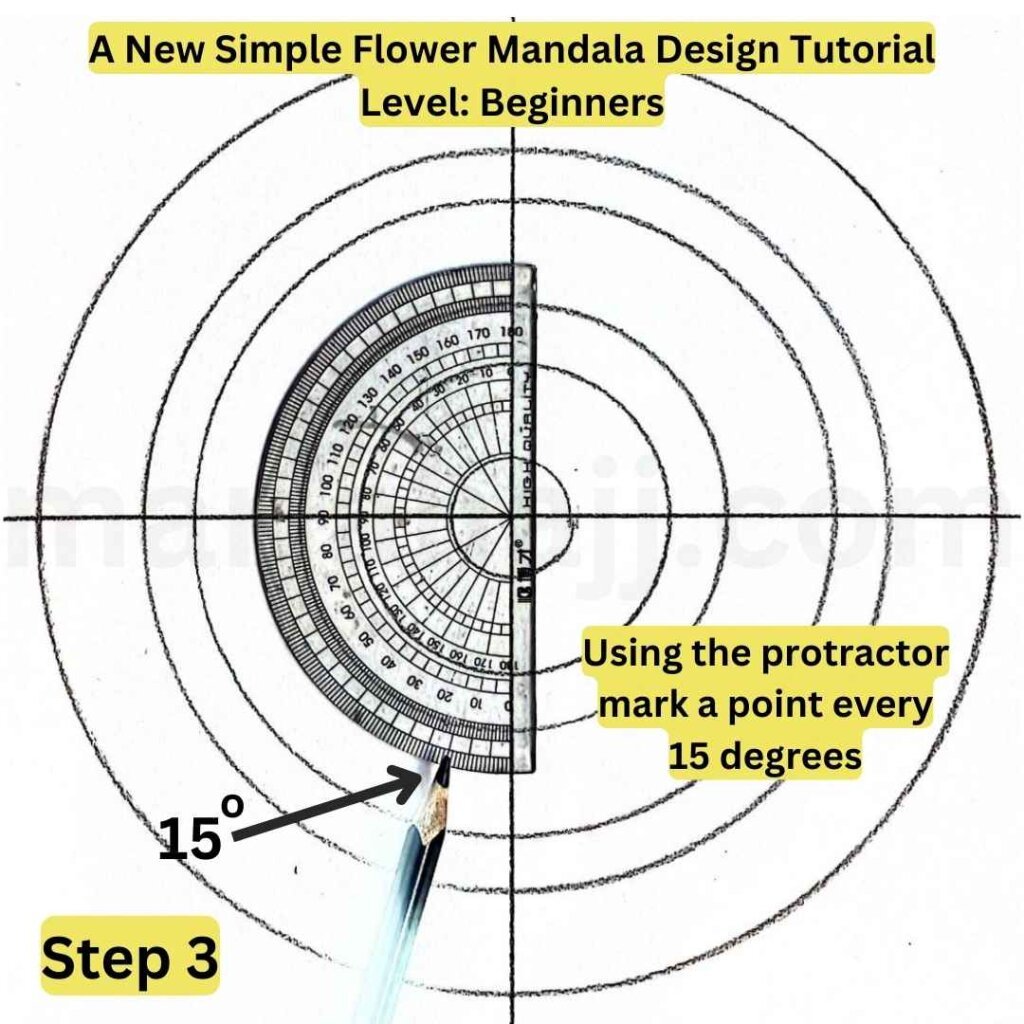
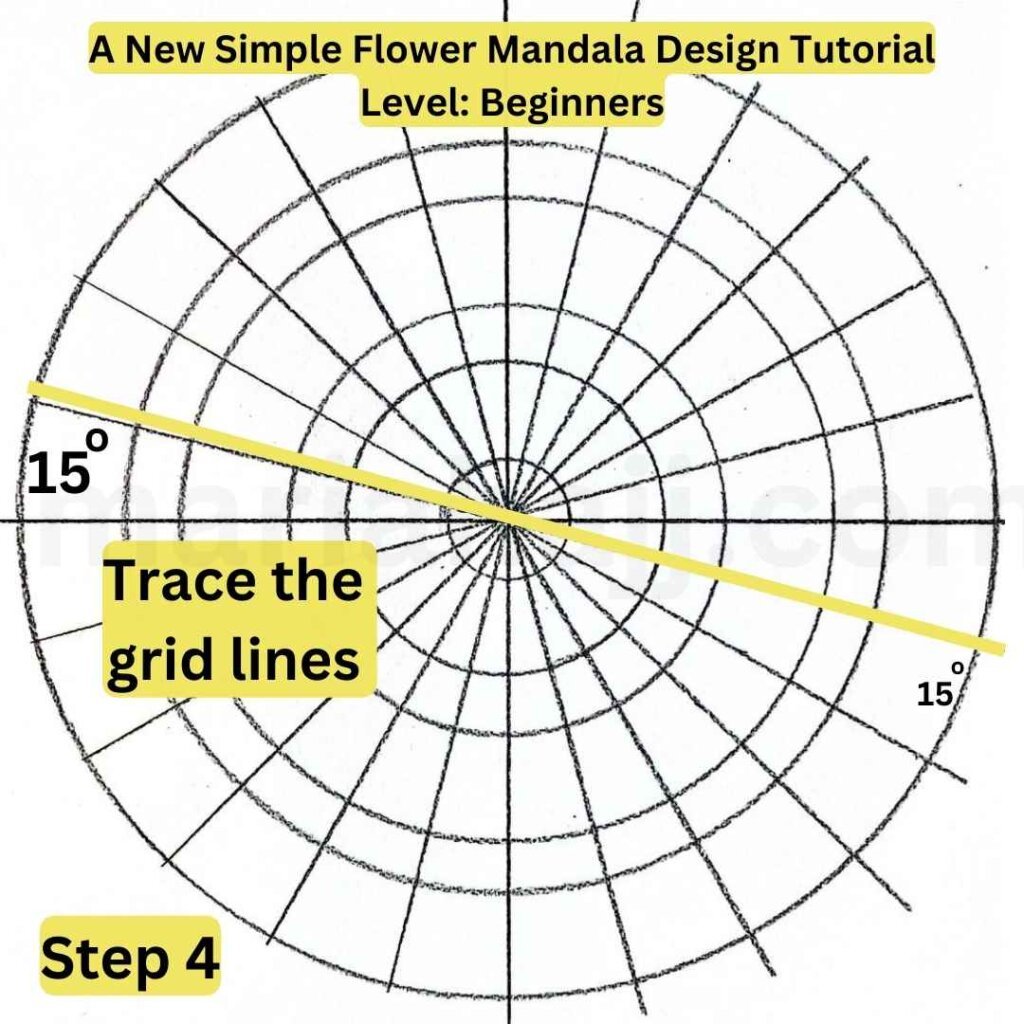
Wondering what the protractor is for? Well, it’s to mark a point every 15 degrees.
Then, trace the grid lines by joining each point, marked in step (3,) with the center of the grid.
Fill the Grid with Easy Mandala Patterns
So, are you ready to create something stunning? Let’s take it step by step, and by the end of this tutorial, you’ll have your very own flower mandala to be proud of. Grab your favorite drawing tools, find a cozy spot, and let’s get started!
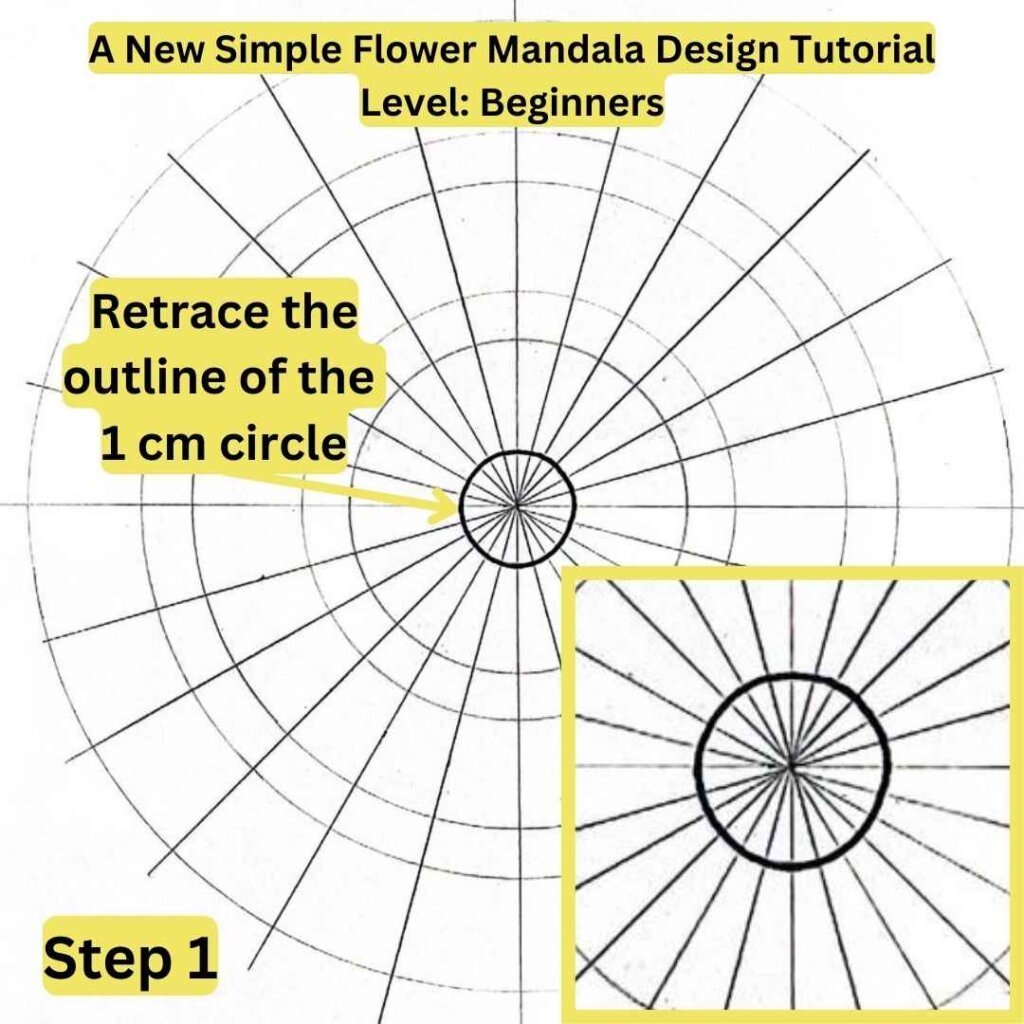
As a first step, retrace the outline of the 1 cm circle to form the flower mandala bud
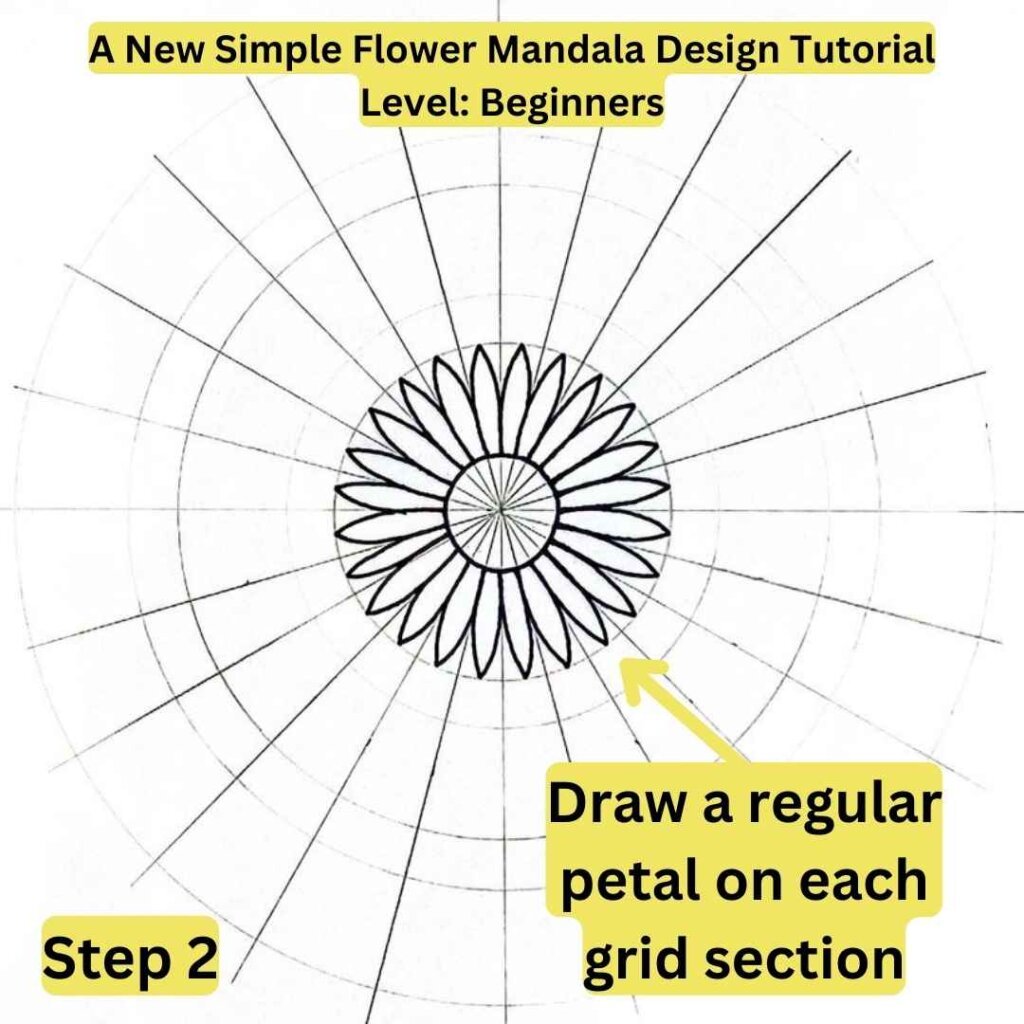
Now, let’s start creating our beautiful flower mandala by drawing one regular petal, on each grid section, on the first row
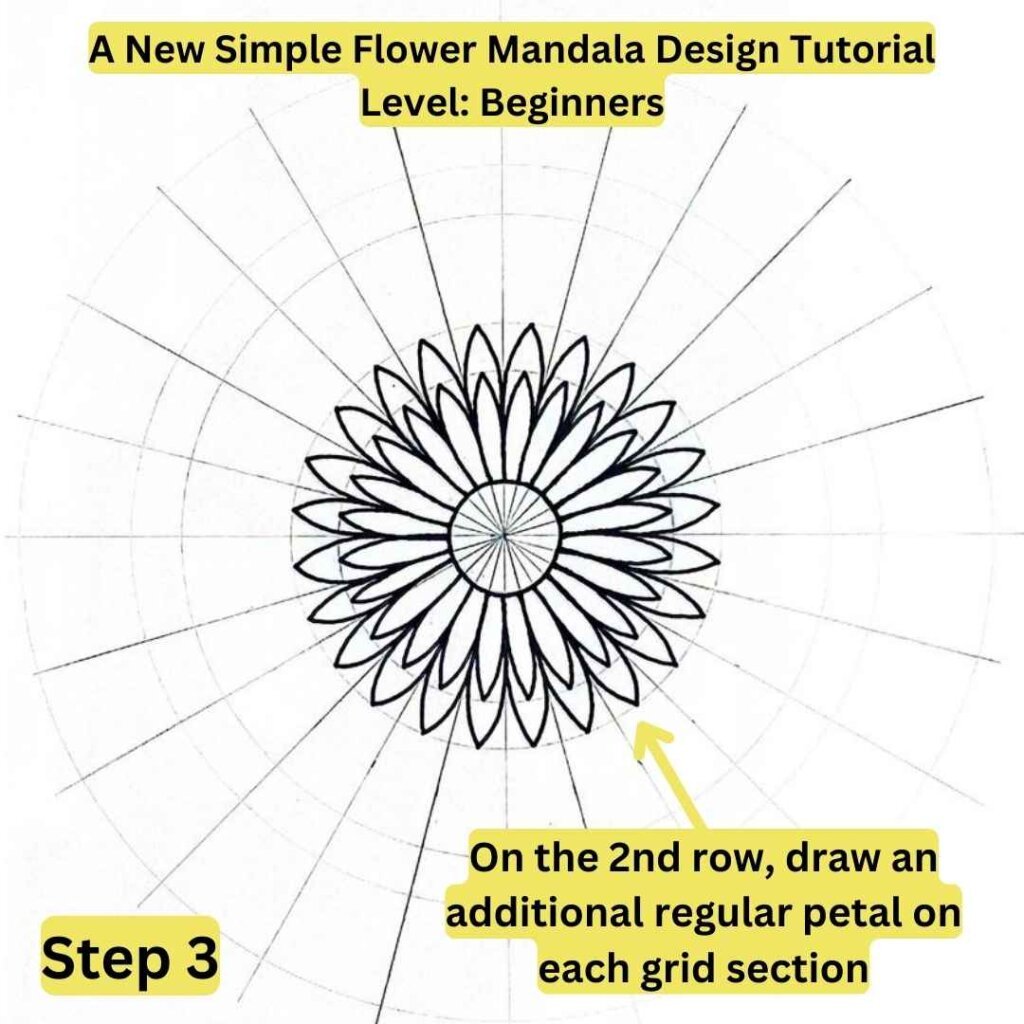
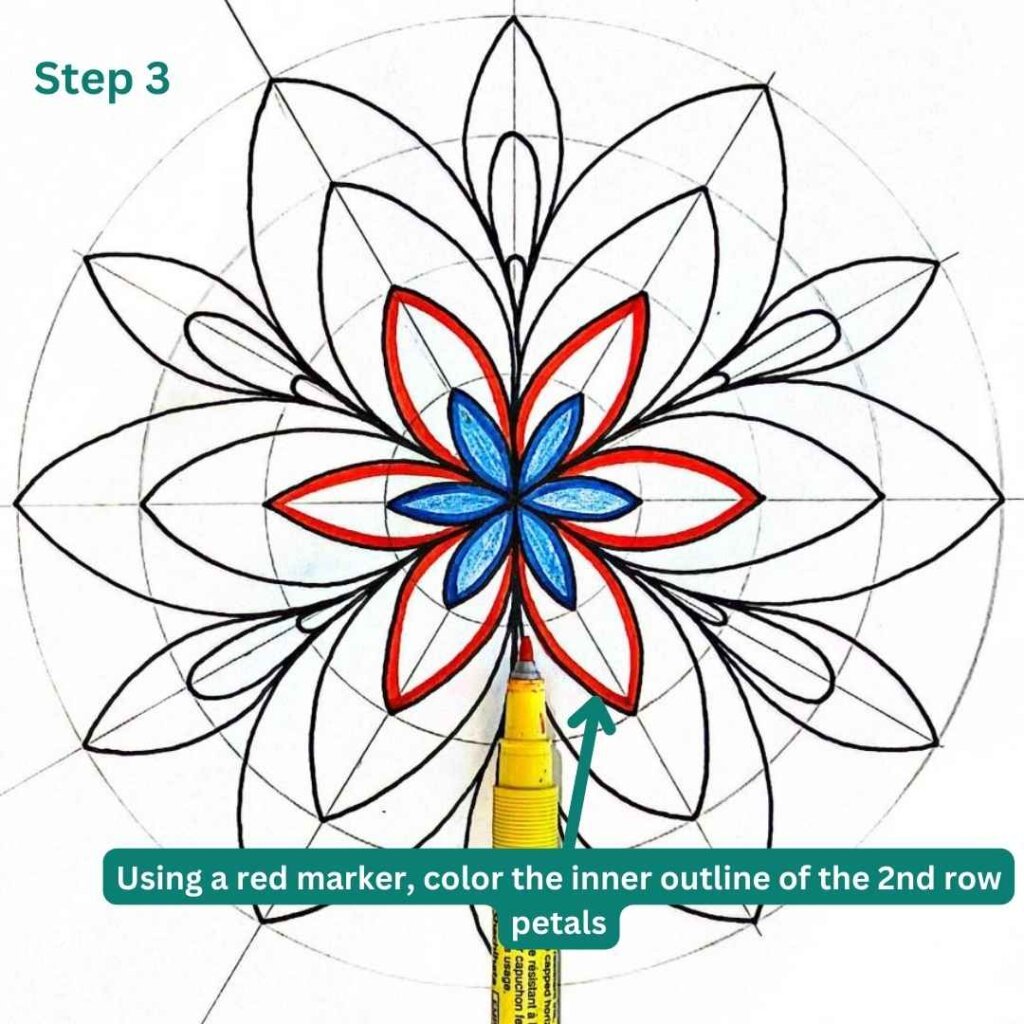
On the 2nd row, draw a regular petal right above each petal drawn in step 2
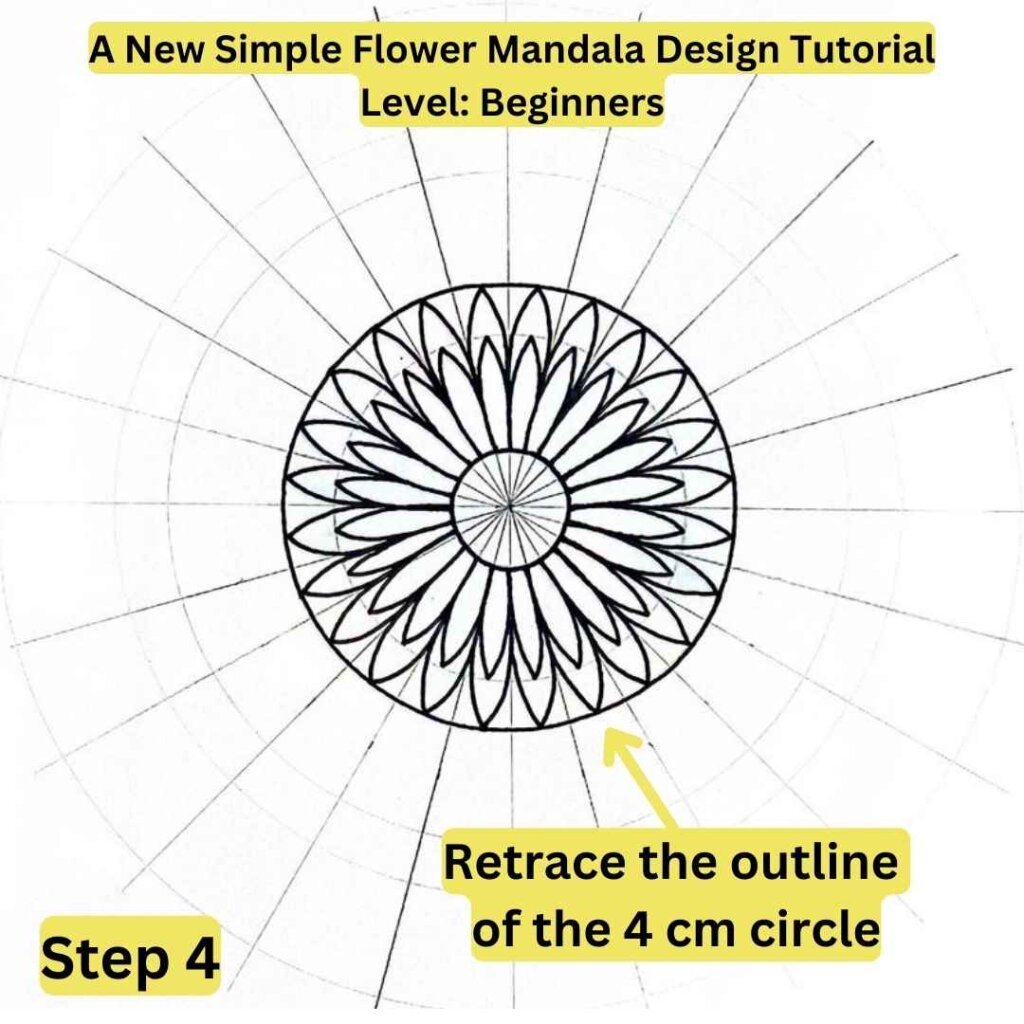
Then, retrace the 4 cm circle as shown above.
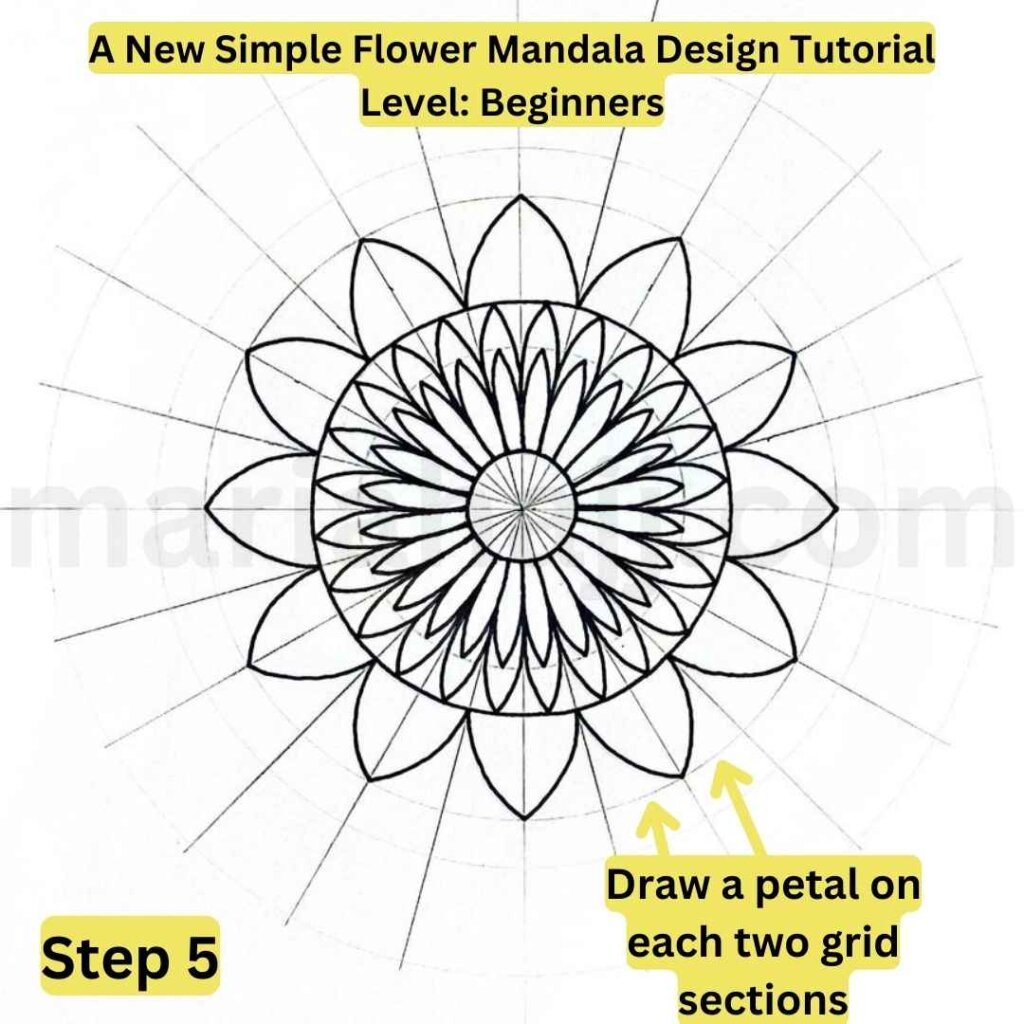
On the third row, draw, on each two grid sections, one regular petal.
Now, we will decorate the right inner side of these -step 5- petals. Draw a curved line that is parallel to the petal outline.
Between each petal of the previous step, draw a double-pointed petal. Take as a starting point the bottom of the previous petals. The second point of the petal should reach the outline of the 7 cm circle.
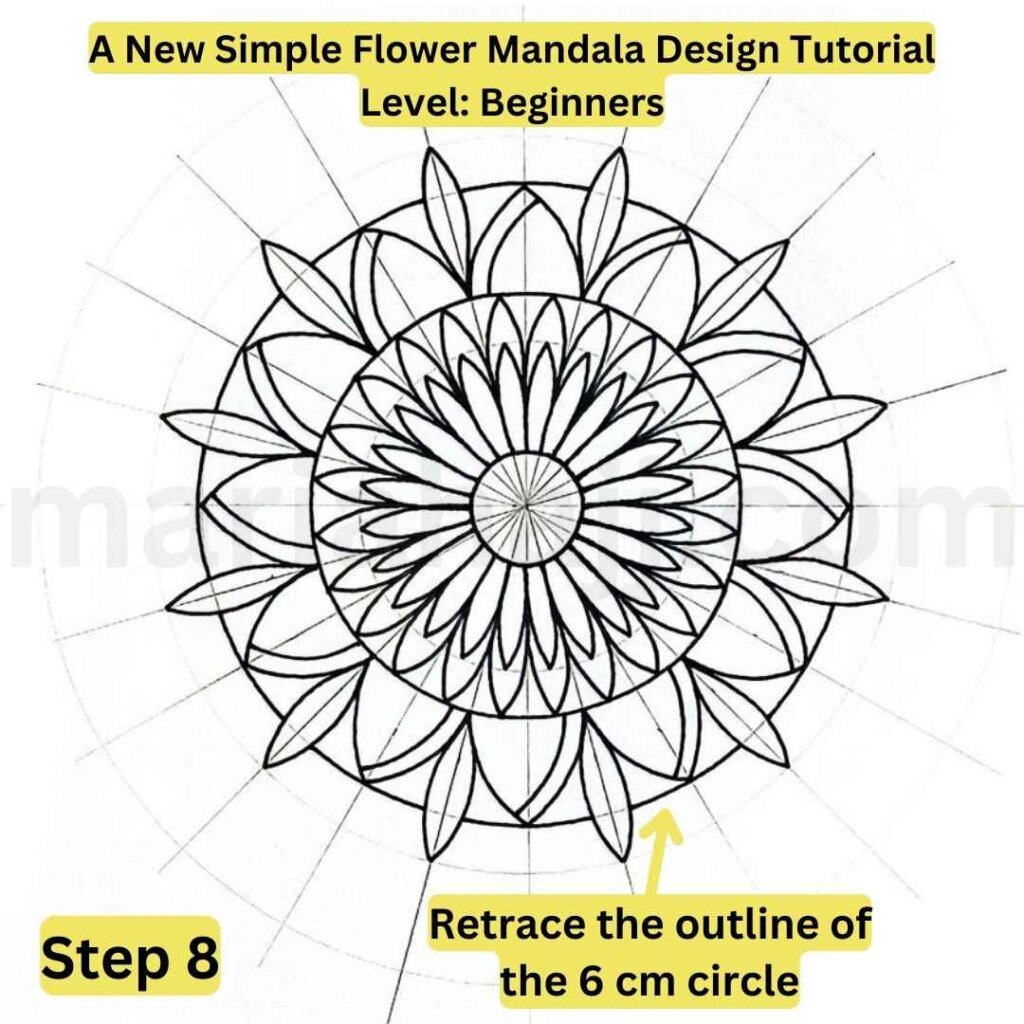
Then, retrace the outline of the 6 cm circle. However, make sure to skip the double pointed petals. So, just trace the part of the circle that is in between the double-pointed petals.
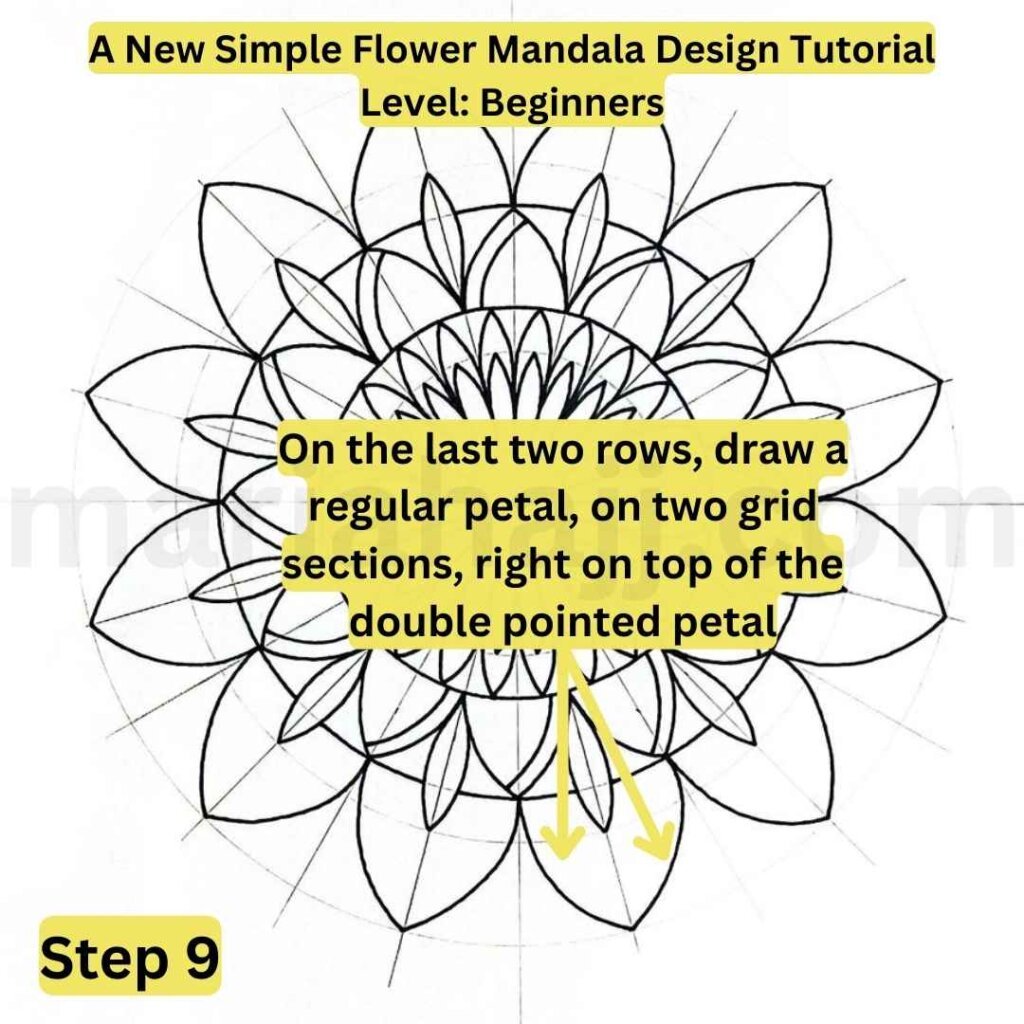
Last, you should trace a regular petal on each two grid sections. These mandala petals will cover the 2 last circles. Also, make sure to draw them right on top of the double-pointed petals that you drew in step 7.
So, how was your drawing experience? I would love it if you can share the results with me on Instagram. I will be happy to create a story especially for you!
What about trying another mandala flower tutorial?
To provide the best experiences, we use technologies like cookies to store and/or access device information. Consenting to these technologies will allow us to process data such as browsing behavior or unique IDs on this site. Not consenting or withdrawing consent, may adversely affect certain features and functions.
Functional
Always active
The technical storage or access is strictly necessary for the legitimate purpose of enabling the use of a specific service explicitly requested by the subscriber or user, or for the sole purpose of carrying out the transmission of a communication over an electronic communications network.
Preferences
The technical storage or access is necessary for the legitimate purpose of storing preferences that are not requested by the subscriber or user.
Statistics
The technical storage or access that is used exclusively for statistical purposes.The technical storage or access that is used exclusively for anonymous statistical purposes. Without a subpoena, voluntary compliance on the part of your Internet Service Provider, or additional records from a third party, information stored or retrieved for this purpose alone cannot usually be used to identify you.
Marketing
The technical storage or access is required to create user profiles to send advertising, or to track the user on a website or across several websites for similar marketing purposes.