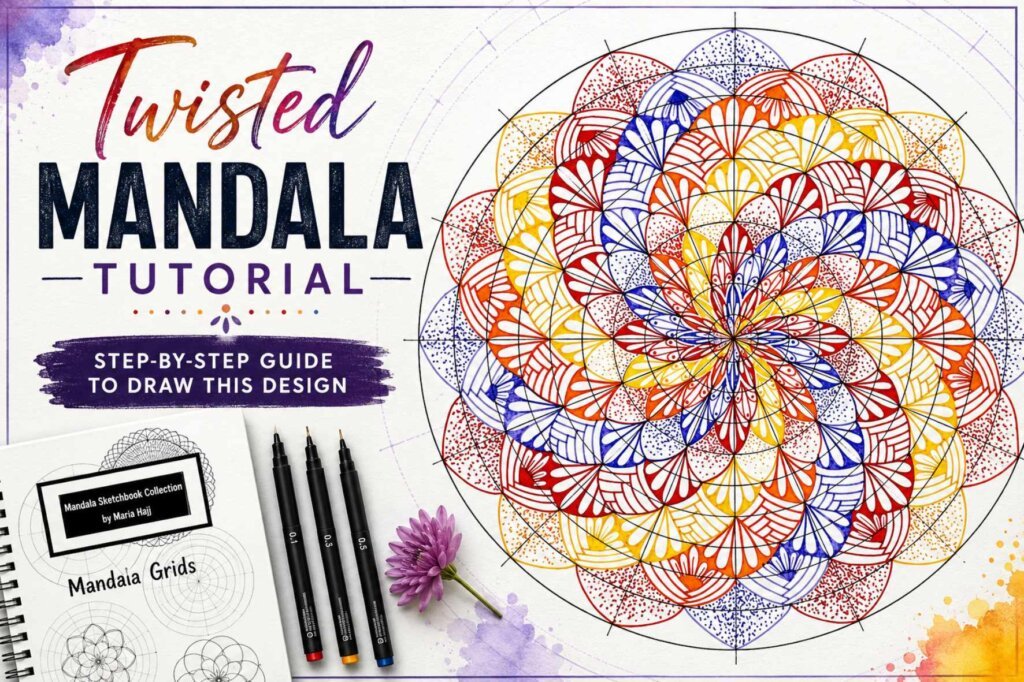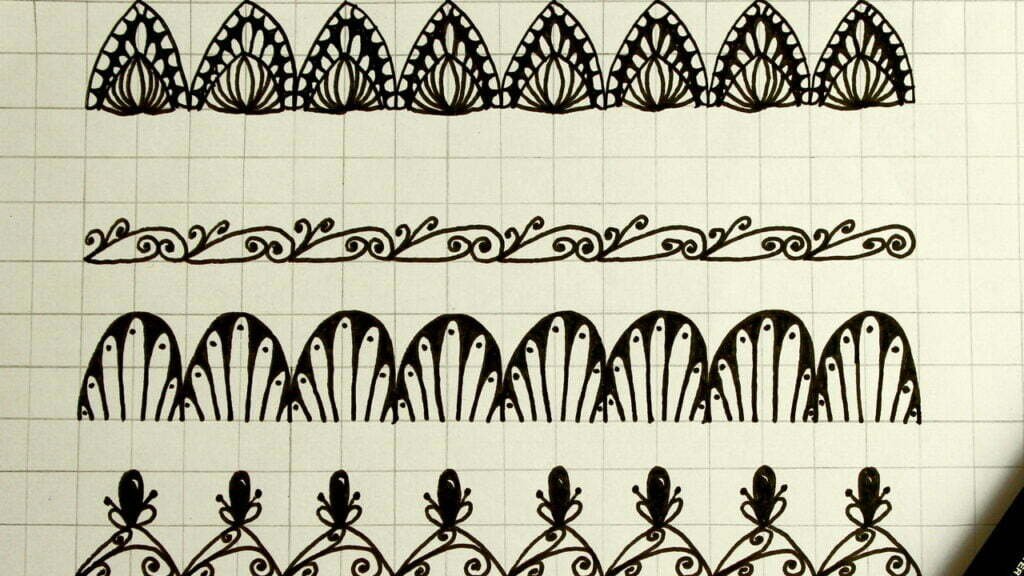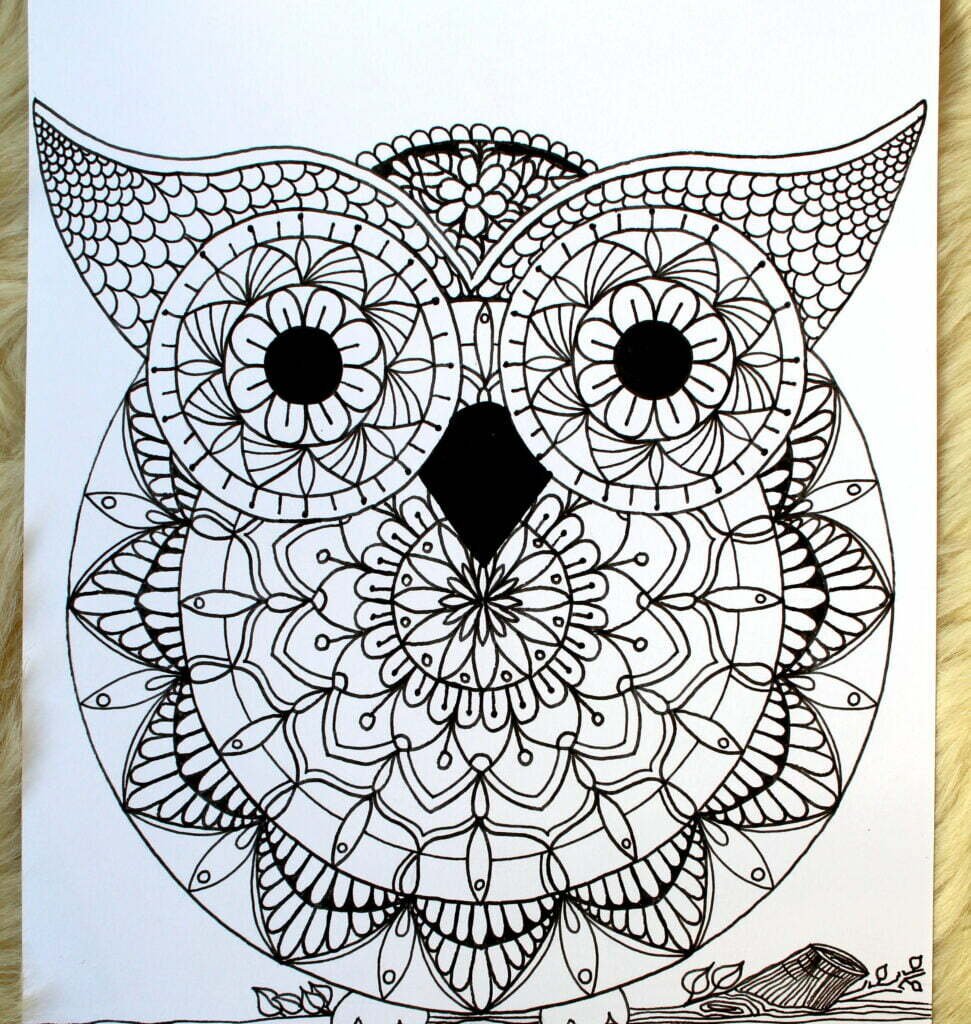
Have you ever admired a beautiful mandala and wondered how artists create such perfectly balanced designs? The secret isn’t extraordinary drawing skills—it’s a well-constructed mandala grid. Every symmetrical mandala, no matter how simple or intricate, begins with a solid foundation that guides every line, shape, and pattern.
When I first started drawing mandalas, I was so excited to create the decorative details that I wanted to skip the grid altogether. I quickly learned that even the smallest mistake at the beginning affected the entire drawing. Since then, I have never started a mandala without first building a proper grid. It may seem like an extra step, but it actually makes the drawing process easier, more enjoyable, and much more accurate.
Why the Mandala Grid Matters
In this complete beginner’s guide, I’ll show you exactly how to draw a mandala grid from scratch, explain why it’s so important, and help you understand how different grid measurements influence the final design. Whether you’re creating your very first mandala or looking to improve your technique, you’ll learn how to build a strong foundation that allows your creativity to shine.
Along the way, I’ll also share practical tips I’ve learned through years of drawing and teaching mandalas, common mistakes to avoid, and simple exercises that will help you gain confidence with every new design. By the end of this guide, you’ll understand not only how to draw a mandala grid but also why every experienced mandala artist relies on one.
So, grab your pencil, compass, ruler, and protractor, and let’s build the foundation for countless beautiful mandalas together.
What Is a Mandala?
The word mandala comes from the ancient Sanskrit language and simply means “circle.” However, a mandala is much more than a circular drawing. It is a carefully balanced geometric design that radiates outward from a central point, creating patterns that are both visually captivating and deeply meaningful.
Cultural Origins and Meaning
Mandalas have been part of human culture for thousands of years. They appear in Hinduism and Buddhism, where they represent the universe, unity, and the journey toward inner balance. Similar circular designs can also be found in Native American traditions, Celtic art, Islamic geometric patterns, and many other cultures around the world. Although each tradition gives the mandala its own interpretation, they all celebrate harmony, order, and the beauty of repeated patterns.
Today, mandalas have evolved beyond their historical and spiritual origins. Artists, designers, and hobbyists create them simply for the joy of drawing, while educators use them to teach geometry, symmetry, and pattern recognition. Their timeless beauty has made them a popular form of artistic expression for people of all ages, regardless of culture or artistic experience.
Modern Uses and Benefits
Drawing mandalas is also widely appreciated for its calming effect. The repetitive process of creating circles, lines, and balanced patterns encourages focus and patience, allowing many people to relax and disconnect from everyday distractions. As an art life coach, I’ve seen how even beginners become fully immersed in the creative process after just a few minutes of drawing. Instead of worrying about the final result, they begin enjoying the rhythm of each carefully placed line.
Regardless of its meaning or purpose, every mandala shares one essential characteristic: perfect radial symmetry. Every shape, line, and decorative element is carefully repeated around a central point to create a balanced composition. Achieving that level of precision isn’t a matter of luck—it starts with a carefully constructed mandala grid, which serves as the foundation for every successful mandala.
What Is a Mandala Grid?
The Foundation of Every Mandala
A mandala grid is the framework that serves as the foundation of every symmetrical mandala. Before drawing petals, leaves, geometric shapes, or intricate decorative patterns, artists first create a grid that guides the placement of every element. Think of it as the blueprint of your artwork. Just as architects rely on plans before constructing a building, mandala artists rely on a carefully measured grid to ensure balance, accuracy, and symmetry.
Key Components of a Mandala Grid
A typical mandala grid is made up of two main components: concentric circles and radial guide lines. The circles all share the same center point and divide the mandala into different layers, while the guide lines radiate outward at equal angles to create evenly spaced sections. Together, these guides allow you to repeat the same shapes consistently around the center, producing the harmonious appearance that makes mandalas so visually appealing.
Is There a Standard Grid?
One of the most common questions I receive from beginners is whether there is a standard mandala grid that works for every design. The answer is no. Every mandala is unique, so the number of circles, the distance between them, and the angle of the guide lines all depend on the design you want to create. A simple floral mandala may only require a few circles with wider sections, while a highly detailed geometric mandala often needs many closely spaced circles and smaller angle divisions.
Why Planning the Grid Matters
When I design a new mandala, I don’t start by thinking about the decorative details. Instead, I begin by planning the grid because I know that every line I draw afterward will depend on it. Taking a few extra minutes to build an accurate grid makes the entire drawing process smoother and helps prevent mistakes that are much harder to correct later.
Tips for Beginners
If you’re just beginning your mandala journey, don’t worry about memorizing measurements or trying to create the perfect grid from scratch. In my tutorials, I provide the exact grid measurements for each design so you can focus on learning the techniques step by step. As you gain experience, you’ll naturally begin creating your own custom grids that match your personal drawing style.
Now that you understand what a mandala grid is and why it’s such an essential part of every successful mandala, let’s look at why learning to build one should be your very first step before creating any design.
Why Every Beginner Should Learn the Grid First
When people first discover mandala drawing, they’re usually excited to start creating beautiful petals, flowers, and intricate patterns. The grid can seem like an unnecessary extra step, especially when you’re eager to see the final artwork come to life. I completely understand that feeling because I had the same temptation when I first began drawing mandalas.
However, I quickly realized that skipping the grid almost always led to frustration. A petal would be slightly larger than the others, a pattern would drift off-center, or the design would gradually lose its balance. Even small inaccuracies became much more noticeable as the mandala grew.
That’s why I always encourage beginners to spend a few extra minutes creating a proper mandala grid before drawing the design itself. Those few minutes make the rest of the process much smoother and far more enjoyable.
Here are some of the biggest benefits of starting with a mandala grid:
It Creates Perfect Symmetry
The grid acts as a roadmap that helps you repeat every shape evenly around the center. Whether you’re drawing simple petals or complex geometric patterns, each section follows the same measurements, creating the balanced appearance that makes mandalas so captivating.
It Helps You Plan Your Design
Instead of wondering where to place your next element, the grid divides your mandala into clear sections and layers. This makes it much easier to visualize your composition before adding decorative details.
It Reduces Mistakes
Without guide lines, small errors can multiply as your drawing expands outward. A well-drawn grid allows you to catch and correct mistakes early, saving both time and frustration.
It Builds Confidence
Many beginners think they aren’t “good enough” at drawing because their first mandalas don’t look symmetrical. In reality, the problem usually isn’t their artistic ability—it’s the lack of a proper foundation. Once you start using a grid, you’ll notice an immediate improvement in the balance and accuracy of your artwork.
It Gives You Creative Freedom
Some people think a grid limits creativity, but the opposite is true. Because you no longer have to worry about symmetry, you can focus your attention on experimenting with new shapes, patterns, and decorative details. The grid quietly takes care of the structure while your creativity takes center stage.
As you continue practicing, you’ll rely less on copying existing measurements and become more confident creating your own custom grids. Every experienced mandala artist starts exactly the same way—with a simple set of circles and guide lines that gradually become the foundation for increasingly beautiful and original designs.
Tools You’ll Need to Draw a Mandala Grid
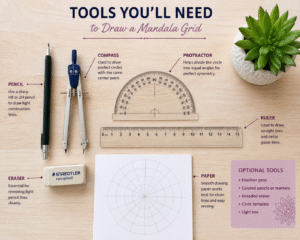
One of the best things about learning to draw mandalas is that you don’t need expensive art supplies to get started. In fact, you probably already have most of the tools you need at home. A few basic drawing instruments are enough to create precise, symmetrical grids that will serve as the foundation for countless mandala designs.
Below are the essential tools I recommend using, along with a few optional items that can make the process even easier.
If you’re not ready to draw your own grids yet, don’t worry. Later in this guide, I’ll show you another option that lets you start practicing right away.
Pencil
A good-quality pencil is one of the most important tools for drawing a mandala grid. Since the grid acts as a guide, you’ll want to draw your construction lines lightly so they can be erased after you’ve completed your mandala.
I usually recommend using an HB pencil because it creates clear, smooth lines without pressing too hard on the paper. If you prefer even lighter construction lines, a 2H pencil is another excellent option.
Compass
A compass allows you to draw perfectly round circles that all share the same center point. This is essential because even a slight shift in one circle can affect the symmetry of the entire mandala.
If you’re new to using a compass, don’t worry. It becomes surprisingly easy after a little practice, and it’s one of the most valuable tools you’ll own as a mandala artist.
Protractor
A protractor helps divide your circles into equal angles, ensuring that every section of your mandala is perfectly balanced.
Depending on your design, you may divide the circle into 10°, 15°, 20°, 30°, 45°, or other equal angle increments. Choosing the correct angle is one of the keys to creating clean, symmetrical patterns.
Ruler
A ruler is used to draw the main axes and the radial guide lines that connect each angle to the center of the mandala.
A transparent ruler is especially useful because it allows you to see your drawing underneath while aligning your lines more accurately.
Eraser
Since the grid is only a construction guide, you’ll eventually erase most of it. A soft, high-quality eraser removes pencil marks cleanly without damaging the paper or smudging your finished artwork.
Try to avoid rubbing too aggressively, especially if you’ve already inked your design.
Paper
Almost any smooth drawing paper can be used for mandalas, but beginners often find A4 printer paper or a simple sketchbook to be the easiest place to start.
As you become more experienced, you may want to experiment with thicker paper if you plan to use markers, watercolor, or other mixed media.
Optional Supplies
Although they’re not required, these tools can make your drawing experience even more enjoyable:
- Fineliner pens for outlining your final design.
- Colored pencils or markers for adding color.
- A light box for tracing practice grids.
- A kneaded eraser for gently lifting pencil lines.
- A circle template for creating very small circles.
Remember, beautiful mandalas are created through patience and practice—not expensive materials. A pencil, a compass, a ruler, and a little time are all you need to begin creating artwork you’ll be proud of.
Now that you have your tools ready, let’s build your first mandala grid step by step.
How to Draw a Mandala Grid Step by Step
Now that you understand what a mandala grid is and why it’s so important, it’s time to create one yourself. Don’t worry if you’ve never used a compass or protractor before—drawing a mandala grid is much easier than it looks.
The key is to work slowly and accurately. Every line you draw at this stage will help guide your final design, so there’s no need to rush. Remember that the grid is only a temporary framework. Most of the pencil lines will be erased once your mandala is complete, so draw them lightly and take your time.
Follow the five simple steps below to create a perfectly balanced mandala grid.
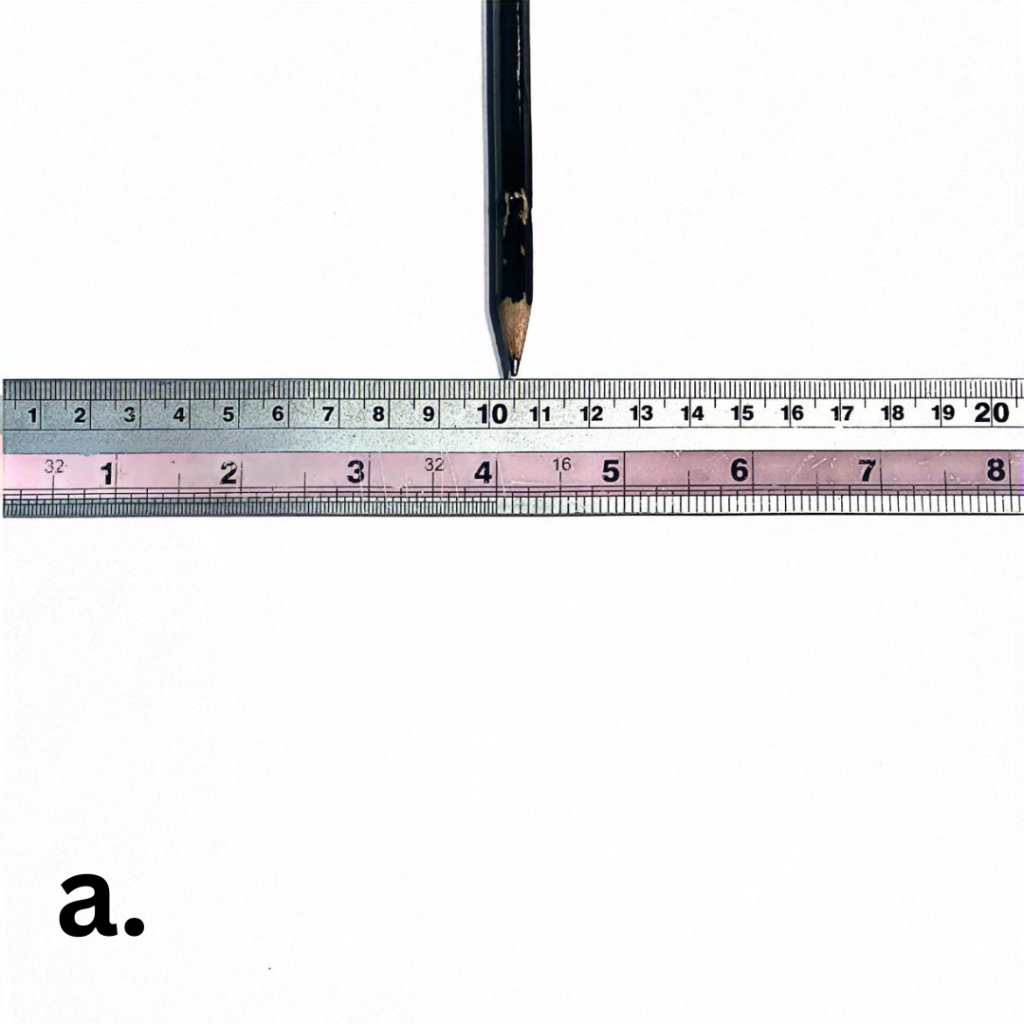
Step 1- Choose your center
First step is to decide where will be the center of your mandala on the paper. In my tutorials, I tend to choose the center of the paper as a center of my mandala so I can benefit from the whole space.
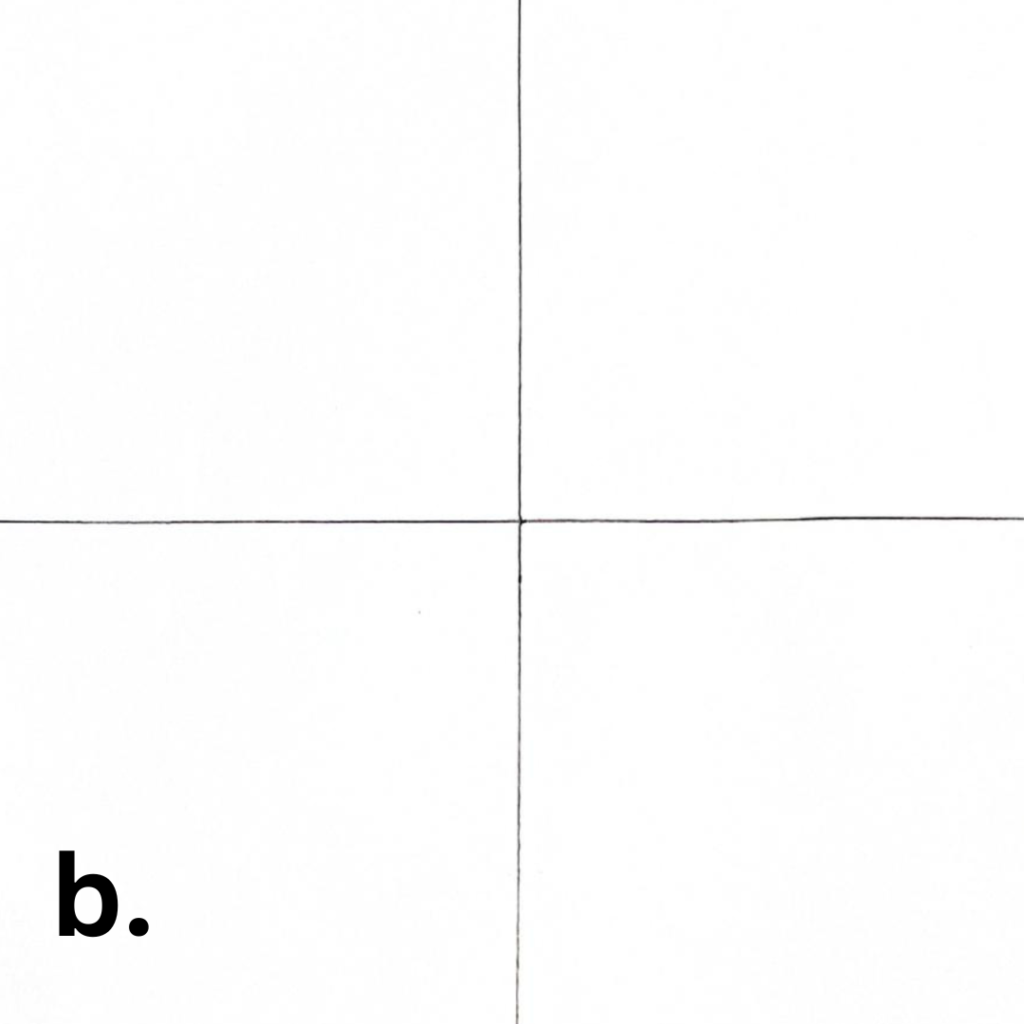
Step 2- Trace the main axes
Once you mark the center of your mandala, trace a horizontal and a vertical line, that pass through it. Exactly like in the illustration (b).
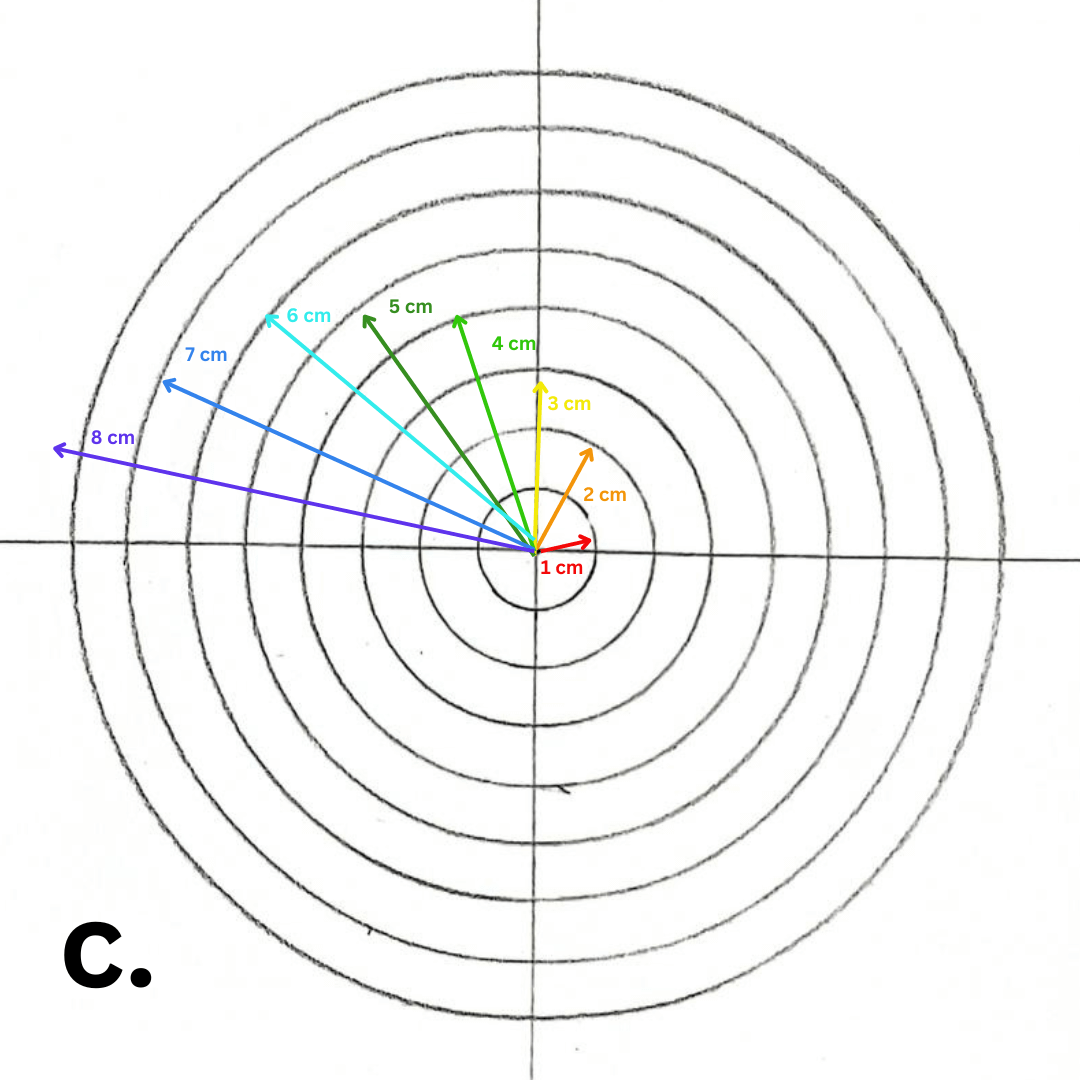
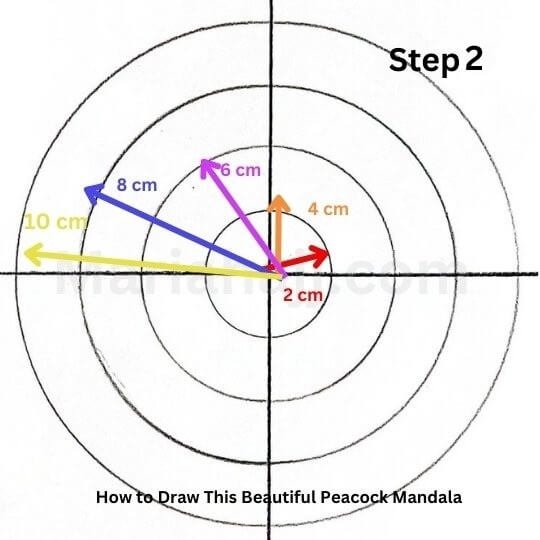
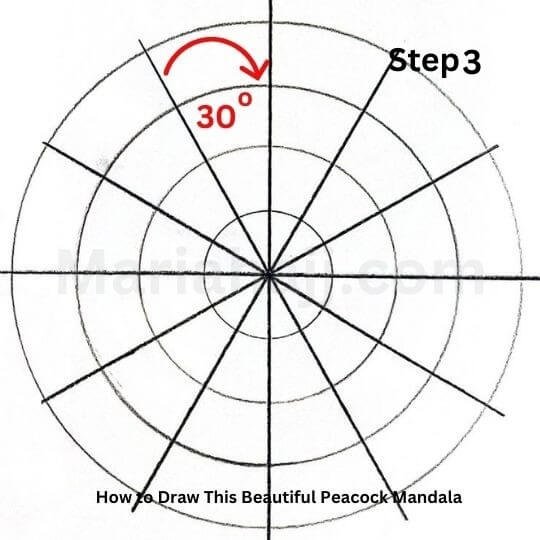
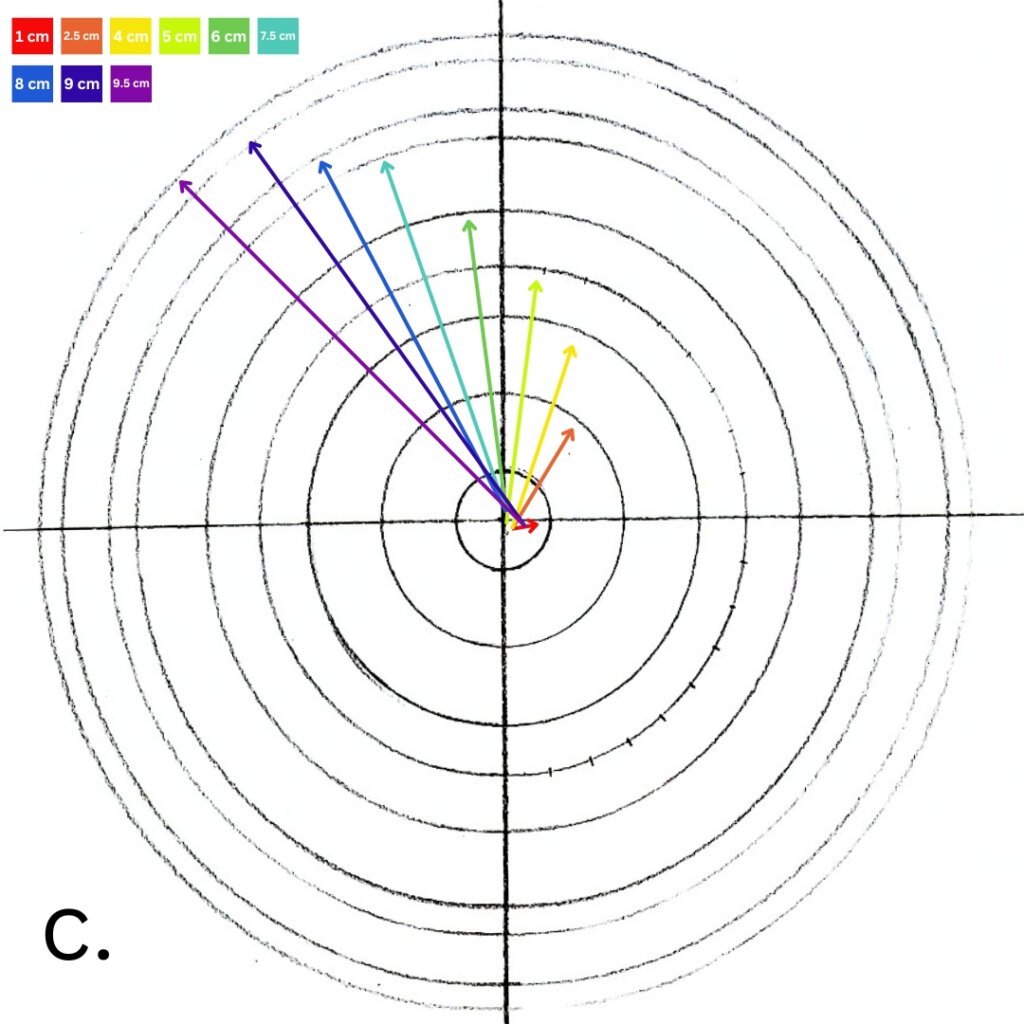
Step 3- Draw the circles
Then, start tracing the circles by using your compass. The radii don’t have a standard size. Every mandala drawing has its own style, and, therefore, her own mandala grid measurements.
That is why, every mandala tutorial, starts with instructions on how to draw the mandala grid, and every time, I give you the proper measurements according to the mandala drawing we are creating together.

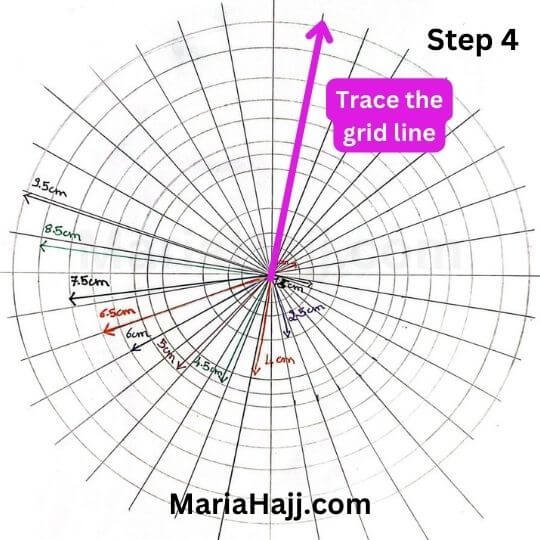
Step 4- Mark the angles
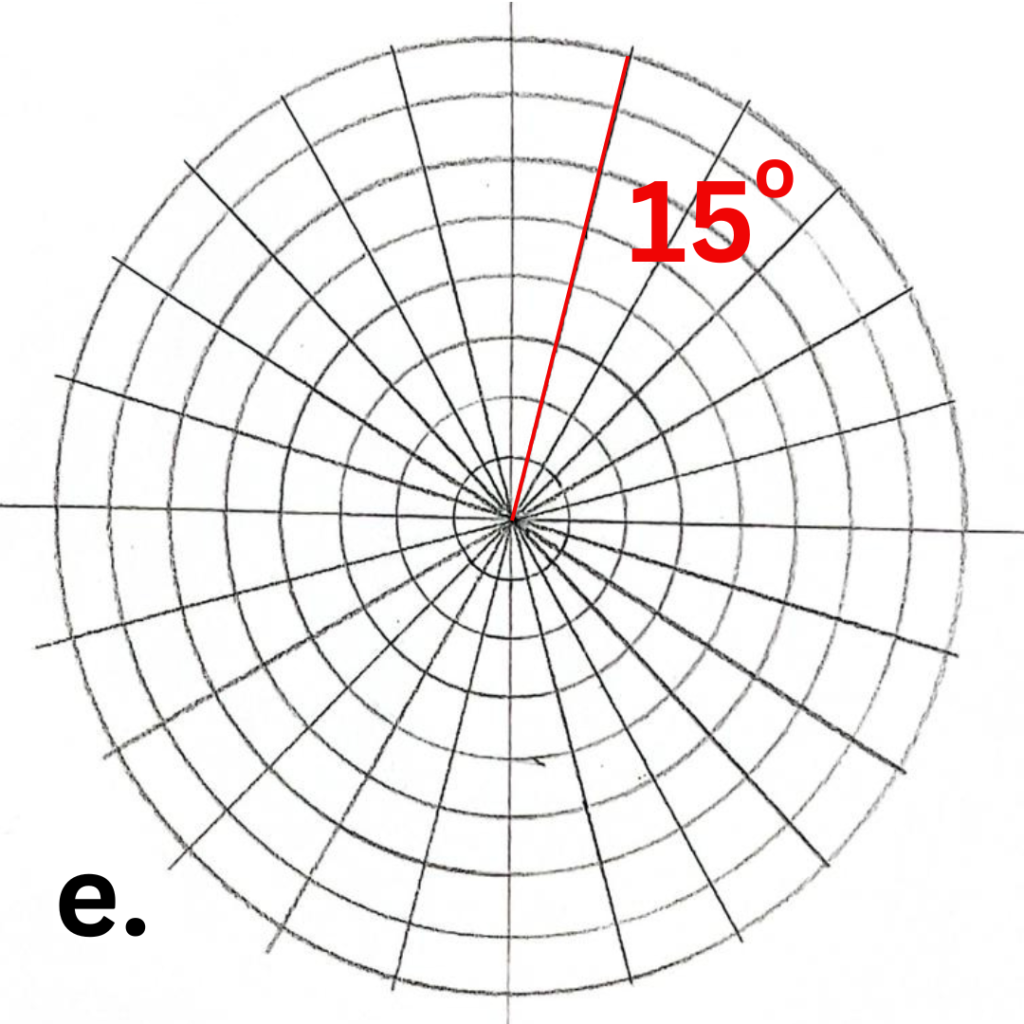
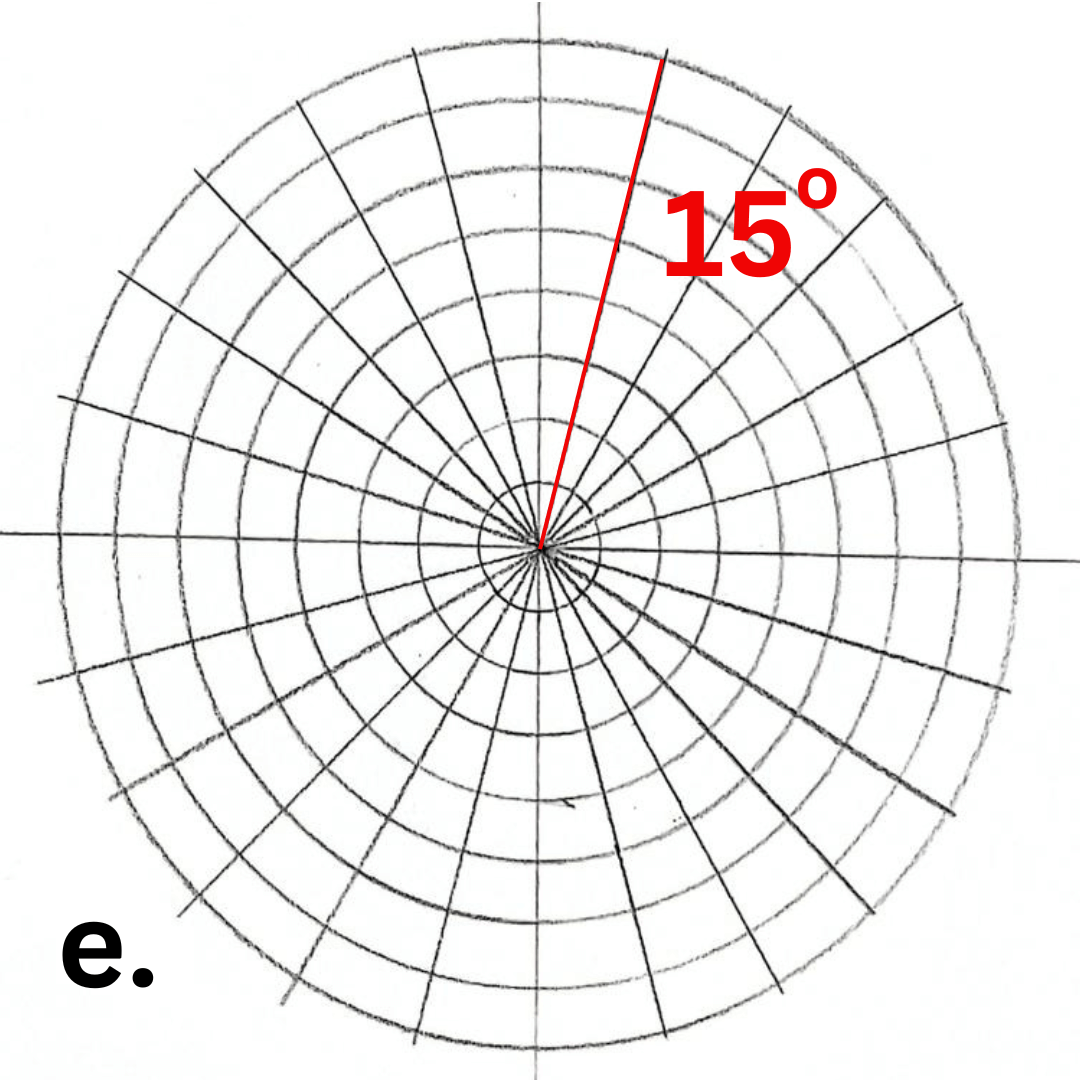
A mandala grid is composed of circles, and gridlines that are equally separated. The distance between the lines depends on the mandala drawing you are creating. Therefore, these grid lines could be separated by 10 degrees, 15 degrees, 20 degrees, 30 degrees, or 45 degrees and more. The importance is to choose a number that could divide the 360 degrees circle into equal grid lines.
In the illustration (d) I chose to separate the lines by 15 degrees.
Step 5- Trace the grid lines
Now trace the lines. In order to do so, join every point you marked above with the center, and trace a line that cuts the circle from side to side.
Pro Tip
Before moving on, take a moment to double-check that your center point is accurate. Even a small error at this stage can affect every circle and guide line that follows. Spending an extra minute here can save a lot of corrections later.
Now that you’ve established the center of your mandala, you’re ready to create the main guide lines that will organize the entire grid.
Understanding Mandala Grid Measurements
One of the questions I hear most often is, “Which measurements should I use for my mandala grid?” The answer is simpler than you might think: there isn’t a single correct set of measurements. Every mandala has its own personality, and the grid should be adapted to match the design you want to create.
The number of circles, the spacing between them, and the angle of the guide lines all influence the final appearance of your mandala. A simple floral design may only need a few widely spaced circles, while a detailed geometric mandala often requires many closely spaced circles and smaller angle divisions.
When creating a new mandala, I usually begin by imagining the overall style I want to achieve. If I want a clean, simple design, I choose fewer circles and wider sections. If I want to add intricate repeating patterns, I create more layers and divide the circle into smaller angles.
The table below shows some of the most common angle divisions and the type of designs they are well suited for.
| Angle Between Guide Lines | Number of Sections | Best For |
|---|---|---|
| 60° | 6 | Very simple beginner mandalas |
| 45° | 8 | Bold geometric designs |
| 30° | 12 | Floral and decorative mandalas |
| 20° | 18 | Medium-complexity patterns |
| 15° | 24 | Detailed mandalas (my favorite for beginners) |
| 10° | 36 | Highly intricate geometric designs |
Keep in mind that these are simply starting points, not strict rules. As your confidence grows, you’ll begin experimenting with different combinations of circles and angles to develop your own unique style.
If you’re just getting started, don’t feel pressured to design your own measurements yet. That’s exactly why each of my mandala tutorials begins with a custom grid. By following different projects, you’ll gradually understand how changing the grid changes the final artwork. Before long, you’ll be creating your own original mandala grids with confidence.
Common Mistakes When Drawing a Mandala Grid
Learning to draw a mandala grid is much easier than most people expect, but like any new skill, it takes a little practice. Don’t be discouraged if your first grid isn’t perfect. Every experienced mandala artist has made mistakes along the way—including me. The good news is that most of these mistakes are easy to avoid once you know what to look for.
Here are the most common issues I see when teaching beginners and how you can prevent them.
Pressing Too Hard with the Pencil
One of the biggest mistakes beginners make is drawing the grid with heavy pencil lines. Remember that the grid is only a guide, and most of it will be erased once your mandala is complete.
Draw your construction lines as lightly as possible. They’ll still be visible while you work, but they’ll disappear cleanly when it’s time to erase them.
Misplacing the Center Point
Every circle and guide line in your mandala depends on the center point. If it’s even slightly off, the entire design can become unbalanced.
Before drawing your first circle, take an extra moment to measure your paper carefully and confirm that the center is accurate.
Choosing Angles That Don’t Divide Evenly
Your guide lines should always divide the full 360° circle into equal sections. Choosing random angles will make it impossible to repeat patterns consistently.
If you’re unsure where to begin, start with one of the most common angle divisions, such as 15°, 30°, or 45°.
Rushing the Grid
It’s tempting to hurry through the grid so you can start drawing the decorative elements. I used to feel exactly the same way. However, I’ve learned that spending a few extra minutes creating an accurate grid actually saves time because there are fewer mistakes to fix later.
Think of the grid as an investment. The stronger the foundation, the easier the rest of the drawing becomes.
Forgetting to Check Your Compass
Sometimes the compass loosens slightly while you’re drawing several circles. This changes the radius without you noticing and can affect the spacing of your grid.
Before drawing each new circle, quickly check that your compass is still set to the correct measurement.
Trying to Make Everything Perfect
Many beginners erase and redraw the same line over and over because they want absolute perfection. While accuracy is important, remember that handmade mandalas have their own charm. Tiny imperfections often disappear once the decorative patterns are added.
Focus on steady progress rather than flawless precision.
Giving Up Too Soon
Your first few grids probably won’t look exactly the way you imagined—and that’s completely normal. Drawing symmetrical mandalas is a skill that improves with practice, not perfection.
Every grid you complete strengthens your understanding of balance, proportion, and symmetry. The more you practice, the more natural the process becomes, and before long you’ll find yourself creating beautiful grids with confidence.
Still Finding Mandala Grids Challenging?
Learning to draw your own mandala grids takes practice, and it’s completely normal if your first attempts don’t turn out exactly as you hoped. Every mandala artist starts somewhere, and building confidence comes one grid at a time.
If you’d rather spend more time drawing mandalas and less time measuring circles and angles, I created a Mandala Grid Sketchbook especially for beginners. It includes a variety of ready-to-use grids with different circle spacings and angle divisions, allowing you to start practicing immediately while gradually becoming familiar with how each grid influences the final design.
Many artists find that working with pre-drawn grids helps them focus on developing their creativity and understanding symmetry before creating their own custom layouts.
You can find my Mandala Grid Sketchbook on Amazon and use it as a practice companion while following the tutorials on this website and my YouTube channel.
Practice Exercises to Improve Your Mandala Grid Skills
Like any artistic skill, drawing a mandala grid becomes easier with practice. Don’t worry about creating a masterpiece right away. Instead, focus on becoming comfortable with your tools and understanding how different grid measurements influence the final design.
If this is your first time drawing a mandala grid, I recommend completing the following exercises before moving on to more detailed mandalas.
Exercise 1: Master the Basics
Draw a simple grid using six concentric circles and divide the circle into 30° sections.
Your goal isn’t to create a finished mandala. Instead, concentrate on keeping your circles evenly spaced and your guide lines accurately aligned with the center.
Exercise 2: Experiment with Different Angles
Create three separate grids using the same number of circles but different angle divisions:
- 30°
- 20°
- 15°
Compare the three grids side by side. Notice how increasing the number of guide lines creates more sections and opens up new possibilities for decorative patterns.
This simple exercise is one of the fastest ways to understand how the structure of a mandala changes before you even begin drawing.
Exercise 3: Add Simple Shapes
Choose one of the grids you’ve created and decorate it using only basic shapes such as:
- Petals
- Circles
- Leaves
- Arcs
- Dots
Repeating simple elements around the grid will help you develop confidence while strengthening your understanding of symmetry.
Exercise 4: Try One of My Tutorials
Once you feel comfortable drawing the grid itself, challenge yourself by following one of my beginner-friendly mandala tutorials that you can find on this website or on my YouTube channel. Each tutorial uses a different grid layout, allowing you to gradually discover how changing the measurements affects the overall design.
Over time, you’ll notice that you no longer need to copy measurements from tutorials. Instead, you’ll naturally begin planning your own grids based on the style of mandala you want to create.
Remember to Enjoy the Process
One of the biggest lessons I’ve learned over the years is that drawing mandalas isn’t about rushing toward the finished artwork. The process itself is part of the experience.
Some days your lines will be steadier than others, and that’s perfectly normal. Every grid you draw improves your precision, strengthens your creativity, and helps you develop the patience that makes mandala drawing such a relaxing and rewarding practice.
Keep practicing, celebrate your progress, and don’t be afraid to experiment. Every beautiful mandala begins with one simple grid—and every great mandala artist began exactly where you are today.
Frequently Asked Questions
Can I draw a mandala grid without a compass?
Yes, it’s possible, but I don’t recommend it if you’re just starting. A compass allows you to draw perfectly centered circles, making it much easier to achieve the symmetry that defines every mandala. As you gain experience, you can experiment with freehand techniques, but learning with the proper tools will give you a much stronger foundation.
What is the best angle for beginners?
There isn’t one “perfect” angle, but I usually recommend starting with 15° or 30°. These measurements create balanced grids that are easy to understand and work well with many beginner-friendly mandala designs.
How many circles should my grid have?
The number of circles depends entirely on the design you want to create. Simple mandalas may only need four or five circles, while more detailed designs can include ten or more. As you practice, you’ll develop a better sense of how many layers your design requires.
Why doesn’t my mandala look symmetrical?
The most common causes are an inaccurate center point, uneven circle spacing, or guide lines that aren’t equally divided. Taking a little extra time when drawing the grid usually solves these problems before they affect the final design.
Should I erase the grid when I’m finished?
Yes. Once you’ve completed your mandala and the ink has fully dried, gently erase the pencil construction lines using a soft eraser. This leaves only your finished artwork while preserving the clean, professional appearance of the design.
Is drawing mandalas suitable for children?
Absolutely. Children can enjoy drawing simple mandalas using basic grids with fewer guide lines and larger spaces. Not only does this help develop creativity, but it also improves concentration, fine motor skills, and patience.
How long does it take to draw a mandala grid?
A simple grid usually takes between five and fifteen minutes to create, depending on its complexity. As you become more familiar with the process, you’ll be able to draw accurate grids much more quickly.
Do I need to memorize grid measurements?
Not at all. When you’re learning, it’s perfectly normal to follow measurements provided in tutorials. Over time, you’ll naturally begin creating your own custom grids based on the style and complexity of the mandala you want to draw.
Watch the Complete Video Tutorial
If you’d like to see the entire process in action, I’ve created a detailed video tutorial that walks you through every step of drawing a mandala grid. Watching someone build the grid while following the written instructions can make the process even easier, especially if this is your first time using a compass and protractor.
Feel free to pause the video whenever you need extra time to complete a step, then continue when you’re ready. Learning at your own pace is one of the best ways to build confidence and enjoy the creative process.
Continue Your Mandala Journey
Congratulations! You’ve just learned one of the most important skills in mandala drawing.
Now that you know how to create a balanced mandala grid, you’re ready to start transforming those circles and guide lines into beautiful works of art. Every mandala tutorial on this website begins with a custom grid, allowing you to apply what you’ve learned while exploring new techniques and patterns.
If you’re not sure where to begin next, I recommend trying one of these beginner-friendly tutorials:
- A simple floral mandala to practice repeating petals.
- A geometric mandala that introduces clean, structured patterns.
- A peacock-inspired mandala with elegant curved shapes.
- A triangle mandala that demonstrates how different grid measurements influence the final design.
As you complete more tutorials, you’ll become increasingly comfortable creating your own grids and eventually designing completely original mandalas from your imagination.
Final Thoughts
Learning how to draw a mandala grid is one of the most valuable skills you’ll develop as a mandala artist. Although it may seem like a simple collection of circles and guide lines, it forms the foundation of every balanced, symmetrical design you’ll create in the future.
Remember that every artist starts as a beginner. Don’t worry if your first few grids aren’t perfect or if they take longer than you expected. Every grid you draw strengthens your understanding of symmetry, improves your precision, and builds your confidence.
Most importantly, allow yourself to enjoy the journey. Mandala drawing isn’t just about creating beautiful artwork—it’s also an opportunity to slow down, focus your mind, and experience the calming rhythm of repeated patterns. Over time, you’ll discover that the process itself can be just as rewarding as the finished mandala.
I hope this guide has given you the knowledge and confidence to create your own mandala grids with ease. Keep practicing, stay curious, and don’t be afraid to experiment with new measurements and designs. Every beautiful mandala begins with a single point, a few carefully drawn circles, and the willingness to take that very first step.
Happy drawing!
Latest Posts
- Mandala Coloring for Stress Relief in the Time of WarThe Invisible Weight of War on the Mind During times of conflict, many people instinctively search for ways to cope, and this is where mandala coloring for stress relief can quietly become a powerful emotional anchor. War does not… Read more: Mandala Coloring for Stress Relief in the Time of War
- For Those New to Mandala Coloring: Tools and TechniquesMandala coloring has become more than just a creative hobby—it’s now a popular way to relax, unwind, and connect with your inner self. Whether you’re looking to relieve stress, explore your artistic side, or simply enjoy a calming activity,… Read more: For Those New to Mandala Coloring: Tools and Techniques
- Art Therapy vs. Art Lessons: Benefits and How to ChooseWhether you’re picking up a paintbrush to unwind or joining a drawing workshop to improve your skills, it’s easy to assume that all creative activities are the same. But if you’ve ever heard someone mention “art therapy” and wondered… Read more: Art Therapy vs. Art Lessons: Benefits and How to Choose
- Easy Mandala Patterns to Create a Mandala Like a ProEasy mandala patterns are a fun and calming way to relax your mind. They’re not just pretty to look at but they can also help you feel more peaceful and focused. In fact, many people use mandala drawing in… Read more: Easy Mandala Patterns to Create a Mandala Like a Pro
- المعنى الجميل للألوان في العلاج بالفنكيف تفهم ذاتك من خلال الألوان التي تختارها أثناء تلوين الماندالا إن لمعاني الألوان بُعدًا أعمق من مجرد ما تراه أعيننا؛ فهي تلامس ما نشعر به في أعماقنا. فكل لون نميل إليه يحمل في طياته قصة، أو ذكرى، أو… Read more: المعنى الجميل للألوان في العلاج بالفن