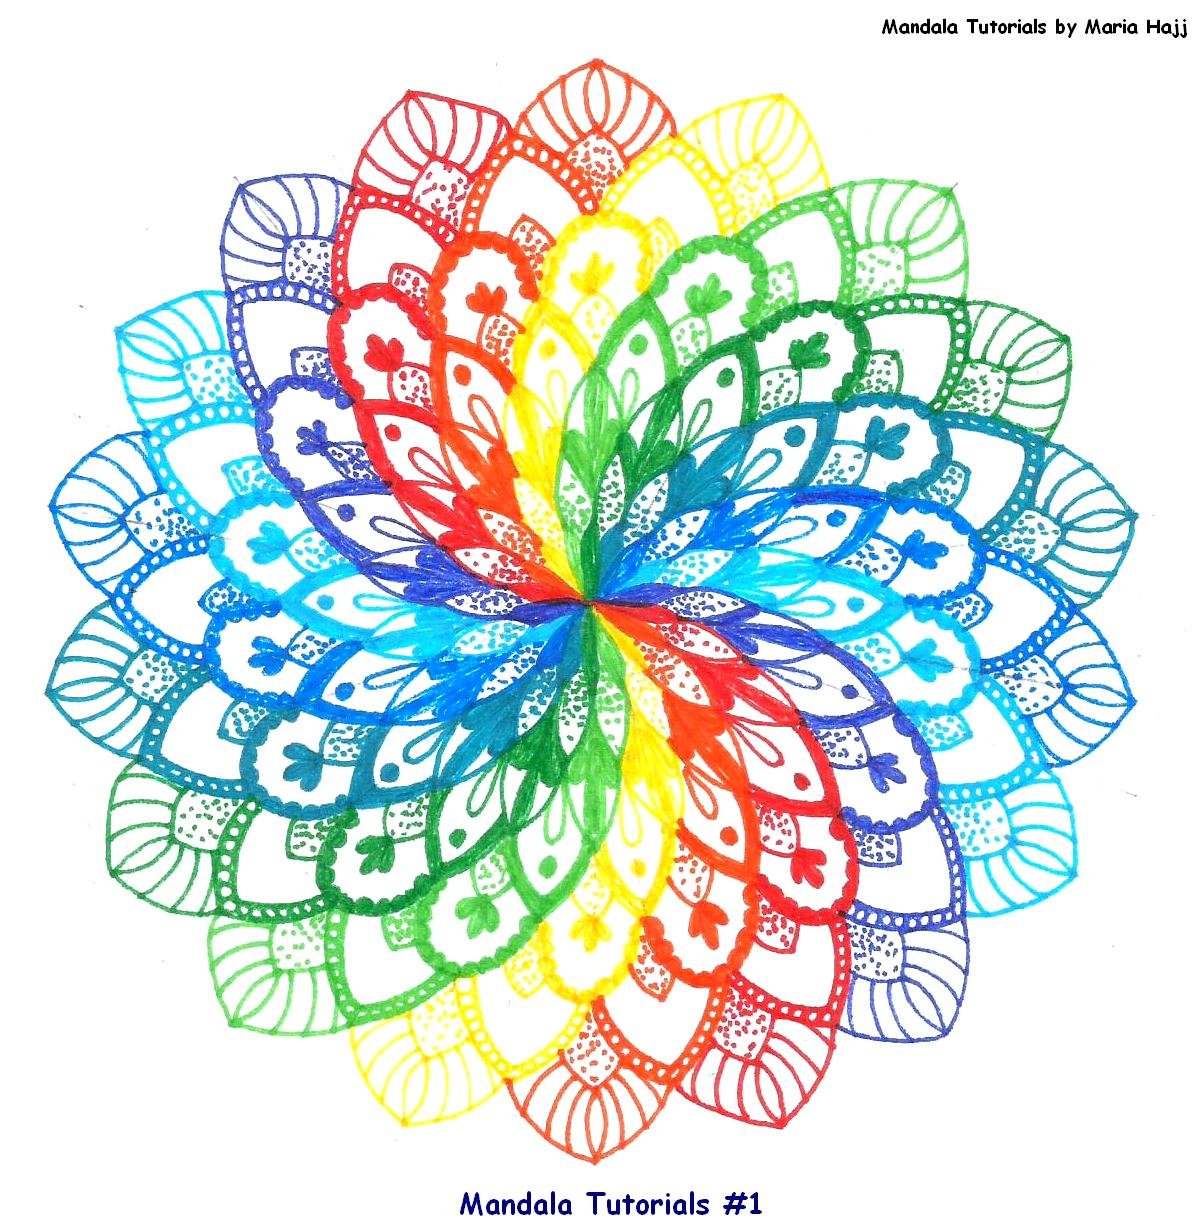
Create a Beautiful Rainbow Mandala in a Few Steps
Rainbow mandala, just the name sounds magical, doesn’t it? A blend of vibrant colors coming together in perfect harmony, creating a mesmerizing work of art. If you’ve ever been curious about drawing mandalas but felt unsure where to start, this is your chance. Don’t worry if you’re new to art or think you don’t have a creative bone in your body. Drawing a mandala can be surprisingly simple, calming, and fun.
In this tutorial, we’ll break it down into small, manageable steps so you can follow easily. You don’t need fancy tools or professional skills—just a willingness to try and a bit of patience. By the end, you’ll have your very own rainbow mandala to admire. And who knows? You might even fall in love with the process.
Why try mandalas? They’re more than just beautiful patterns. Mandalas are a form of art therapy. They help you relax, focus, and express yourself. Plus, the burst of colors in a rainbow mandala adds an extra layer of joy and positivity.
So, gather your supplies—paper, a pencil, a ruler, and some colorful pens or markers. Find a comfortable spot and let your creativity flow. Whether you’re drawing for the first time or have some experience, this tutorial is perfect for anyone who loves the idea of creating something beautiful.
Ready? Let’s dive in and make a stunning rainbow mandala together!
Materials Needed for the Rainbow Mandala
Don’t stress about having the “perfect” materials for your rainbow mandala since this is all about creativity and fun! As a beginner, there’s no need to buy fancy supplies. Look around your home for simple things like a pencil, eraser, ruler, and any paper you have on hand. For coloring, grab whatever you’ve got—markers, colored pencils, crayons, or even a basic pen. The beauty of mandalas lies in the process, not the tools. Using what you already have makes the experience more relaxed and personal. So, keep it simple and let’s get started!

- Compas
- Protractor
- Eraser
- Ruler
- Pencil
- A4 White paper or cardboard
- Colored fine point Stabilo pens
Let’s Start Our Project
Sketch a Grid for the Rainbow Mandala
A mandala grid is a composition of circles and grid lines that will help us keep the symmetry of a mandala without effort.
Grids can have different measures and angle degrees. It is fun to try to experiment by changing the angles between grids lines and distances between circles. Just keep in mind that grid lines have to be equally separated.
I invite you to check this video tutorial about mandala grids.

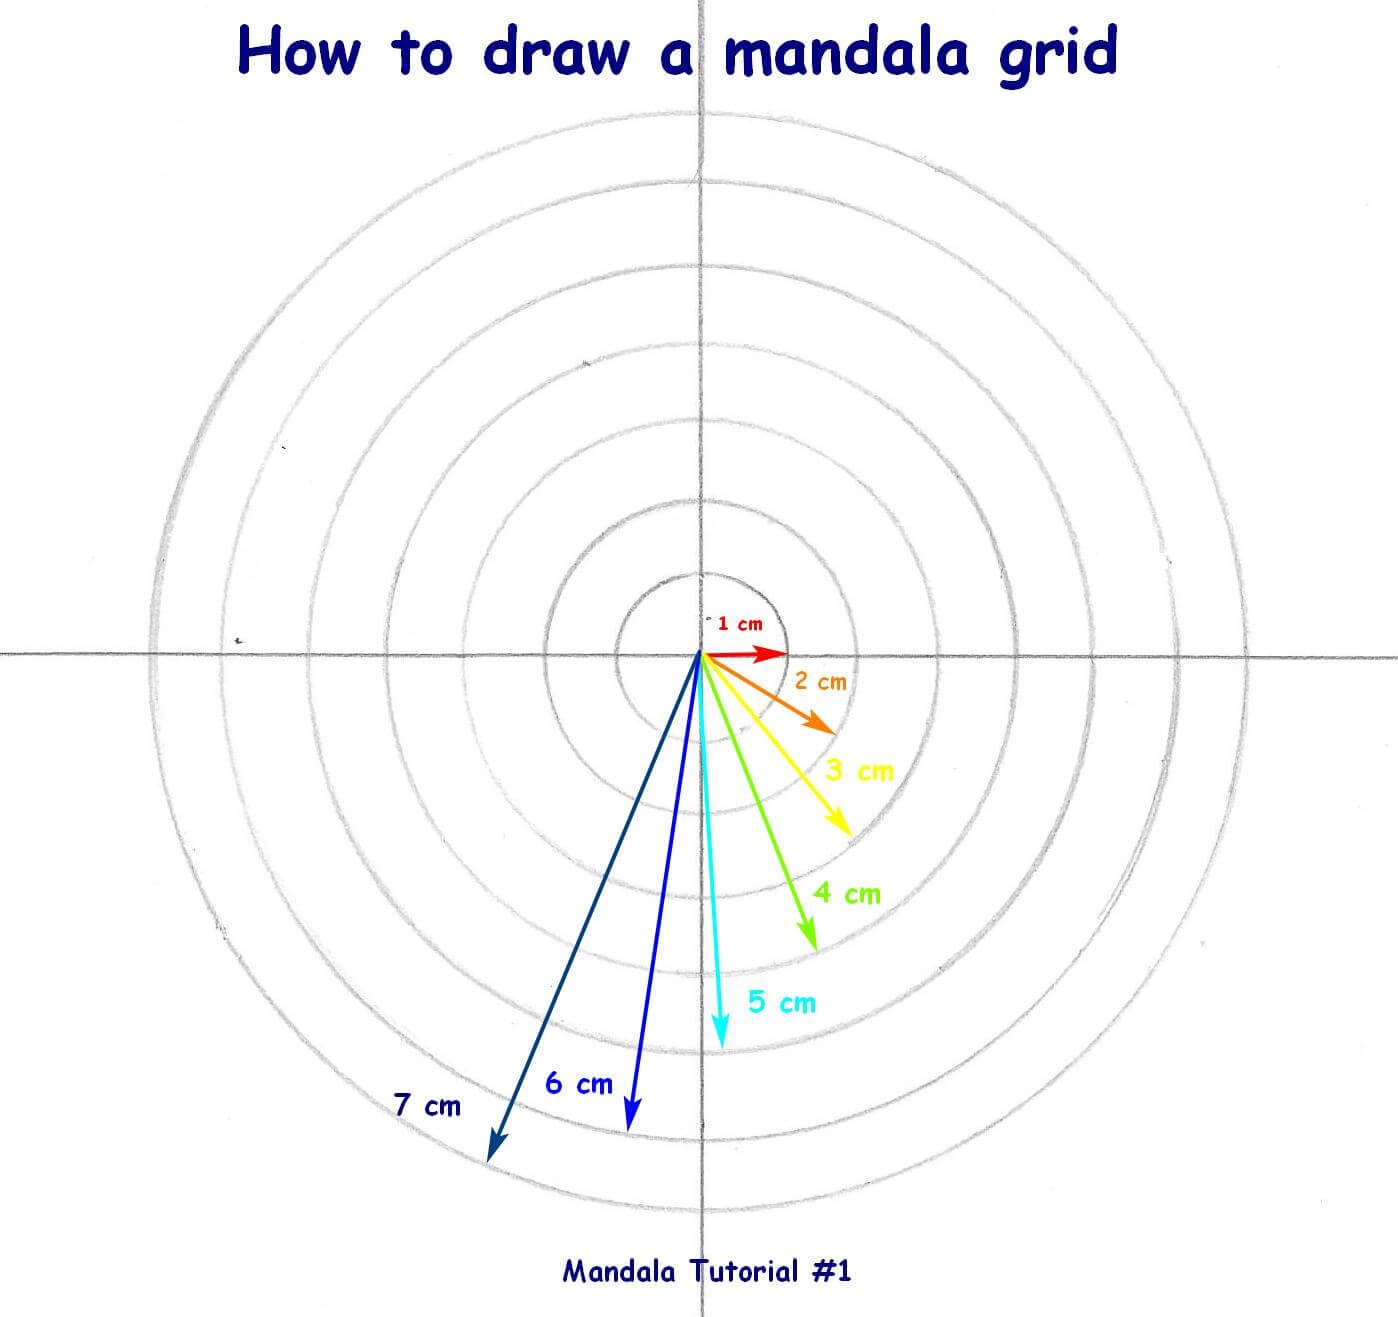
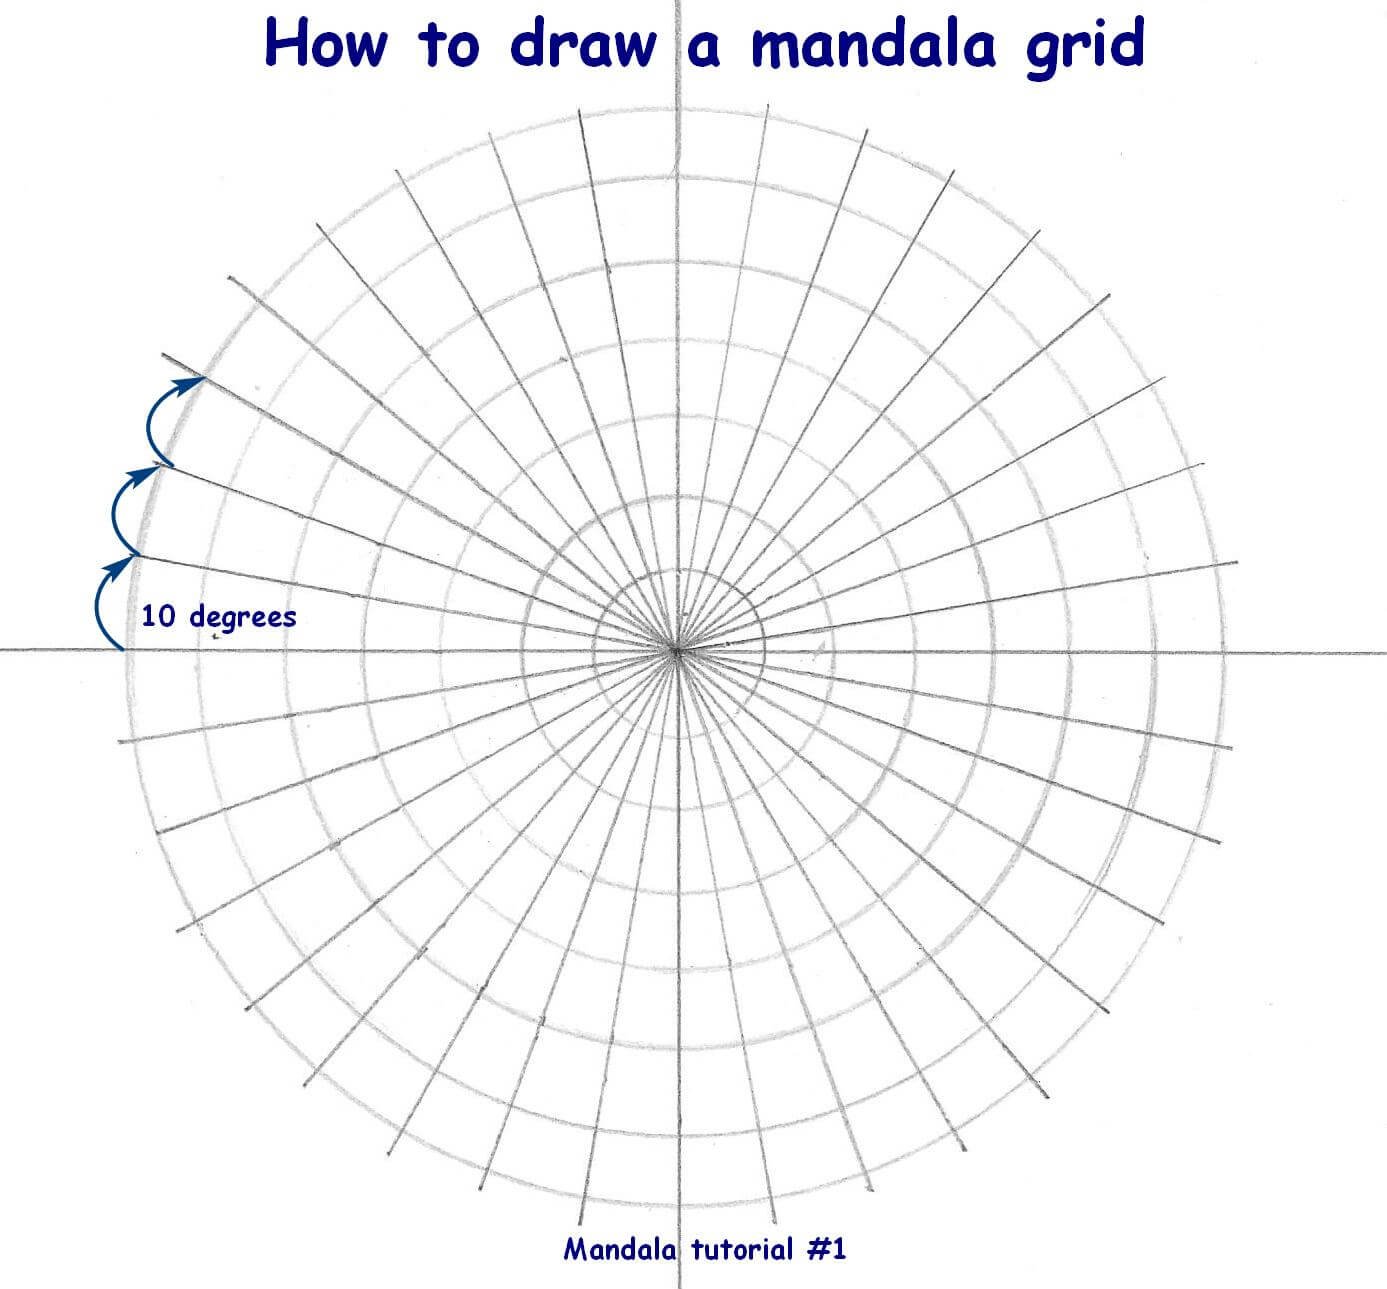
Then using the ruler, you trace the lines.
Let’s Create the Rainbow Mandala
To draw a mandala, we use a number of basic shapes and decorate their inside to create the effect we need to create while drawing. And this inside decoration will create what we call a pattern.
So, in the illustration below, I have listed the different patterns to use in this mandala tutorial. Kindly have a look at the illustration, and read the explanations written. More details will be explained as we move forward throughout this mandala tutorial.

Now we start filling the mandala grid with patterns
To draw a mandala we always start from the center. But first, choose the color sequence you like to follow. In this mandala tutorial, I have chosen nine colors that I will show you how to use in order to get a twisted effect.
Start by filling the center of the grid
First, in the center of the grid, start by drawing double-pointed petals on each two grid sections making sure to trace each petal with a different color, until all colors are used. Then repeat until all eighteen petals are drawn. So, if you choose nine colors, each will be repeated twice. Once drawn, color the inside of each petal.
Check the two following illustrations.


Start expanding the design outwards
As a second step, draw one petal on each two grid sections. In order to twist the colors, follow this step. Start with the red pen; draw a petal that starts from the summit of the previous red petal and ends at the summit of the orange petal. Repeat with the orange petal; start drawing the orange petal from the summit of the previous orange petal and end it at the summit of the previous yellow petal, and so on. Once all the petals are drawn, fill them using the stippling technique. The below illustrations will show you exactly how to proceed.


The twisted effect in this rainbow mandala is becoming clearer
The following step requires you to draw new petals on the third row; each petal on two grid sections. Keep twisting the color throughout the whole mandala tutorial exactly as explained in the previous step. Afterward, start filling the inside of the petals with teardrops as shown in the illustrations below and color them.


In this 4th step, draw petals on each two grid sections respecting the twisting protocol we followed from step the prevous step. Once all the petals are drawn fill them as follows:
- First trace an inner double outline
- Then draw a middle empty teardrop
- and later proceed by filing l it by a colored dot
- last thing to do is to color the double outline (check the illustrations below to follow the detailed steps)


Draw arc petals on each two grid sections by respecting the color twist. Decorate the inside of the arc petals as follows:
- Trace arcs on the inner outline of the arc petal and fill them
- Then, draw a regular small petal inside the arc petal, fill it by stippling, then at the summit draw three teardrops and fill them.


Draw Petals on each two grid sections then trace a double outline. Now, fill it with small circles and draw another small petal and fill it with stippling.

Here, you have to trace a petal on each two grid sections before you draw another small petal inside of each. Then, decorate the empty space with curves.

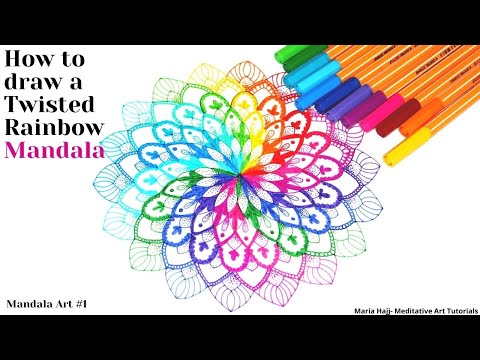
Watch the Video Tutorial
Conclusion
And now, you have accomplished a beautiful rainbow mandala in just a few easy steps. Take a moment to admire your work. Isn’t it stunning? Don’t you feel great about yourself? You’ve not only created a piece of art but also embraced the calming, joyful process of mandala-making.
Think about how far you’ve come since starting. From gathering simple materials to designing intricate patterns, every step was a part of your creative journey. Each line, shape, and color reflects your unique style. That’s the beauty of mandalas—they’re as individual as the person creating them.
It wasn’t just about drawing, was it? Along the way, you practiced focus, patience, and creativity. Maybe you even felt a sense of relaxation as the rainbow colors came to life. That’s what makes mandalas so special—they’re more than art; they’re an experience.
If you feel inspired, why stop here? Try experimenting with new patterns, colors, or themes. Use different tools or techniques. There’s no limit to what you can create. Every mandala you make will tell a new story and bring its own sense of accomplishment.
So, well done! You’ve not only followed the steps but also embraced the joy of creating something beautiful. Now, keep your rainbow mandala as a reminder of your creativity and the happiness it brought, and whenever you need a little escape, remember—you can always draw another.