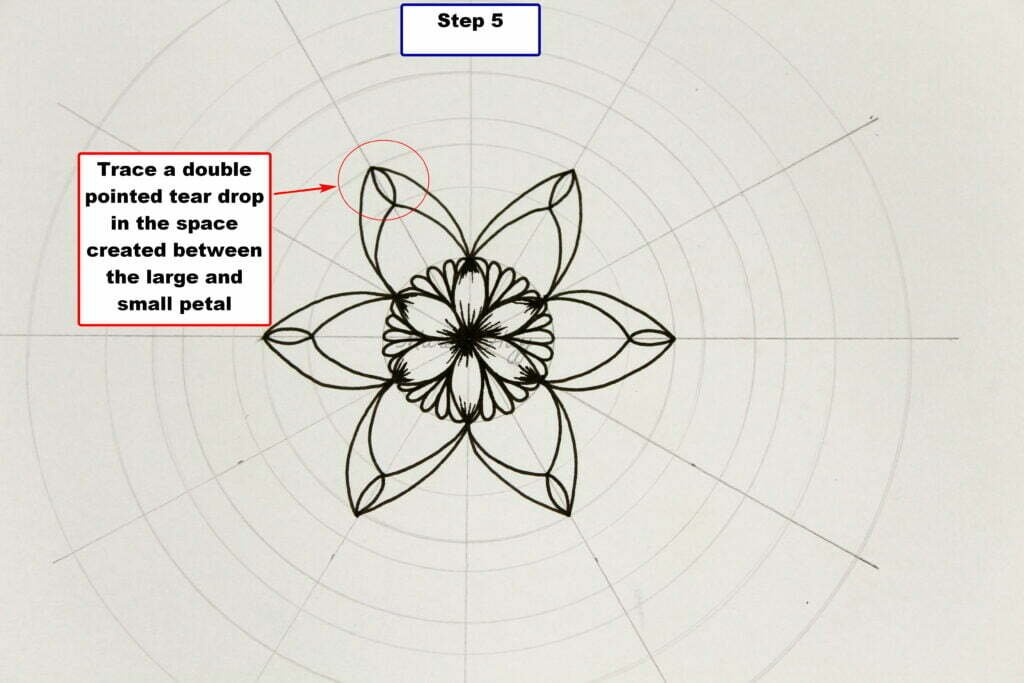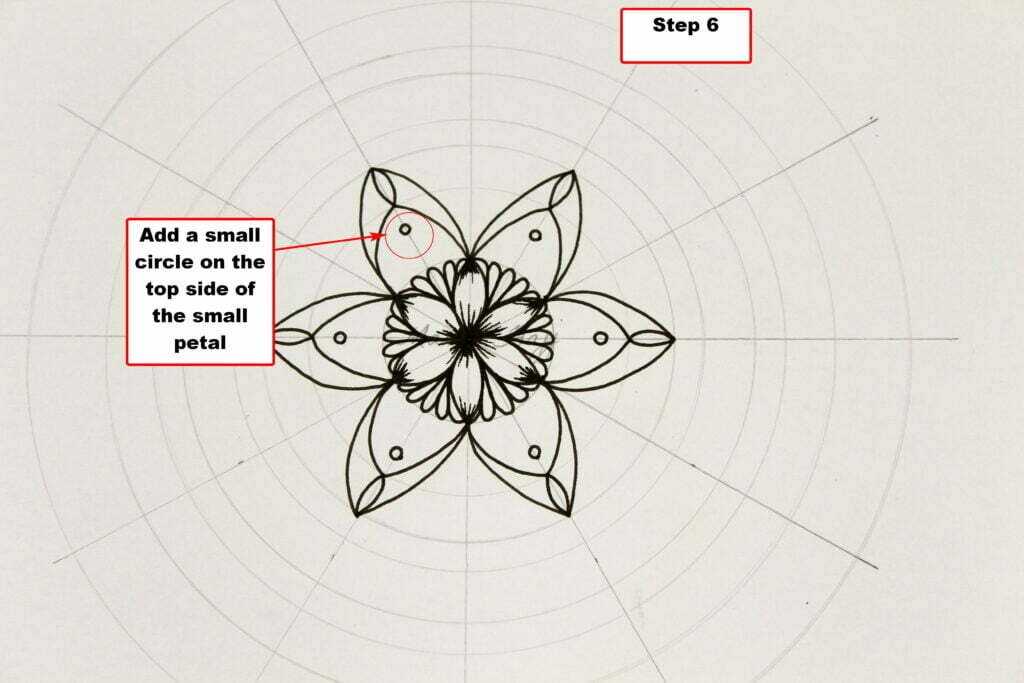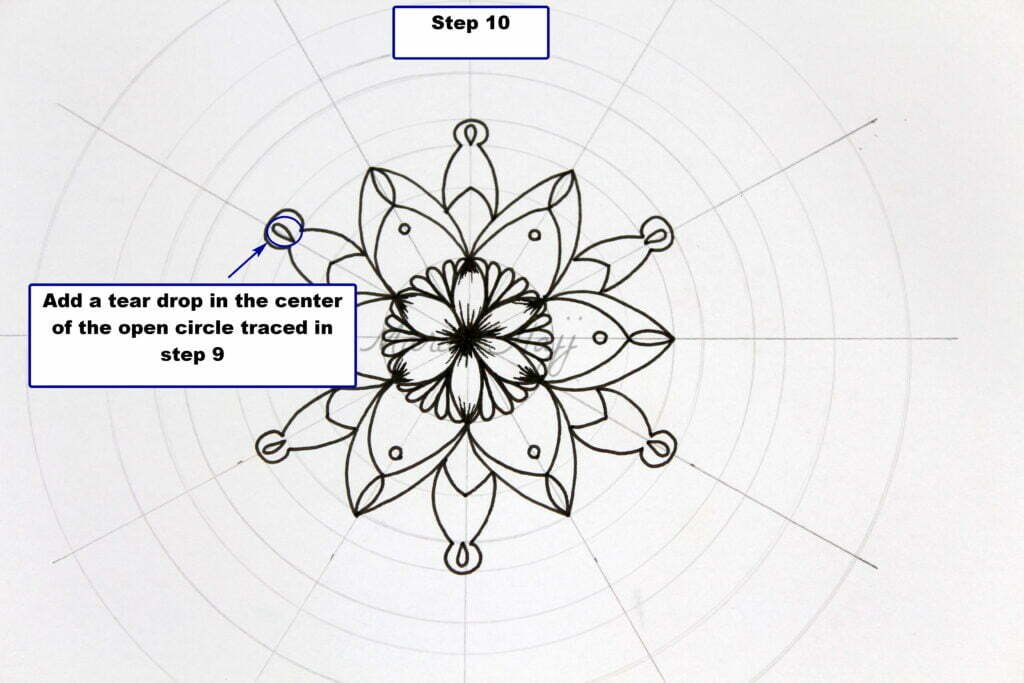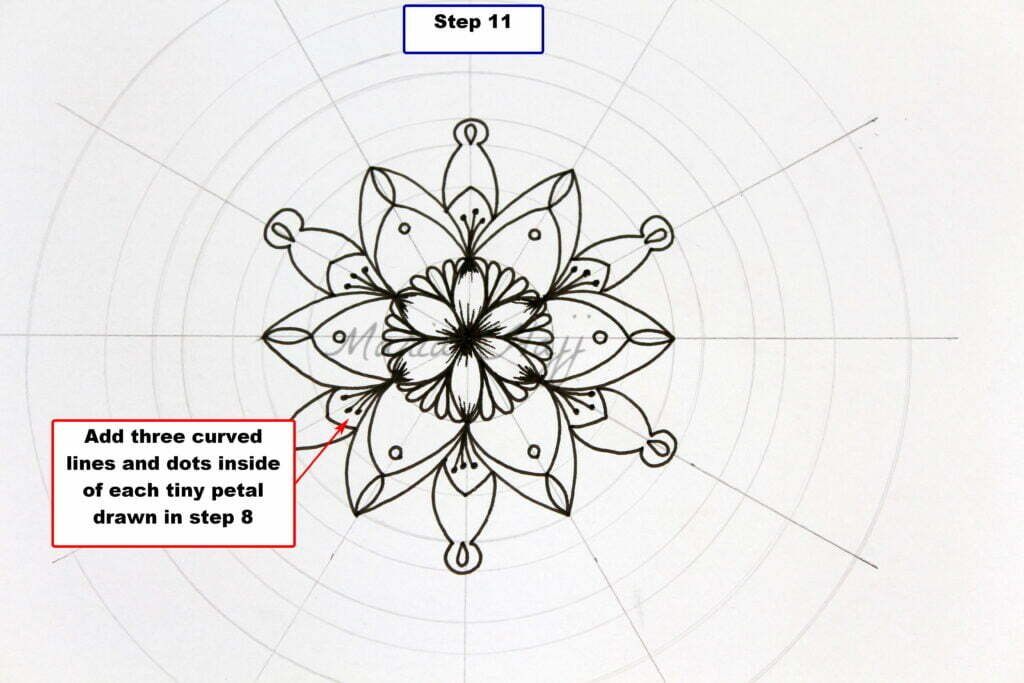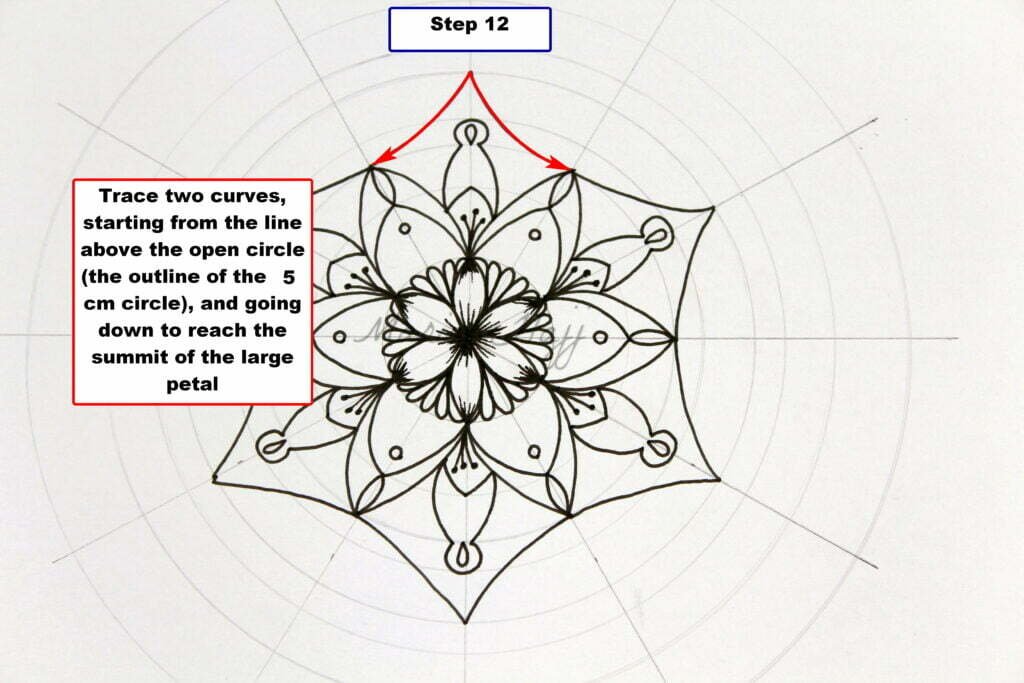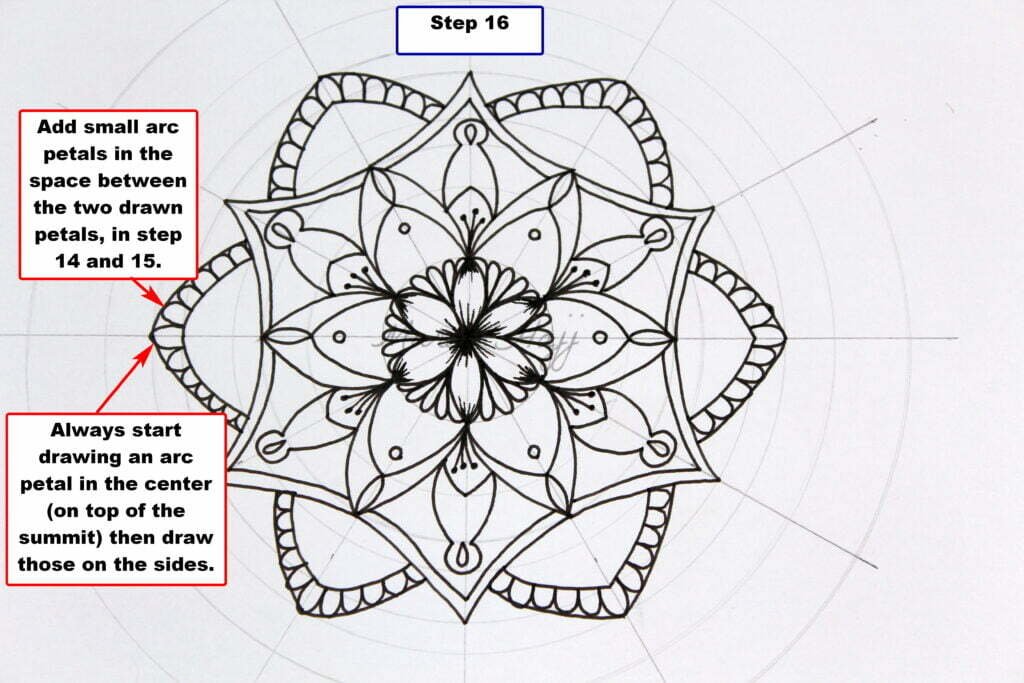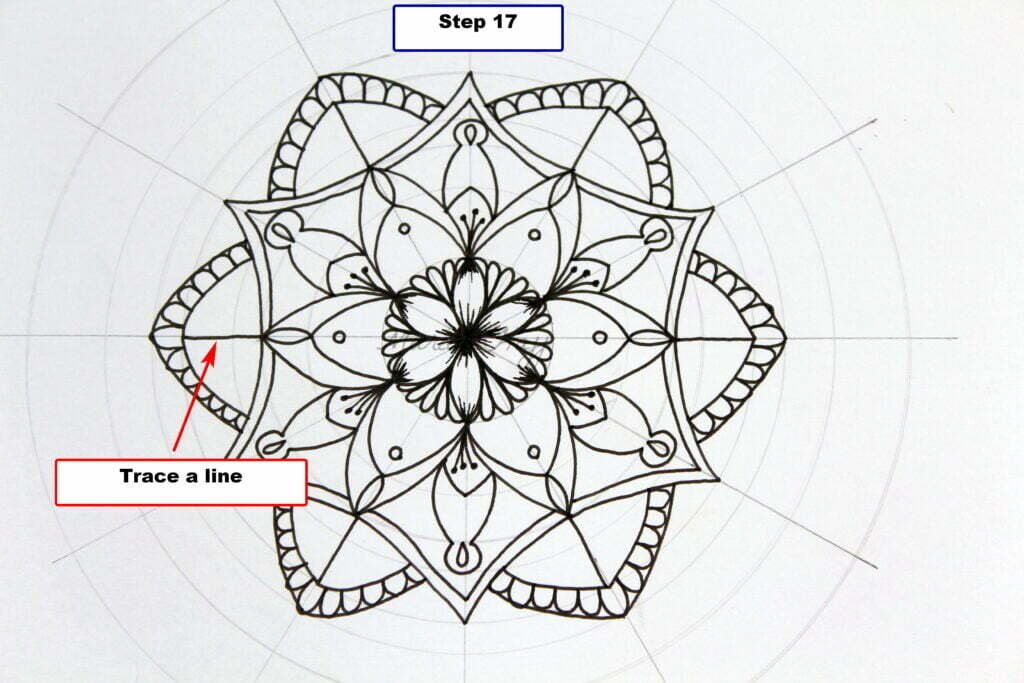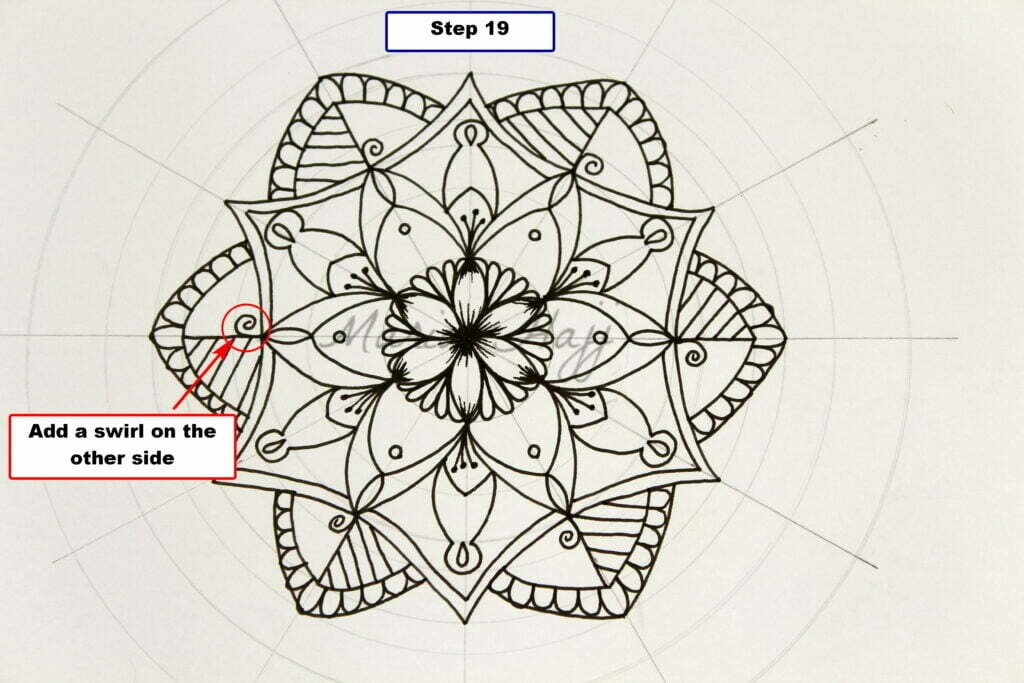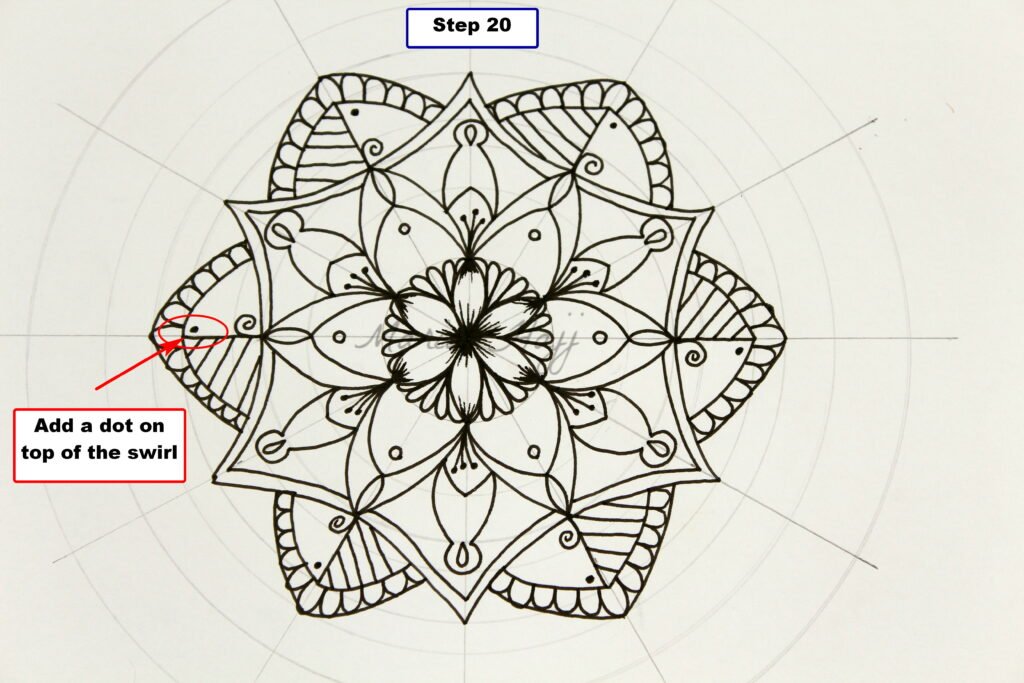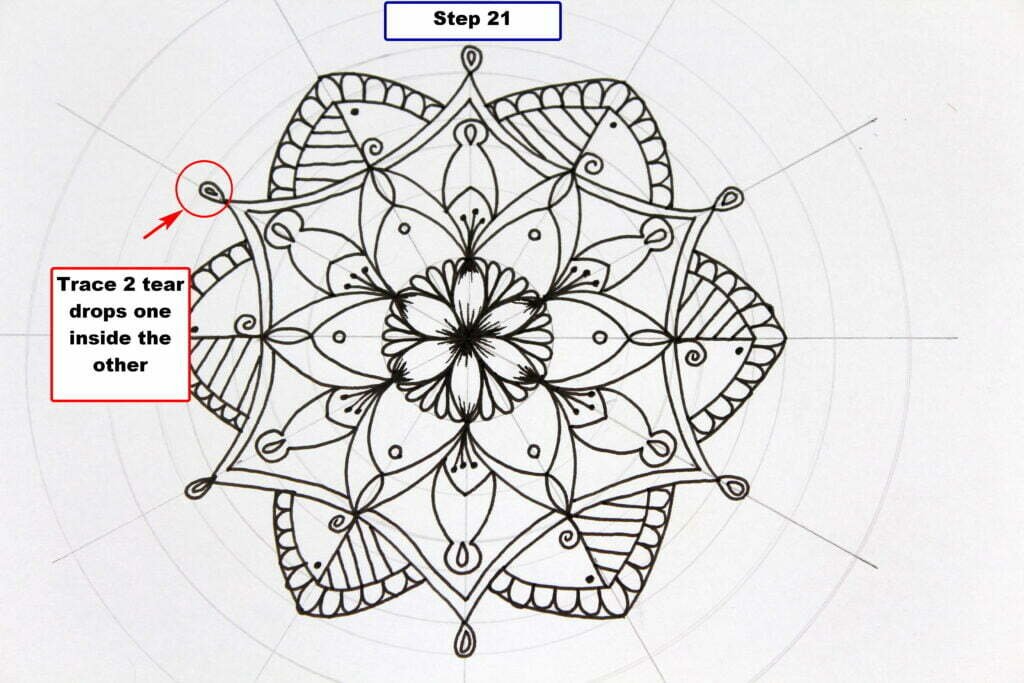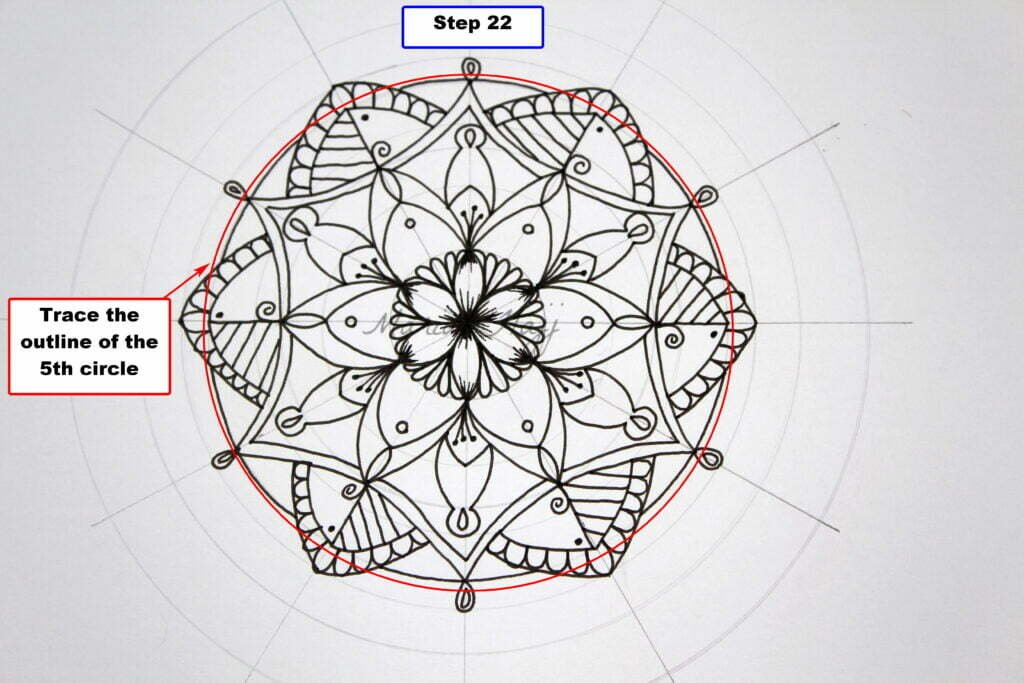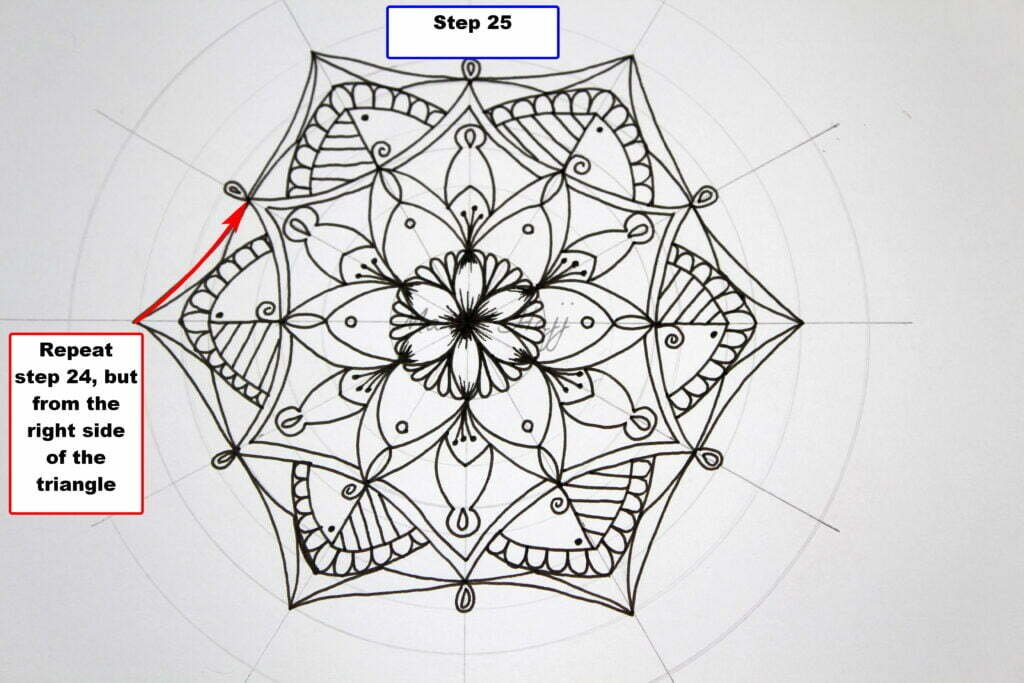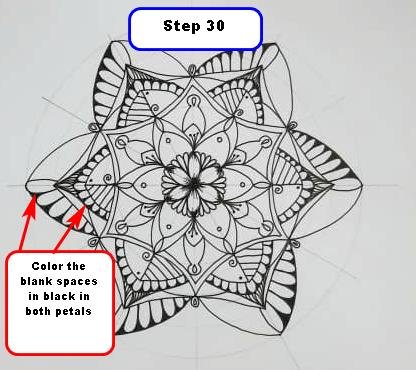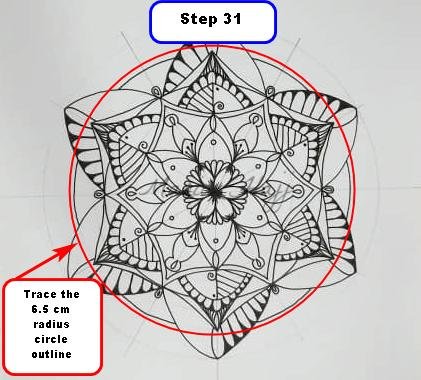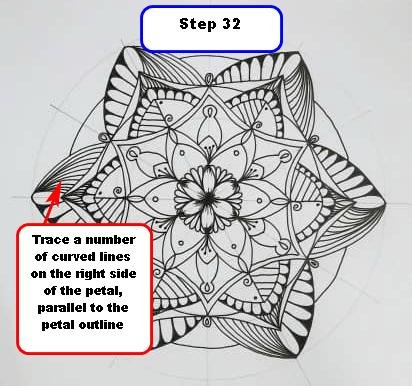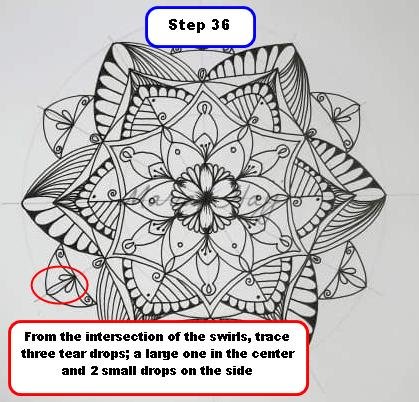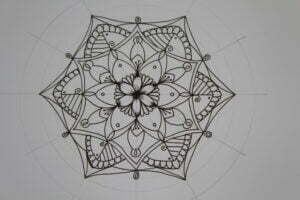
This is a step by step easy tutorial on how to draw this creative Mandala design.
The pictures posted in this article offer you detailed instructions on every step needed to draw the Mandala.
This tutorial is divided into 36 easy steps, but before diving into the drawing process let’s learn a few basic knowledge about Mandala and Mandala drawing.
The basic materials you need for every Mandala are the following:
- A4 paper
- Compass
- Protractor
- Pencil
- 12″ Ruler
- Fine drawing pen 0.2
The compass and protractor will allow you to trace the base structure in every Mandala, called mandala grid, that helps achieve symmetry in a simple way.
The grid is composed of a number of circles, which sizes differ based on the design you’re targeting, and a number of lines that should be separated but equal angles.
In all the simple Mandala tutorials, I start by taking the center of the paper. This center will be the one and unique center around which all the circles of the Mandala will be organized.
The measures required for the circles are as follows:
Radius lengths: 1.5 cm, 3 cm, 4 cm, 5.5 cm, 6 cm, 7 cm, and 8.5 cm
As for the grid lines, they are separated by 30 degrees.

Below you will find the different steps of this beautiful Mandala art. In a Mandala, you always start from the center and take the grid lines and grid sections as a landmark needed to trace your lines.


