How to Draw a Basic Flower Mandala
Welcome to My Simple and Easy Flower Mandala Tutorial!
Are you ready to create a beautiful flower mandala with just a few simple steps? If you’ve always wanted to draw mandalas but thought they were too complicated, don’t worry because this tutorial is perfect for beginners, and I’ll guide you every step of the way.
First of all, drawing a mandala is not only fun, but it’s also very relaxing as it helps you focus, unwind, and enjoy the creative process. Plus, you don’t need any special tools—just a pencil, a piece of paper, and a little bit of patience!
At the end, you’ll have a lovely flower mandala that you can color, frame, or even turn into a gift. So, grab your pencil, relax, and let’s start drawing! I promise, it’s easier than you think.
Let’s Start Drawing This Beautiful Flower Mandala
The design I have prepared for you today is a simple yet very beautiful Mandala design. As they say in french ” C’est dans la simplicité que se trouve la beauté“.
Actually, this design is perfect for beginners because the Mandala grid is simple, made with only 4 different circles, and the grid sections are wide, and the shapes chosen are easy.
Quick Mandala Drawing Tips
(Click to read the article “Mandala tips and tricks“)
- A mandala consists of a number of circles organized around one center
- Always begin your drawing at the center and work your way outward.
- Complete each line before moving on to the next row.
- Always have a compass, a protractor, a pencil, a ruler and a fine drawing pen by your side.
The Materials Needed for This Project
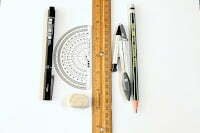
- A4 white paper or cardboard
- a sharp pencil
- eraser
- a 30 cm ruler
- compass
- protractor
- a 0.5 drawing pen
You don’t need a specific pen to start drawing your mandala! While a 0.5 drawing pen is great, you can use any pen that feels comfortable to you. Whether it’s a gel pen, fine liner, or even a simple ballpoint pen, what matters most is your creativity. Each pen gives a unique effect, so feel free to experiment and see what works best for you. The most important thing is to enjoy the process and have fun!
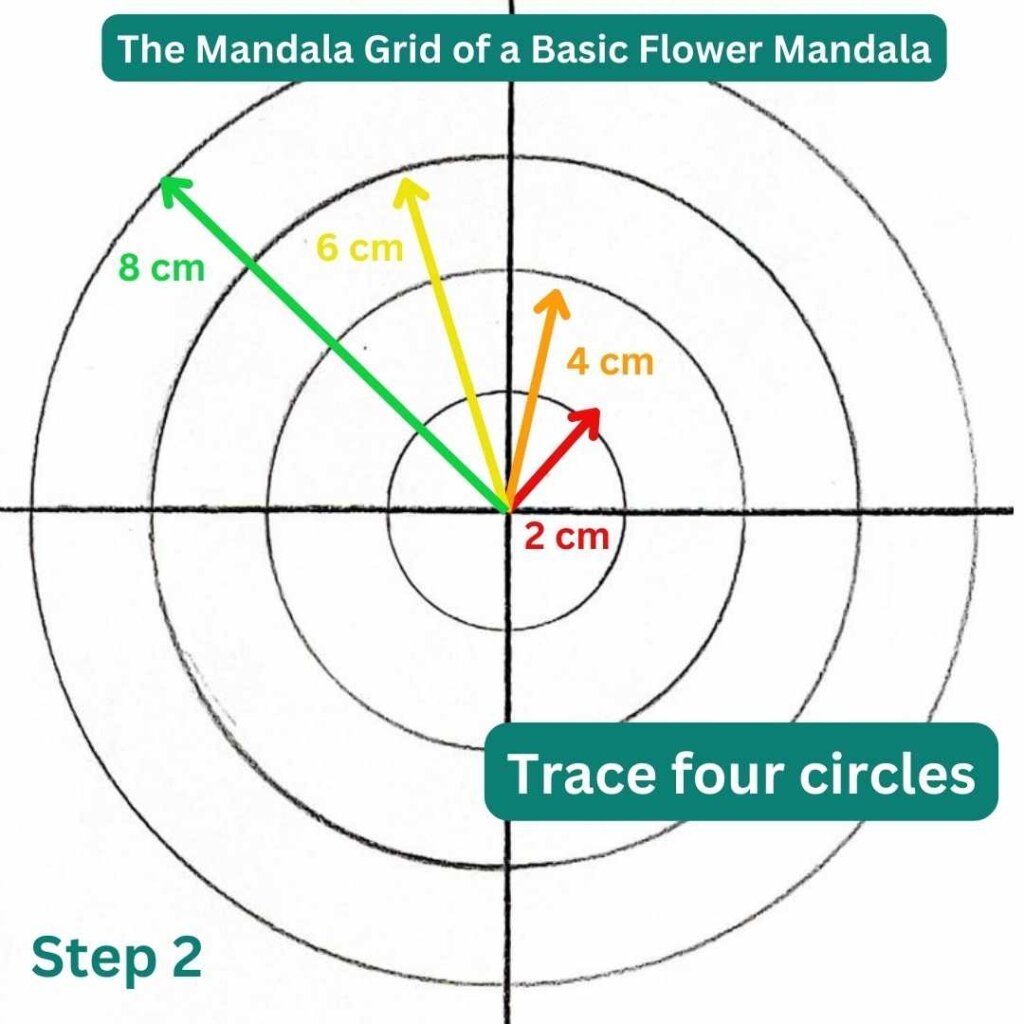
Prepare the Mandala Grid
A mandala grid is like your best friend in the drawing process! It helps keep everything balanced, symmetrical, and beautifully organized. When you start with a grid, you don’t have to worry about uneven shapes or lopsided patterns—it gives you a solid guide to follow. Even if you’re a beginner, a grid makes it so much easier to create a stunning mandala with the right proportions. Plus, it gives you the freedom to play around with different patterns while keeping everything neat and structured. So, before you start drawing, take a moment to set up your grid—you’ll thank yourself later!


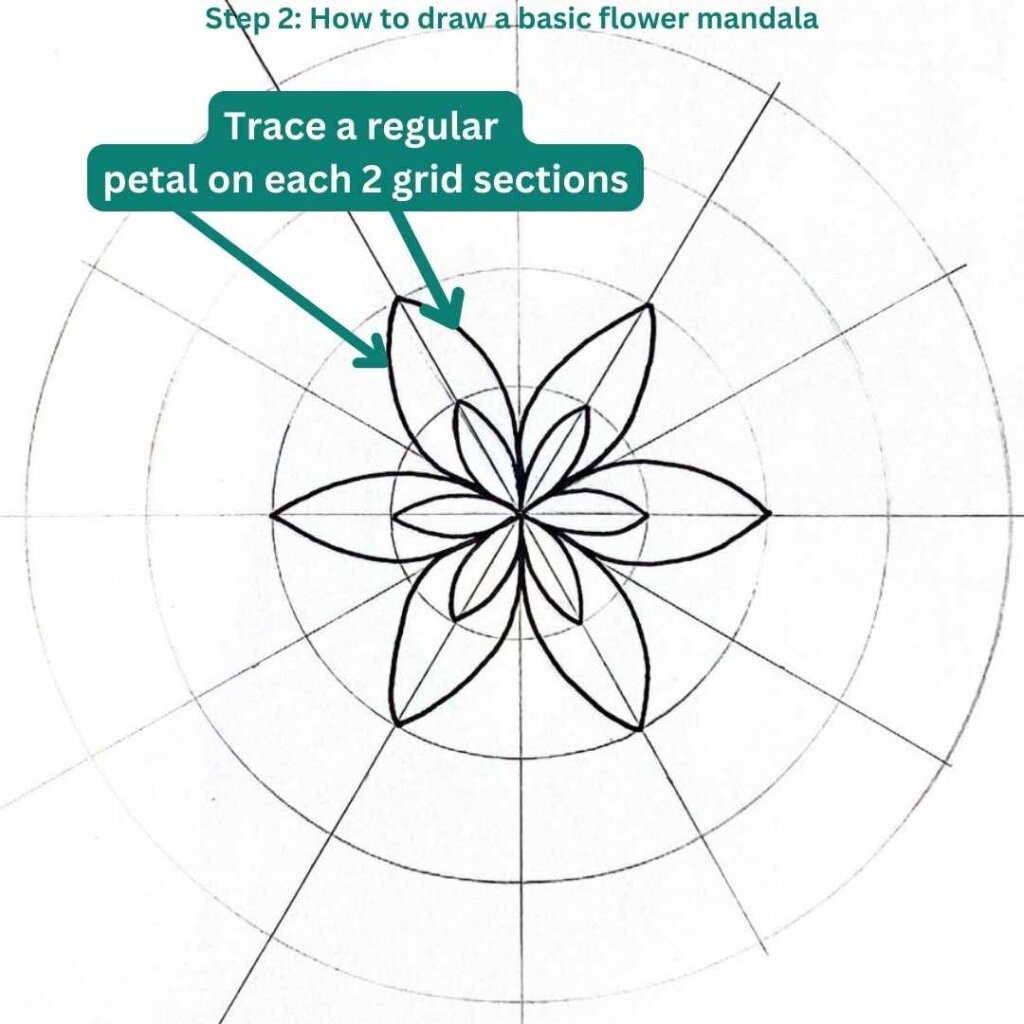
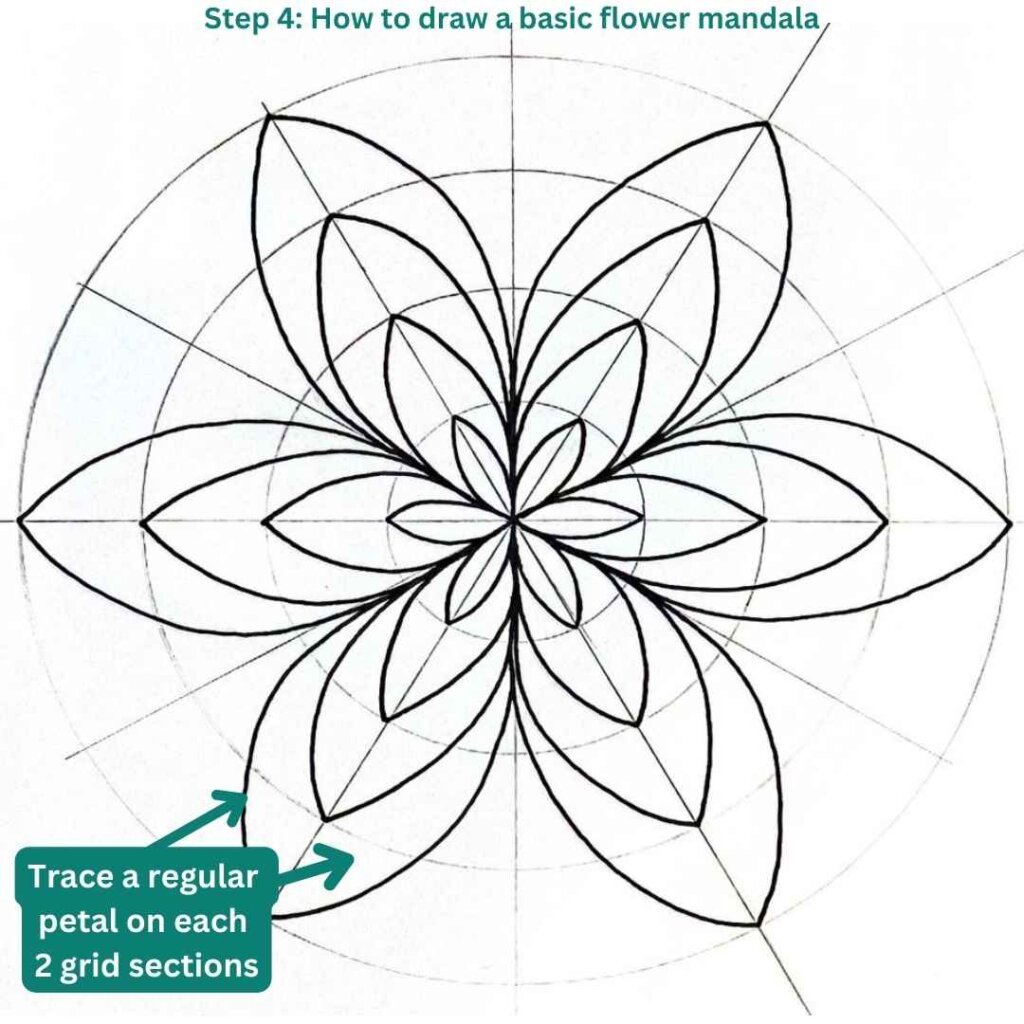
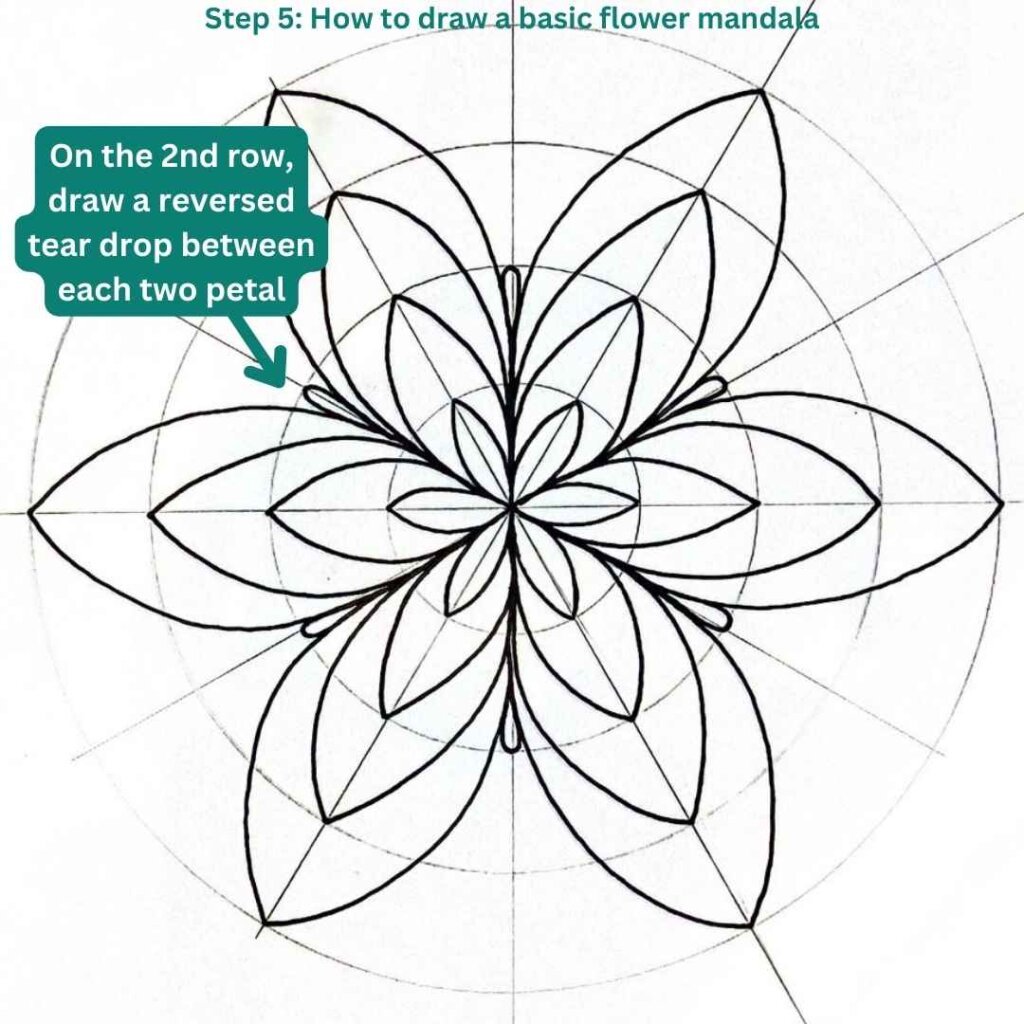
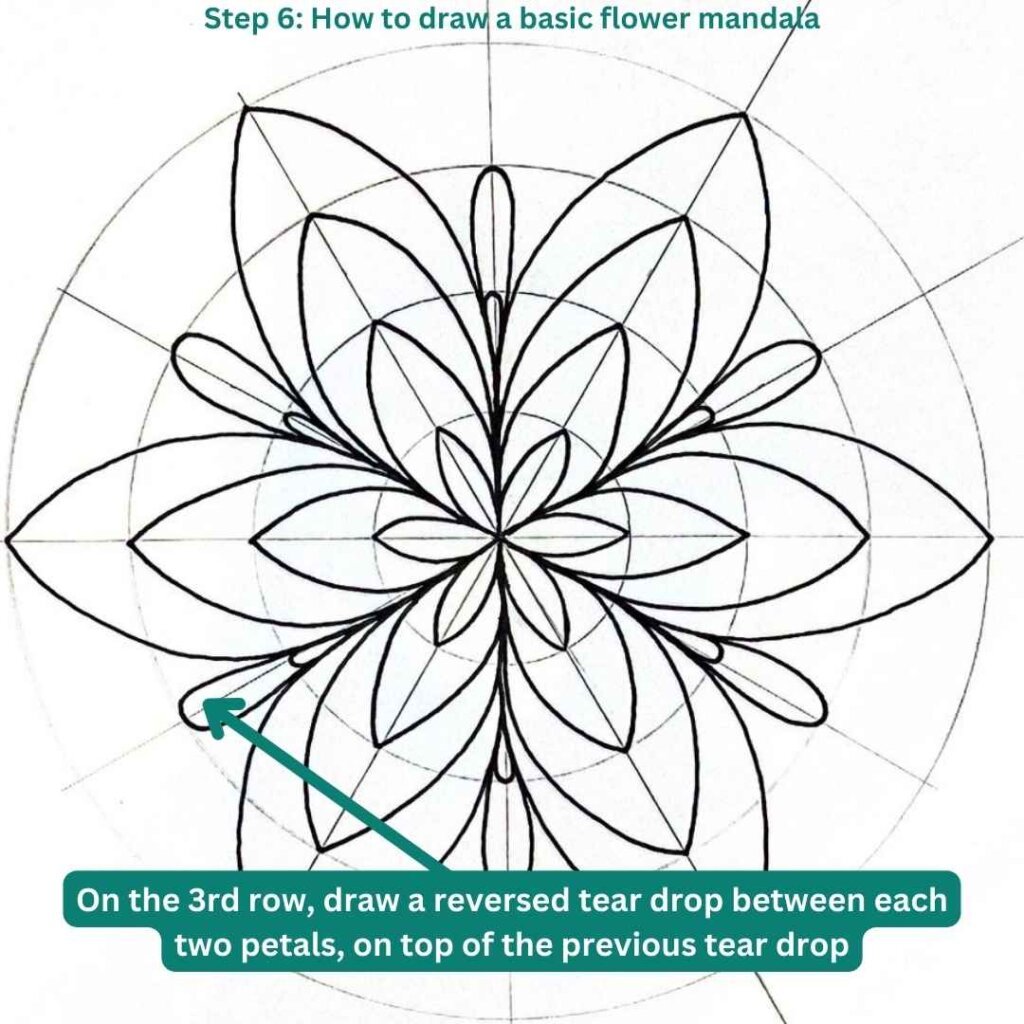
How to Fill the Mandala Grid to Create the Beautiful Flower Mandala


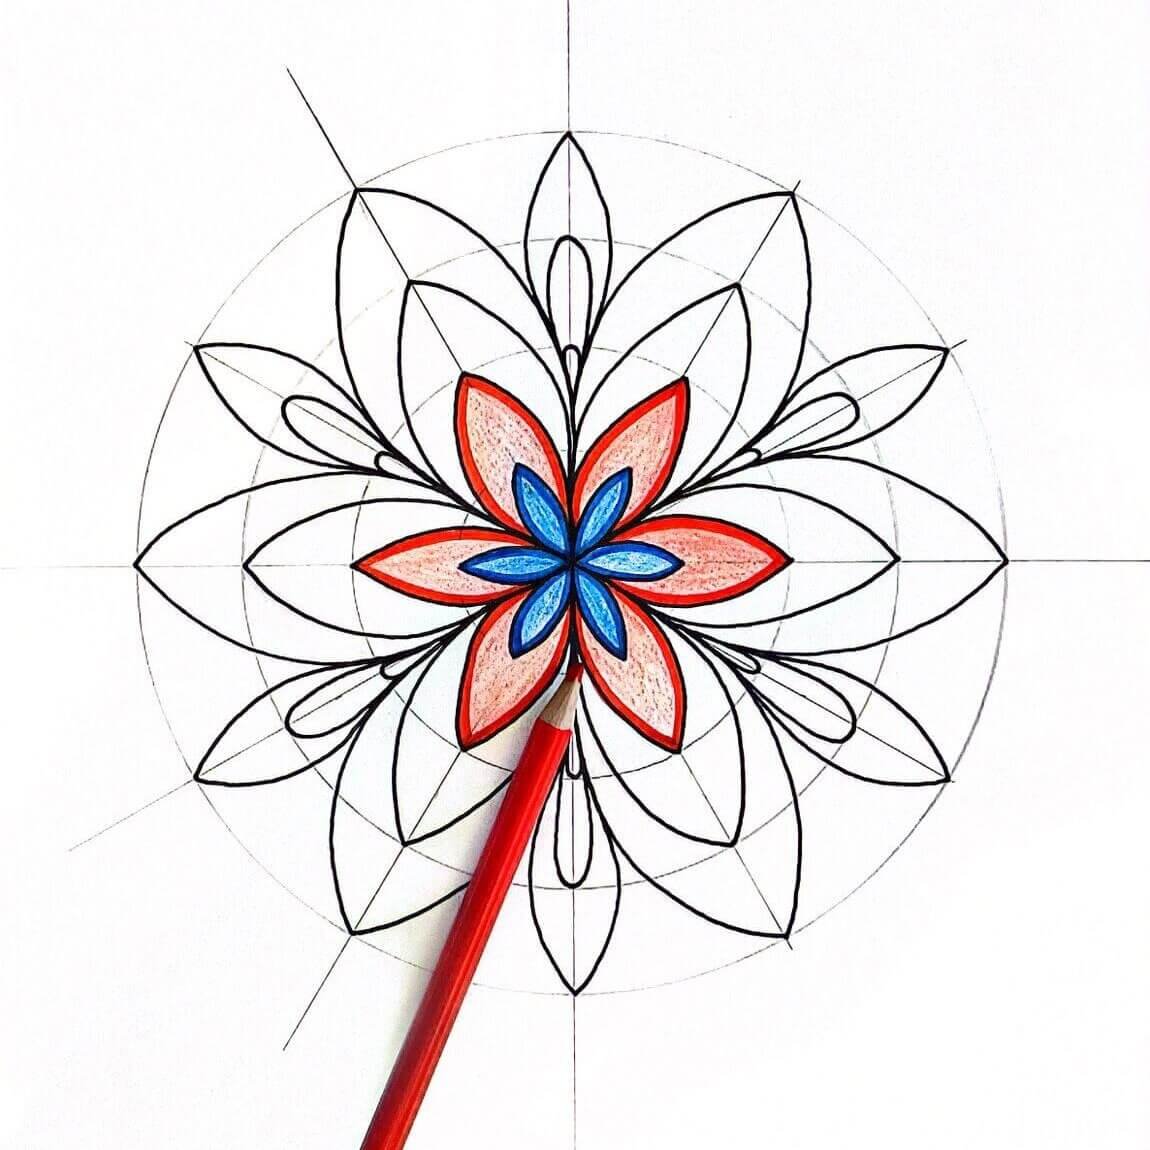
How to Color this Mandala Flower


This flower mandala radiates balance and joy! The blue brings calm and creativity, while yellow sparks positivity and confidence. Red adds passion and playfulness, and purple reflects imagination and wisdom. These colors show a mix of focus, energy, and inner peace—a truly vibrant expression!
I’d love to see your beautiful creations! So, will you share the results of this tutorial with me on INSTAGRAM? Tag me in your posts or stories so I can admire your unique flower mandala and share your amazing work. I can’t wait to see how you bring your own colors and creativity to life!
A Small Inspiring Story About How My Journey as a Mandala Artist Started
I still remember the first time I discovered the beauty of mandala art. I was alone in a cozy cabin, surrounded by the peaceful stillness of the woods, coloring in an adult coloring book. As I turned the pages, admiring the intricate designs, I started wondering about the technique behind them. The more I colored, the more curious I became, so, I couldn’t wait to get back home and start experimenting on my own!
YouTube became my go-to resource, and I found countless tutorials that helped me understand the basics. But what truly shaped me into the artist I am today was daily practice. Mandala art slowly became more than just a hobby—it became a part of me, as essential as the air I breathe every morning.
A few months ago, at the start of the lockdown, I decided to launch this website. Since I could no longer hold my weekly meditative art workshops in person, I wanted to find a way to stay connected with my students and followers. That’s when the idea of free online tutorials came to life. As a result, I created my YouTube channel and this website to share my passion, inspire others, and help people experience the same joy and peace that mandala art has given me.
And here we are today—thank you for being part of this journey!
Here’s a video suggestion for you taken from my YouTube channel. Enjoy!!