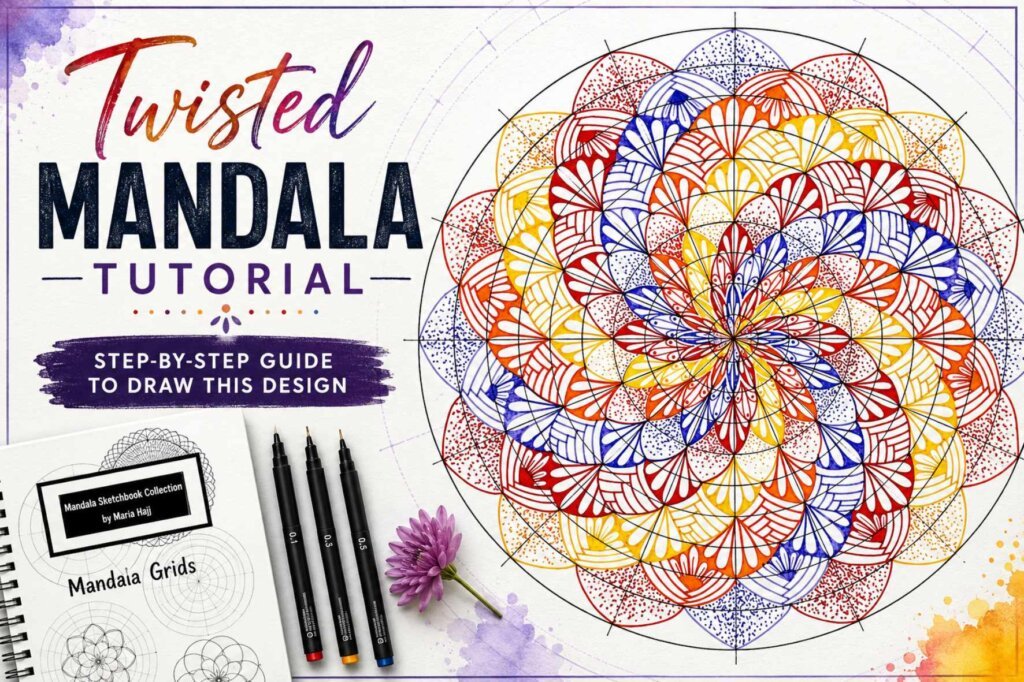
How to Draw This Easy Mandala with One Stunning Pattern
Easy mandala drawing is within everyone’s reach! You don’t need complex designs to create something beautiful. A mandala can emerge from a few simple lines, forming a mesmerizing pattern.
In this tutorial, I’ll guide you step by step to draw a stunning mandala using just one single pattern. You’ll see how, with repetition and symmetry, even the simplest design transforms into a captivating artwork.
Many people believe mandalas must be intricate, but that’s not true. Simplicity often creates the most elegant designs. By focusing on a single element, you’ll gain confidence and enjoy the meditative process of drawing.
If you’ve never drawn a mandala before, this is the perfect place to start. Even if you have experience, you’ll discover a new way to create unique designs effortlessly.
So why not give it a try? Grab your pen, relax, and let your creativity flow. You’ll be surprised at what you can achieve with just a few simple strokes!
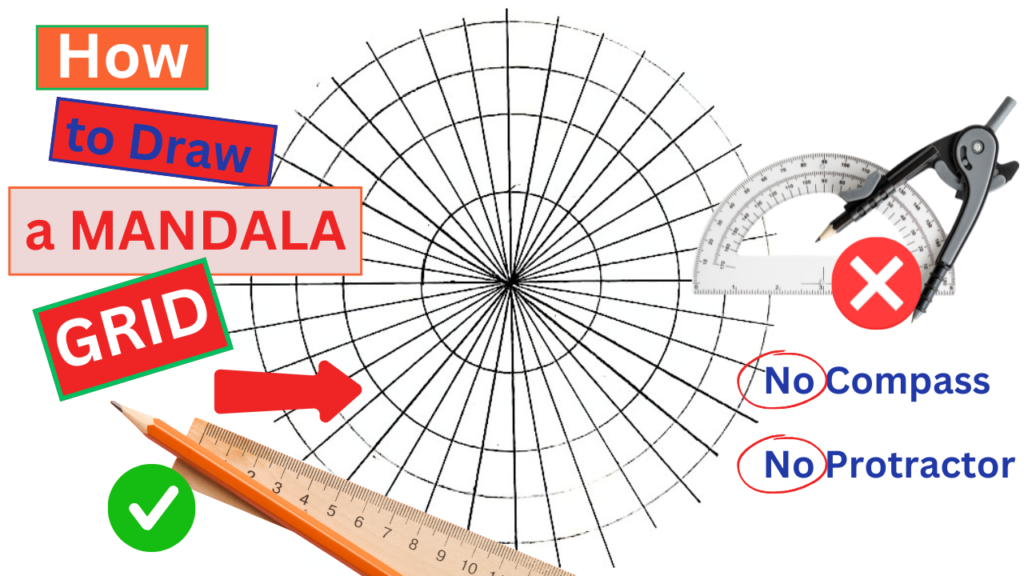
1- The Needed Materials
You don’t need perfect materials to create a beautiful mandala! Many people hesitate to start because they lack a compass or protractor. However, mandala drawing is about creativity, not perfection.
If you don’t have these tools, don’t worry! In my tutorial, I’ll show you how to draw a precise mandala grid using simple techniques. With just a pencil and paper, you can achieve stunning results.
So, don’t let missing materials hold you back. Grab what you have, follow my steps, and start your mandala journey with confidence and ease!
- A4 white paper
- a sharp pencil
- 30 cm ruler
- compass
- protractor
- eraser
- 0.5 drawing pen
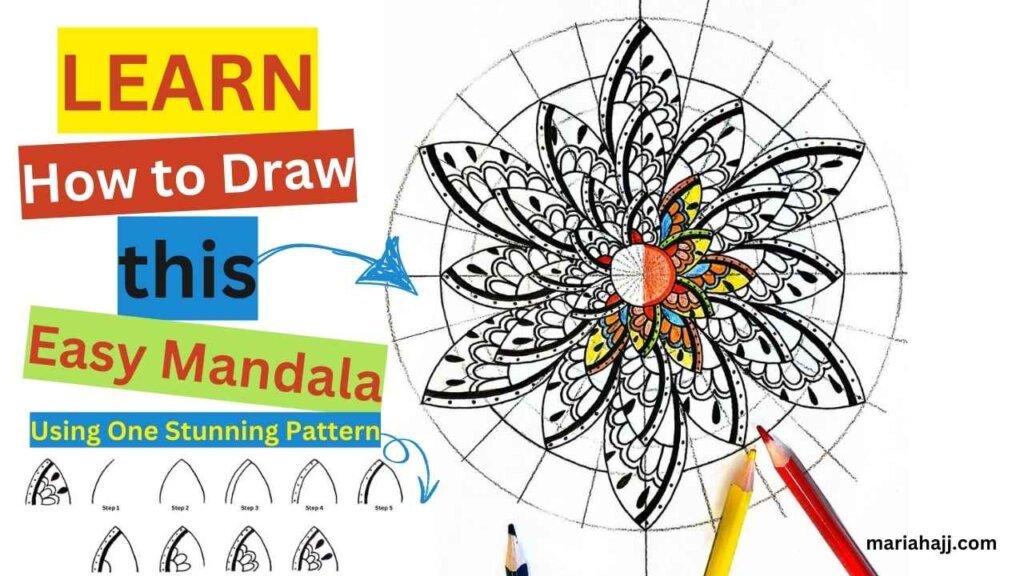
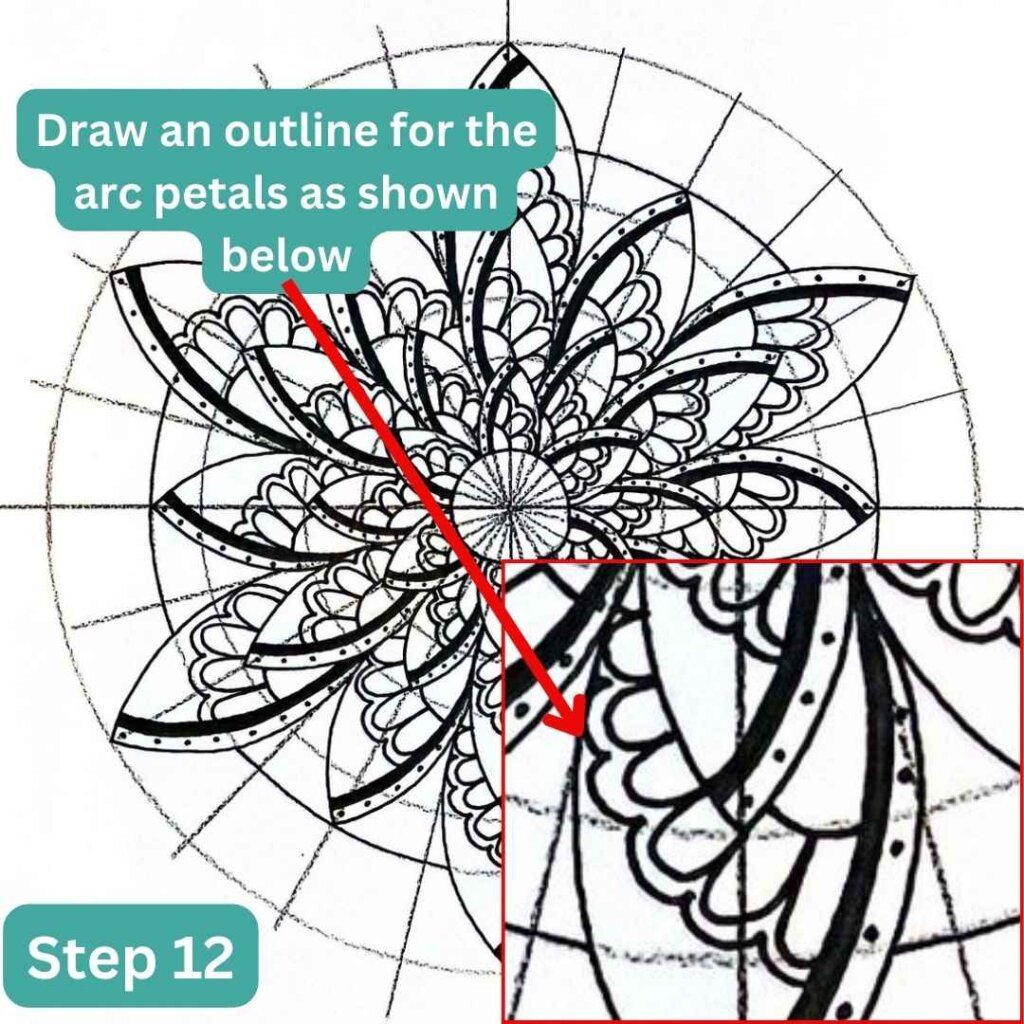
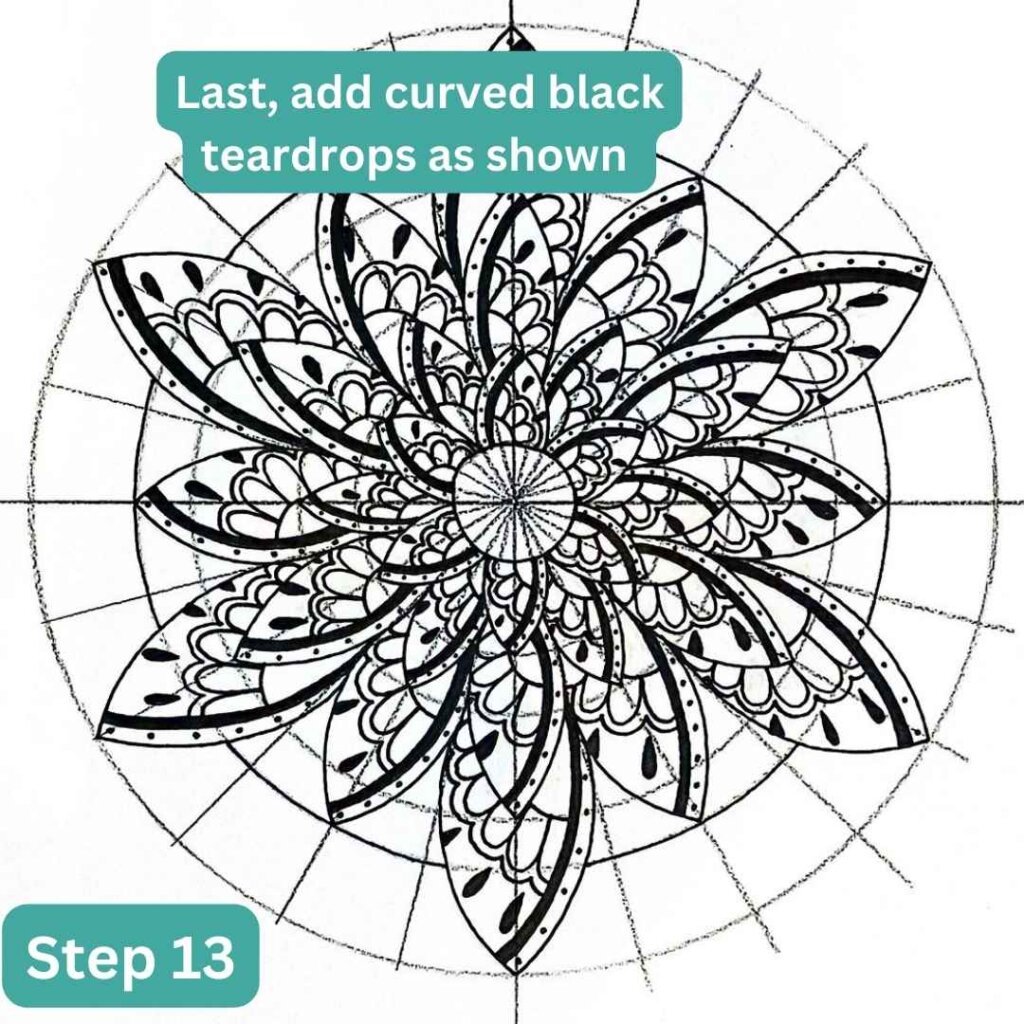
2- How to Draw this Easy Mandala Pattern
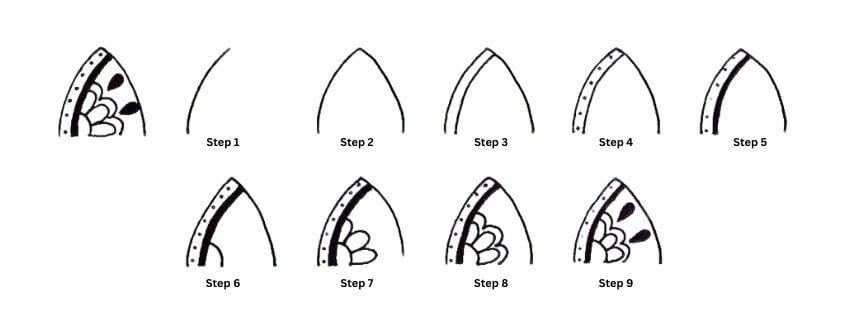
The illustration above shows in detail how to reproduce the easy mandala pattern.
Before starting your mandala, take a moment to sketch the easy pattern on a piece of paper. Practicing first helps you feel more comfortable with the design and improves your precision.
Try repeating the pattern several times until it feels natural. Don’t worry about making it perfect—just focus on getting familiar with the movement.
Once you’re confident, you’ll find it much easier to apply the pattern to your mandala. So, grab a pencil, relax, and enjoy the process. A little practice makes a big difference in creating a smooth and beautiful design!
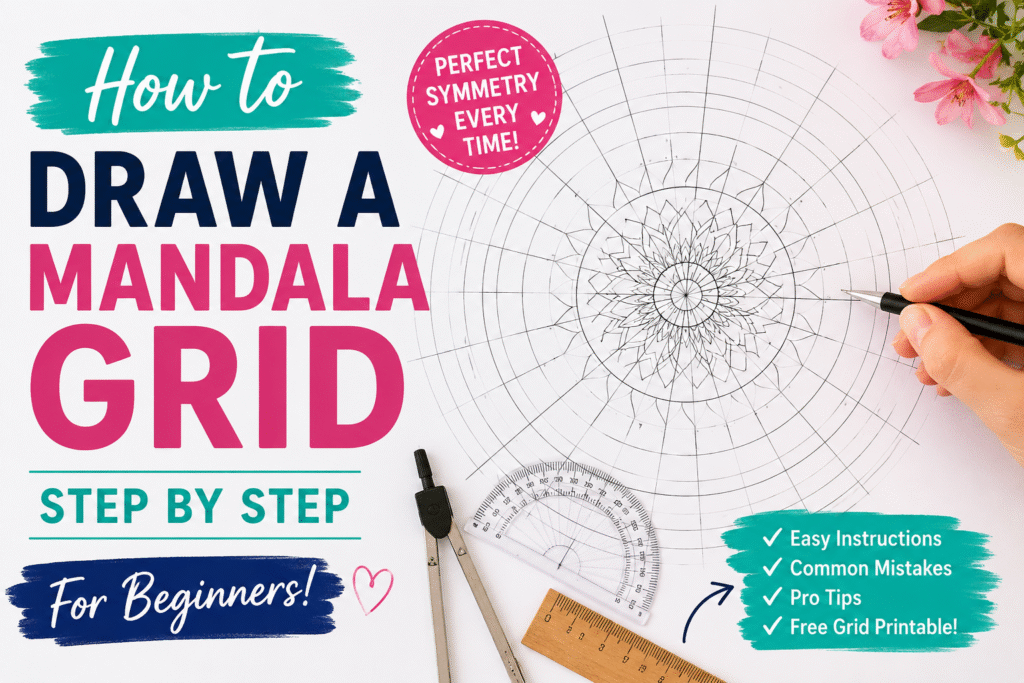
3- How to Draw the Mandala Grid
A mandala grid is essential for creating a balanced and harmonious design. Without a proper structure, your mandala may look uneven or unorganized. That’s why starting with a well-drawn grid makes the process much easier and more enjoyable.
First, a grid helps maintain symmetry. Since mandalas are based on repetition, having clear guidelines ensures that every pattern is evenly spaced. This way, your design remains visually appealing from every angle.
Moreover, a grid allows you to plan your artwork. Instead of guessing where to place each element, you can follow the guidelines, making the process smooth and stress-free. Even if you’re drawing an easy mandala, a grid helps keep everything aligned.
Additionally, using a grid saves time. When you have a solid foundation, you won’t need to erase and redo sections repeatedly. This makes the drawing experience more relaxing and enjoyable.
Finally, a mandala grid gives you creative freedom. By organizing your design from the beginning, you can focus on adding details and experimenting with patterns.
So, before you start, take a moment to create your grid. It’s a simple step that makes a huge difference in achieving a stunning final result!

Then, trace a horizontal line and a vertical line that crosses the center. This will be the base of our mandala grid.
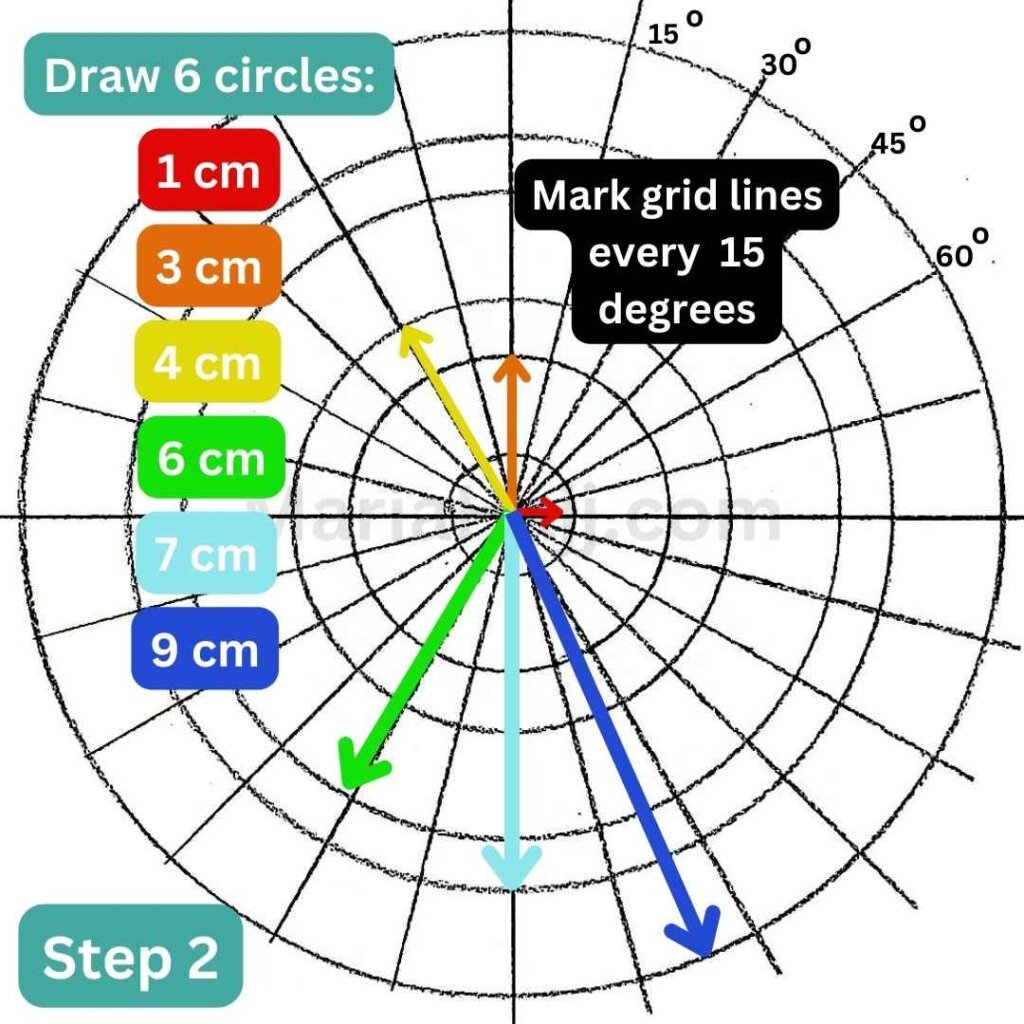
Then, using the protractor, mark a point every 15 degrees and trace the grid lines, crossing the center.
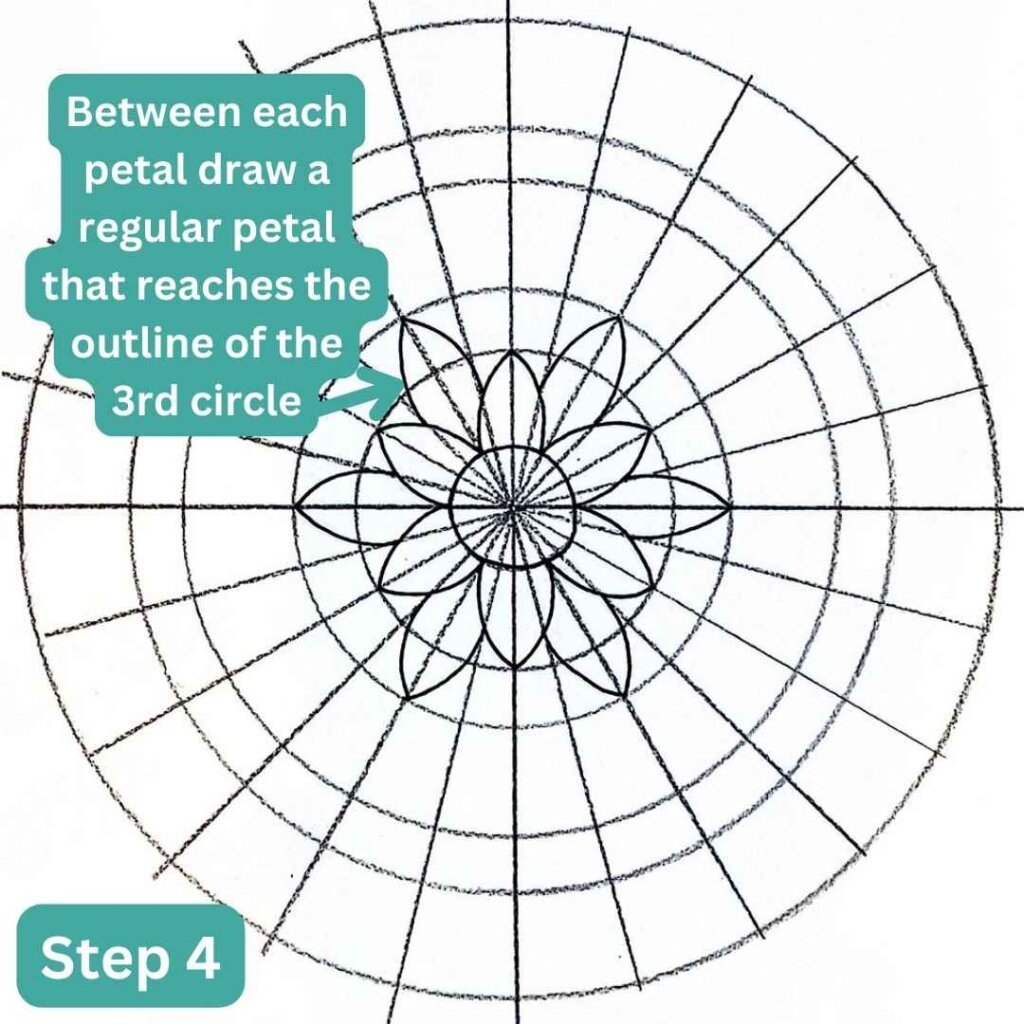
4- How to Draw the Easy Mandala Flower
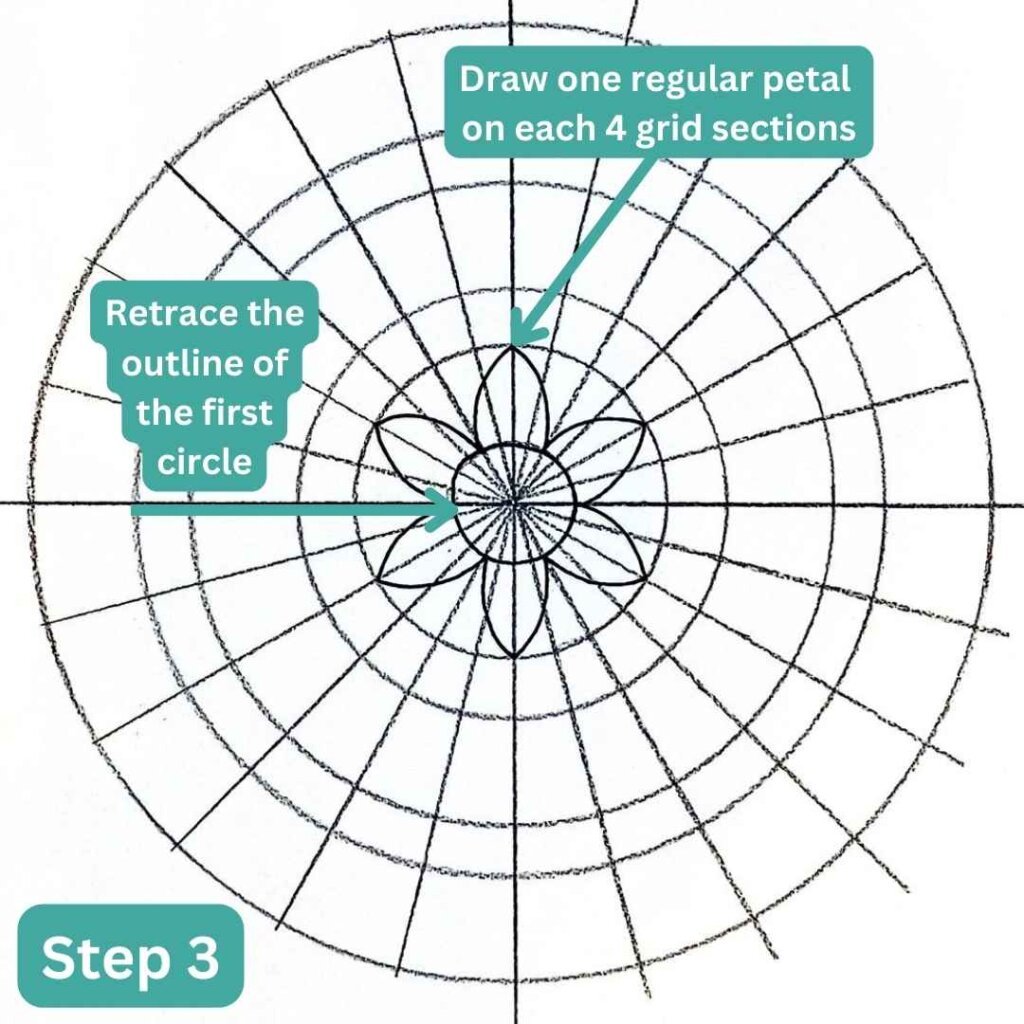
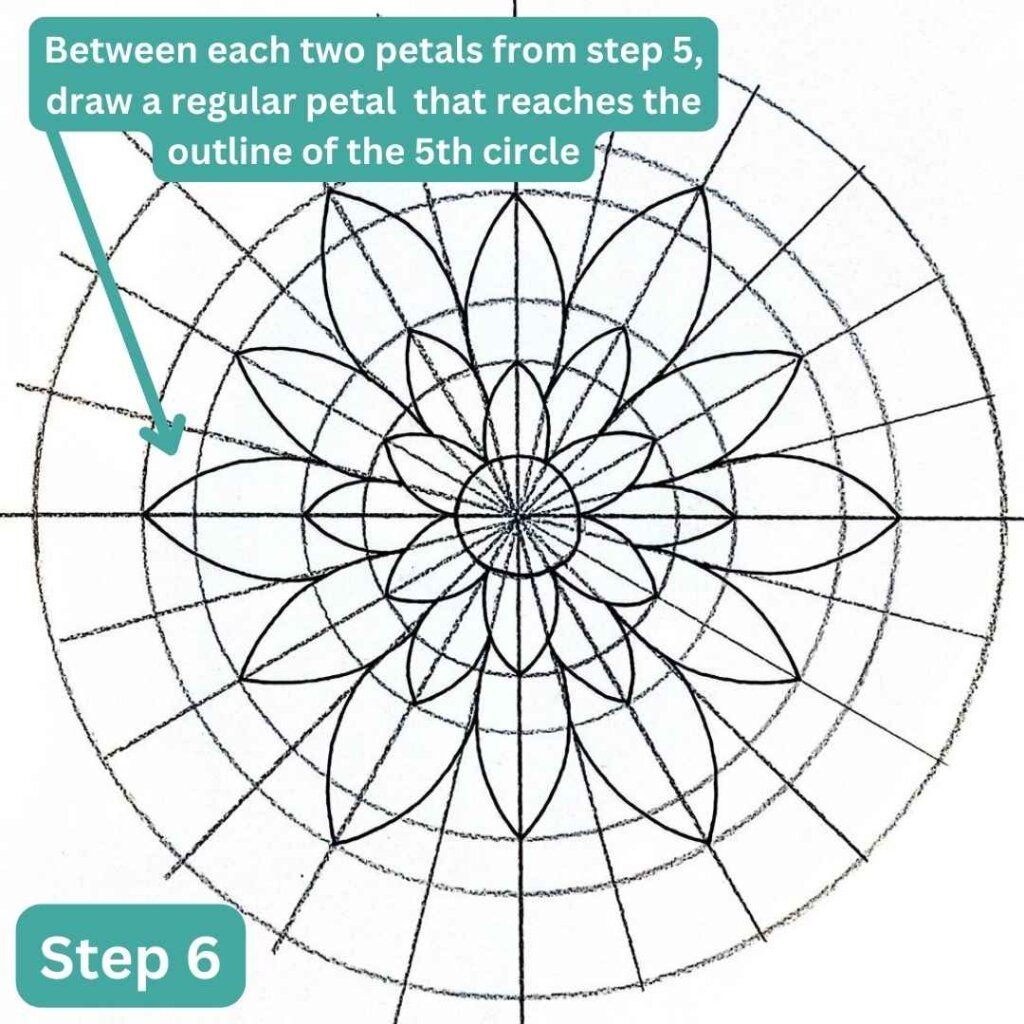
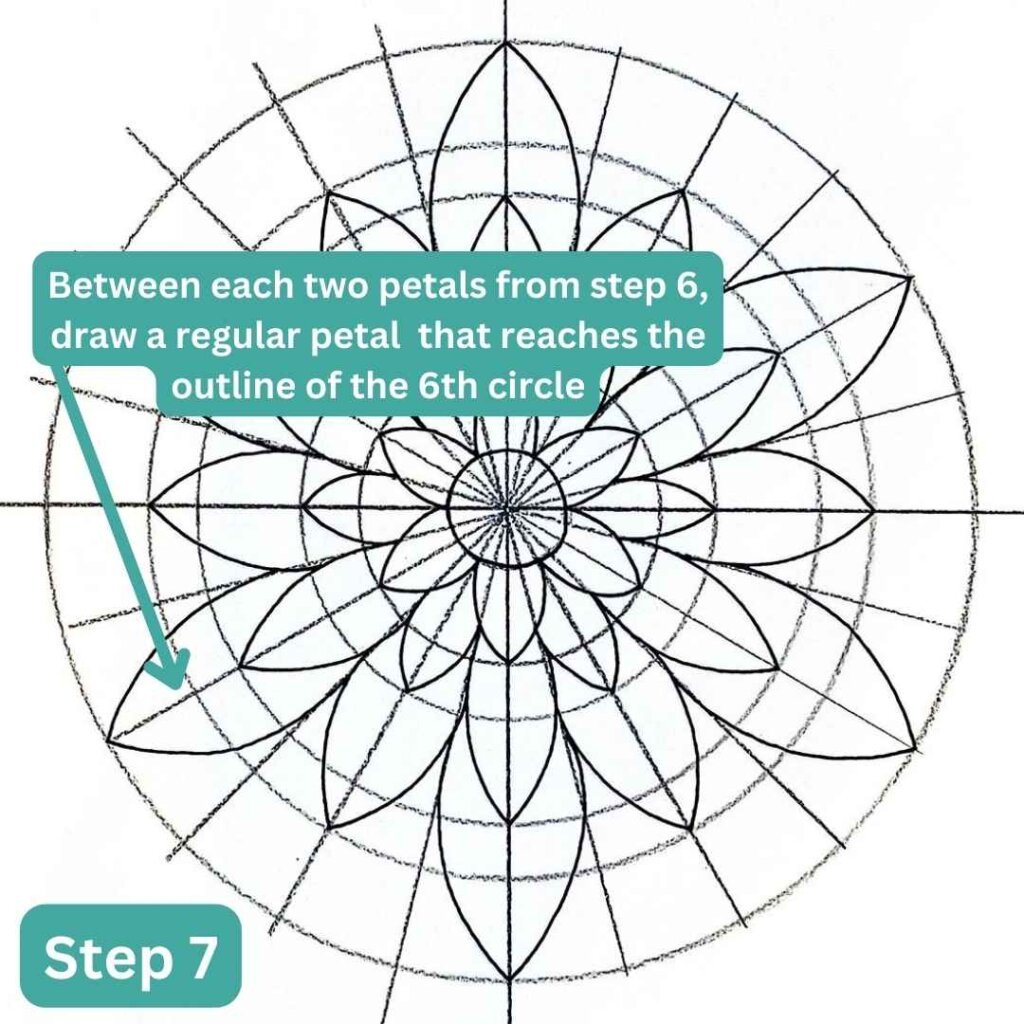
Then, on the 2nd row, draw one regular petal on each four grid sections.
-Each petal should be on two grid sections.
– The tip of the petal should reach the outline of the 4 cm circle.

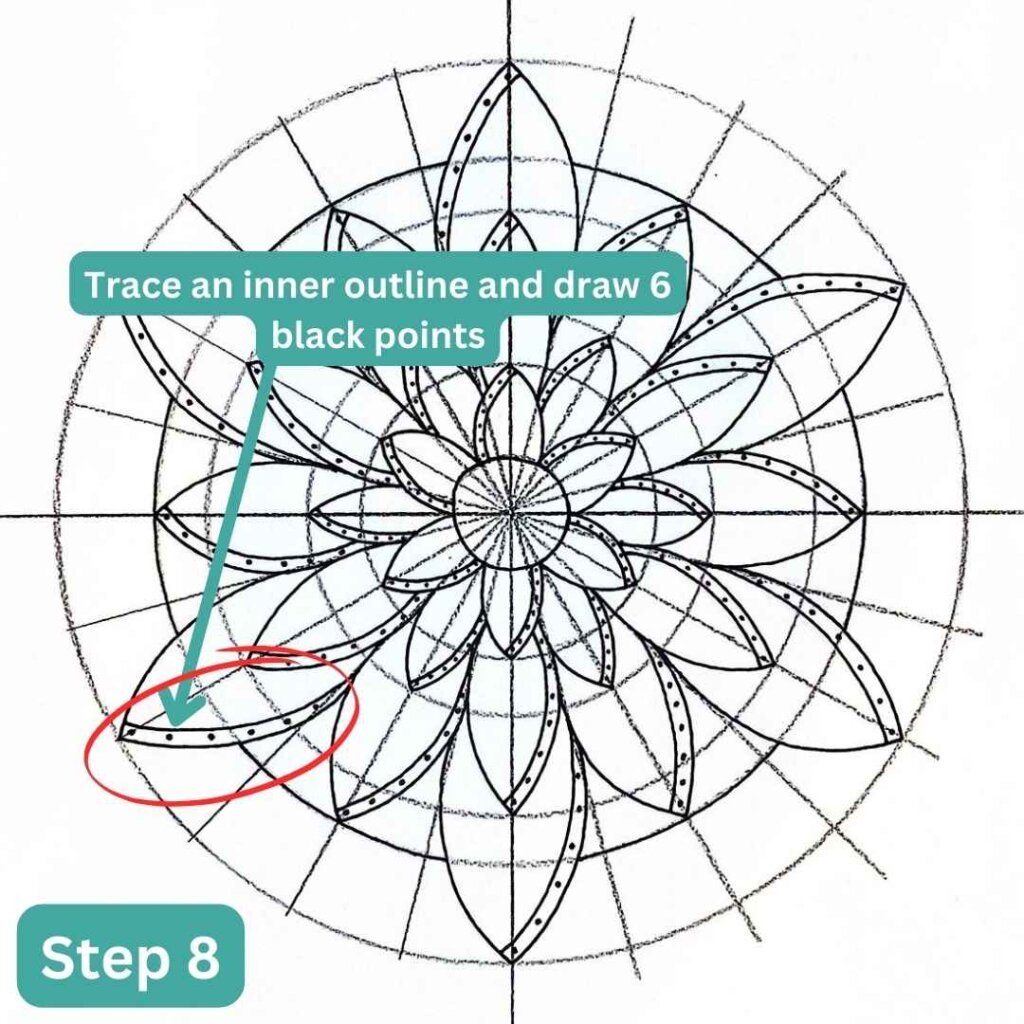
First step is to draw an inner line on the left side of each petal then decorate the space created with 6 black dots.


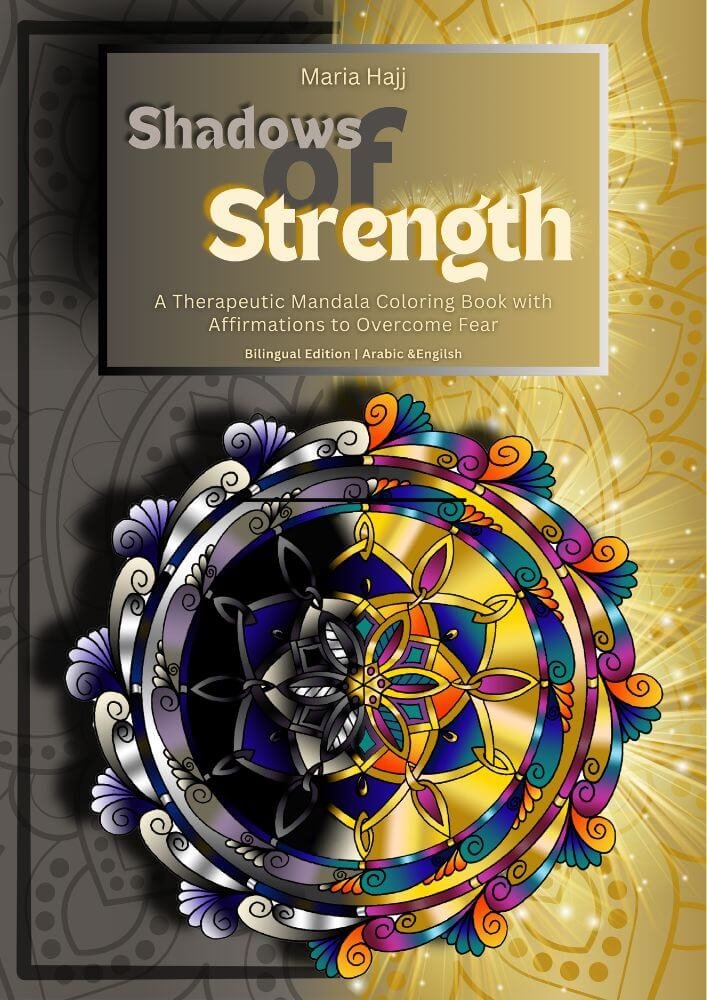
Shadows of Strength Book- 40 Ways to Reclaim Your Courage
Shadows of Strength: A Mandala Coloring Book With Shadows of Strength, you color your fears…
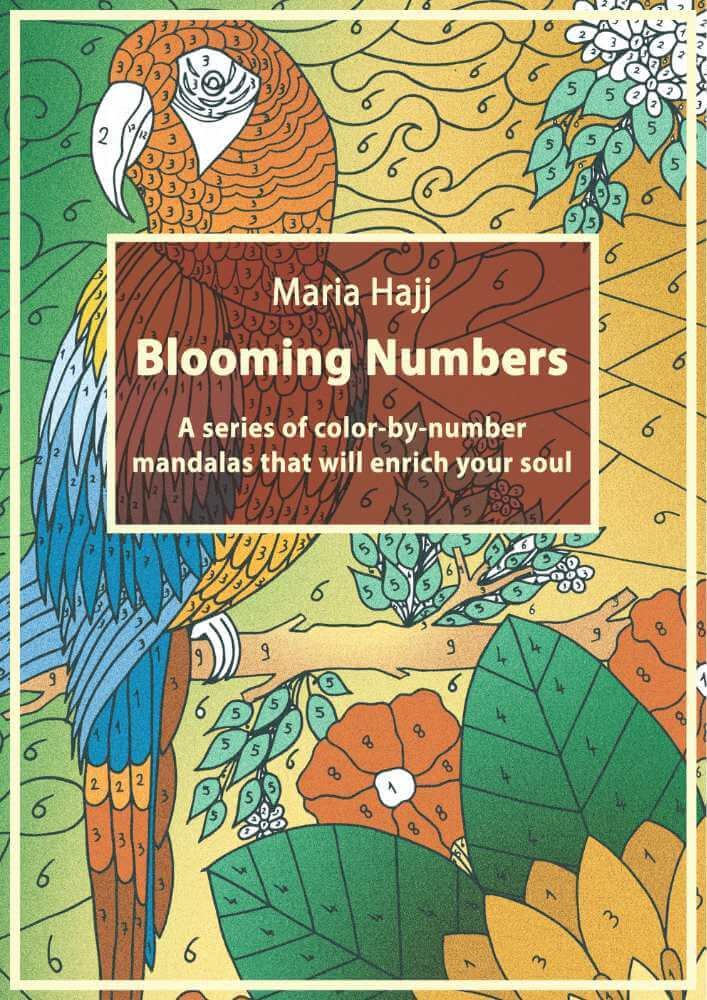
Blooming Numbers: A Color by Number Mandala
Color by Number Mandalas- A soothing path to emotional calm and focus Price: 6$ Dimensions:…

This Is a Beautiful Mandala Coloring Book with Arabian Vibes
Whispers of Arabia When you open Whispers of Arabia, you don’t just open a mandala…