Have you ever felt overwhelmed or anxious and didn’t know how to calm your mind? You’re not alone. Life can be stressful, but there’s a simple, creative way to find peace—drawing mandalas. In fact, easy mandala art for beginners has become a popular way to reduce anxiety.
Mandalas are more than just pretty patterns. In fact, they are powerful tools that help you slow down and reconnect with yourself. The act of drawing a mandala brings your focus to the present moment. As a result, your mind begins to relax, and stress fades away.
Interestingly, the famous psychologist Carl Jung discovered this long before it became mainstream. He noticed that his patients felt more balanced when they created mandalas. Jung believed that mandalas were a reflection of the inner self. He used them as a therapy tool to help people understand their emotions and feel more whole.
The best part? You don’t need to be an artist to enjoy it. In fact, the beauty of mandala art lies in its simplicity. Anyone can draw one. Even a few minutes of quiet drawing can help shift your mood and bring peace to your day.
In this tutorial, we’ll guide you step by step. You’ll learn how to create mandalas, even if you’ve never drawn one before. More importantly, you’ll feel the calming effect it has on your mind and body.
So, take a deep breath. Grab a pencil or pen. Let’s begin this peaceful journey into the healing world of mandalas.
Always Start by Preparing a Mandala Grid
If you’ve ever looked at a mandala and wondered how it’s so perfectly balanced, the secret is in the grid. A mandala grid is a helpful guide made of circles and lines. It may seem simple, but it plays a big role in making your drawing process easy, smooth, and enjoyable.
First of all, the grid helps keep everything symmetrical. Since mandalas are all about balance and harmony, symmetry is very important. However, drawing perfect shapes without help can be tricky. That’s why the grid is so useful. It shows you exactly where to place your lines, patterns, and shapes. As a result, your mandala looks clean and even, without stress.
In addition, using a grid gives you more confidence. Instead of guessing where to draw next, you have a clear path to follow. This means you can focus on being creative, rather than worrying about making mistakes. Even beginners find it easier to enjoy the process when a grid is there to guide them.
Not only does it make things simpler, but it also saves time. Rather than correcting errors or redrawing parts, you’ll spend more time having fun with colors and patterns.
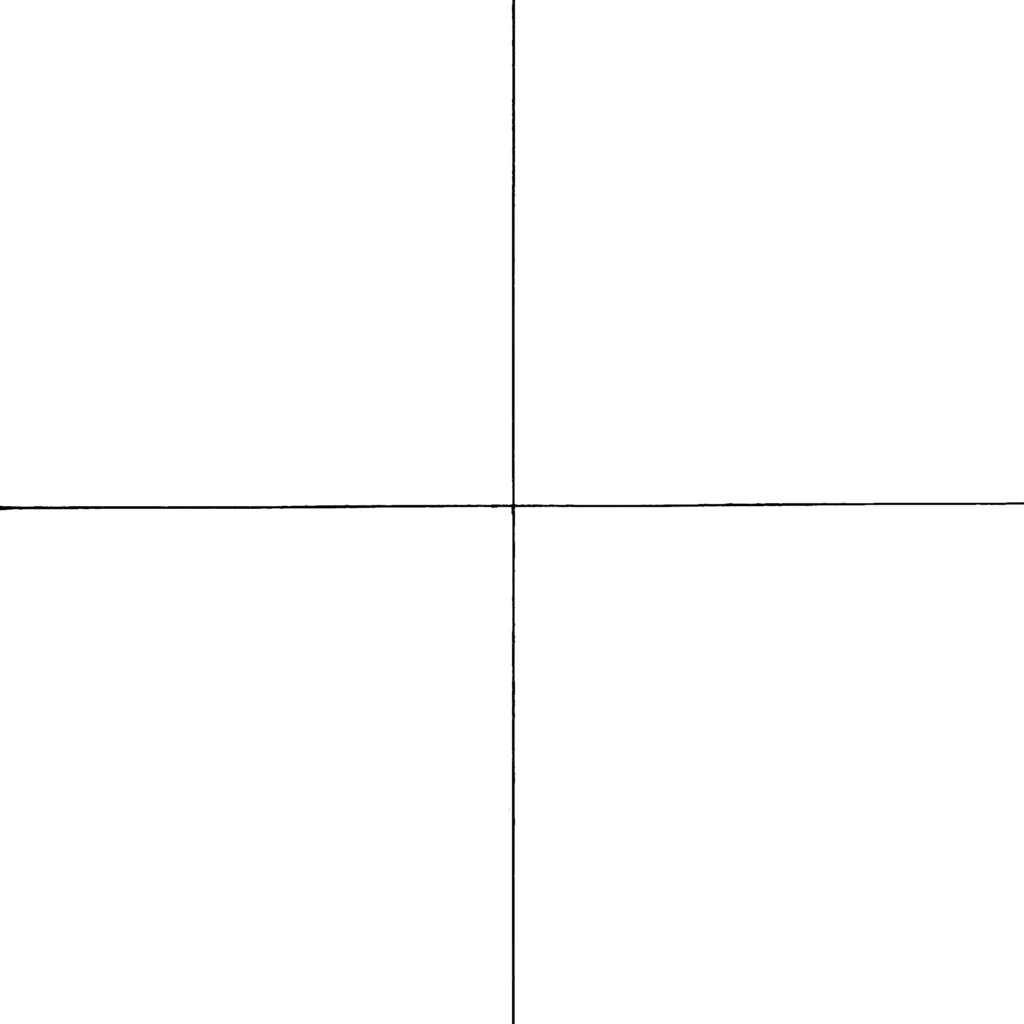
1- Mark the center of the paper, then trace a perpendicular axe passing through it.
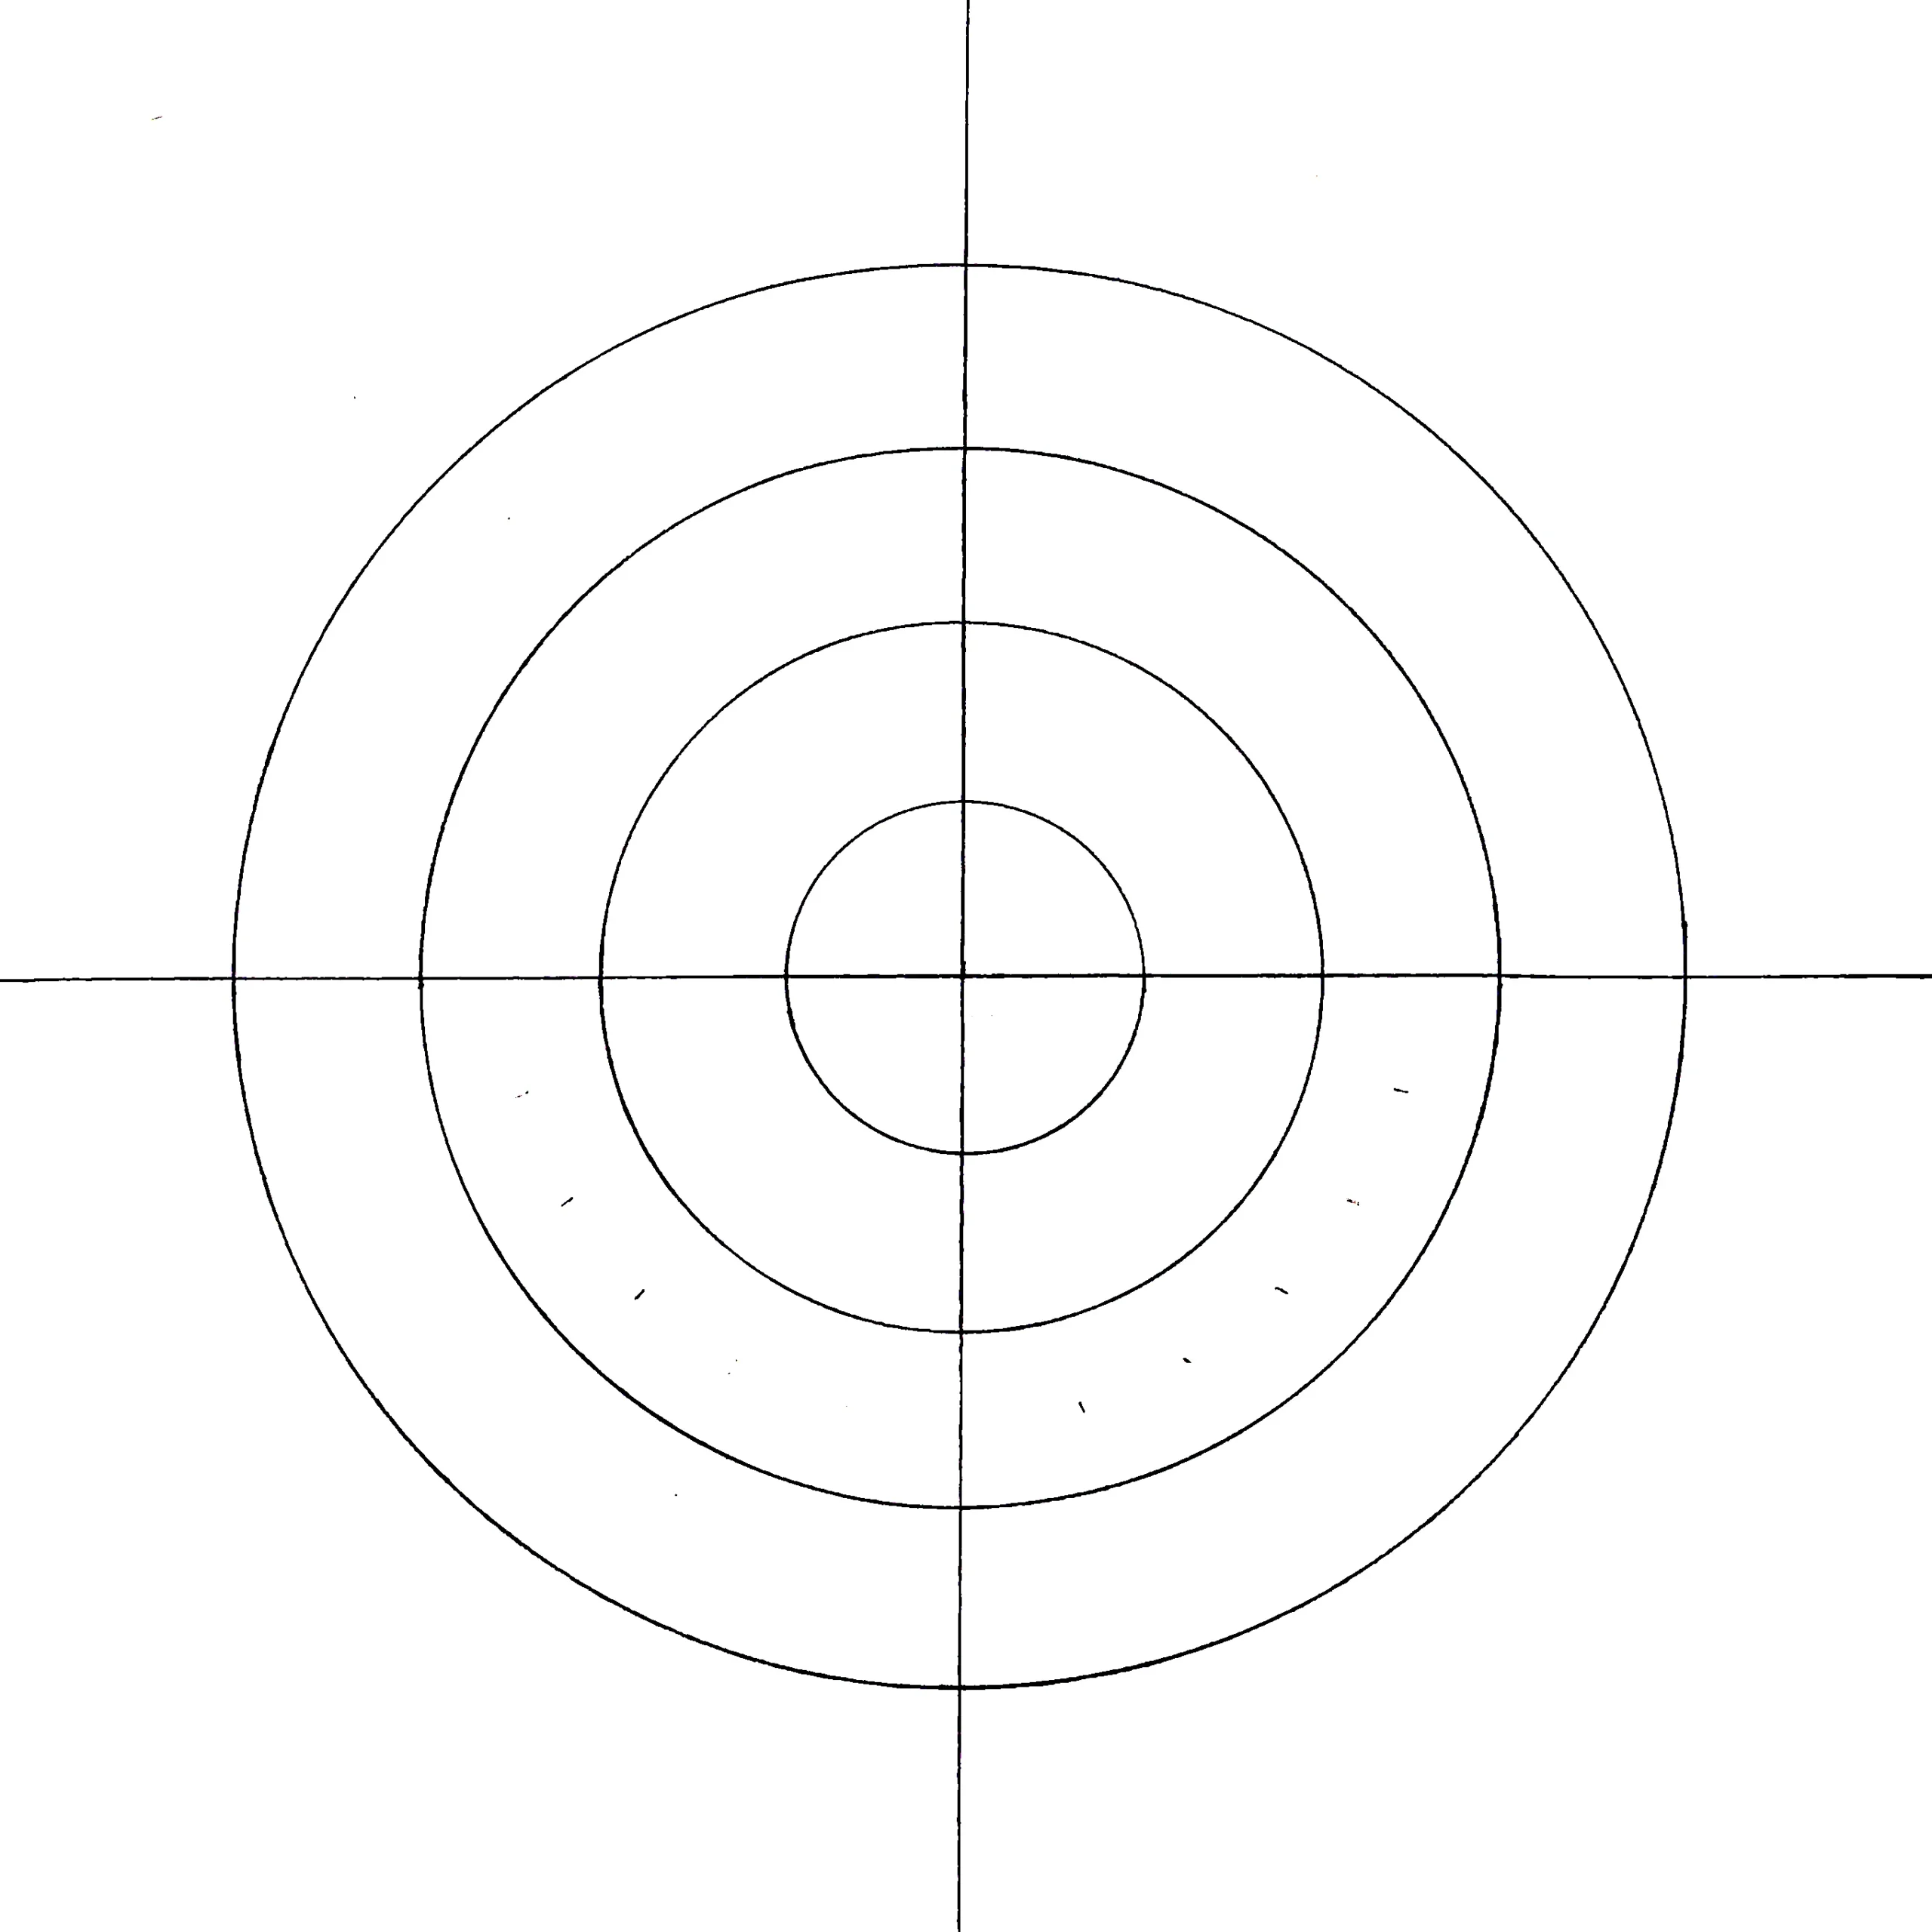
2- From the center, trace 4 circles with the following radii: 2, 4, 6, and 8 cm
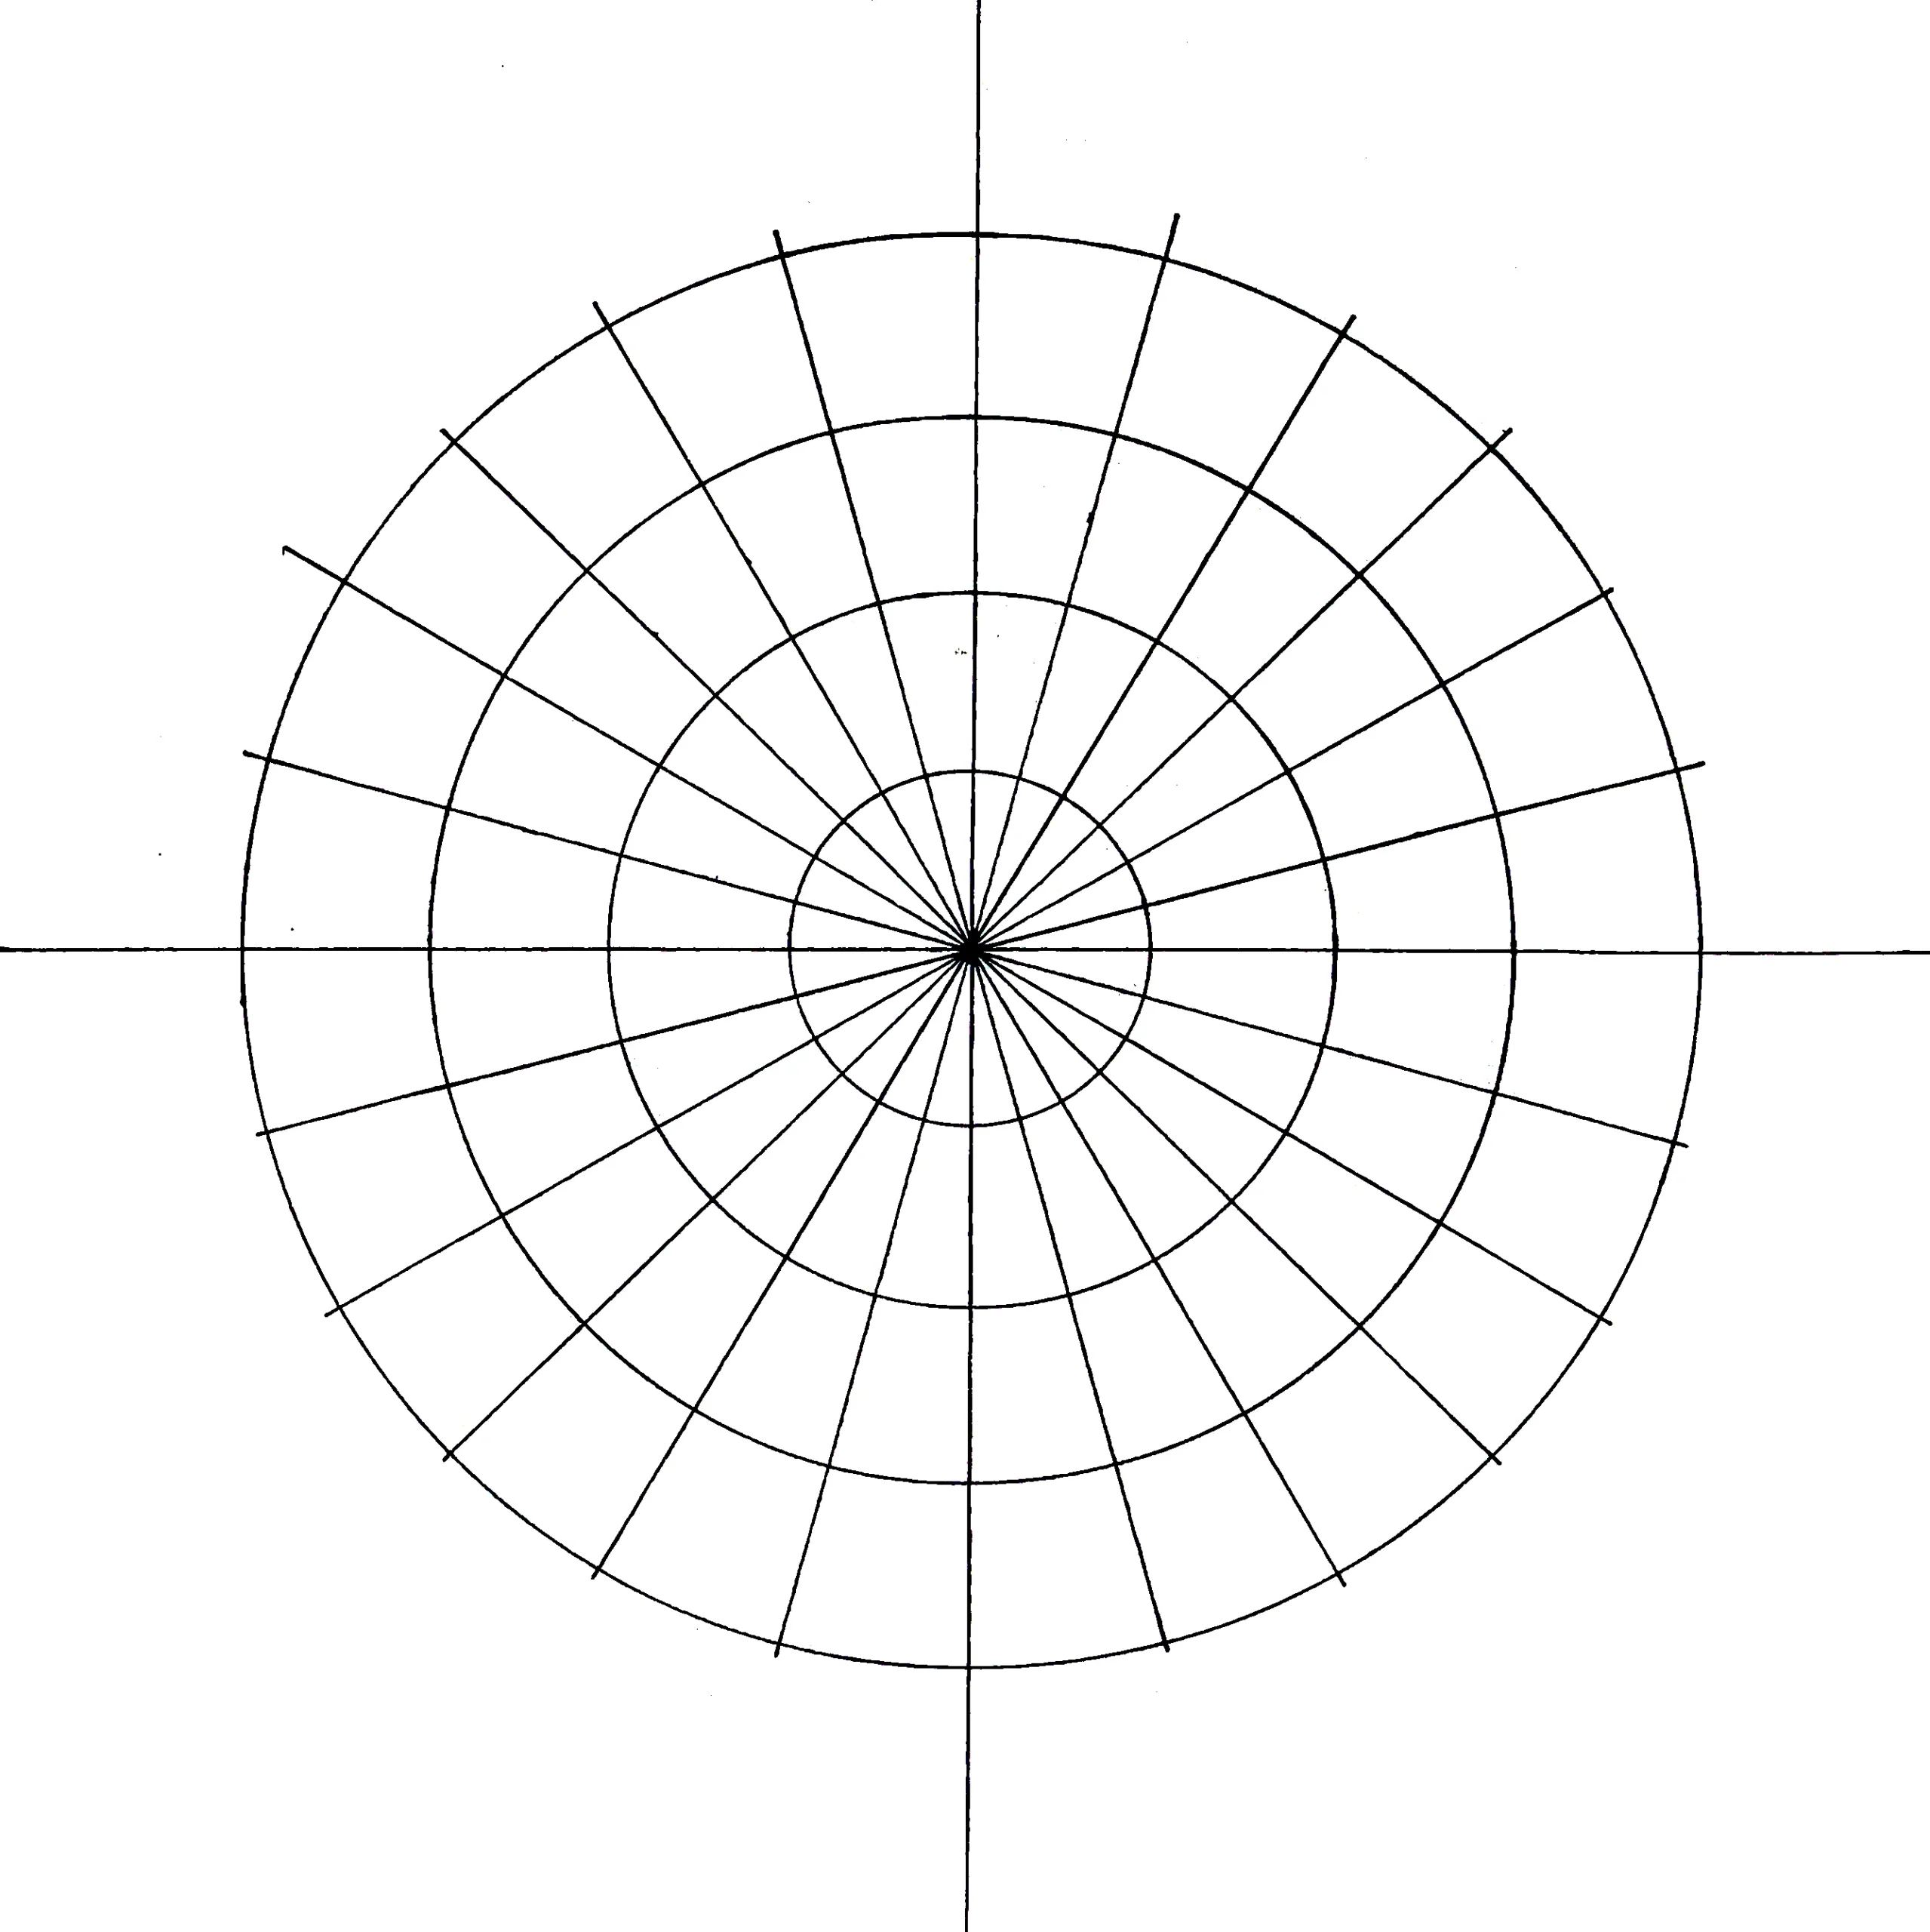
3- Now, use the protractor to draw a
line every 15 degrees
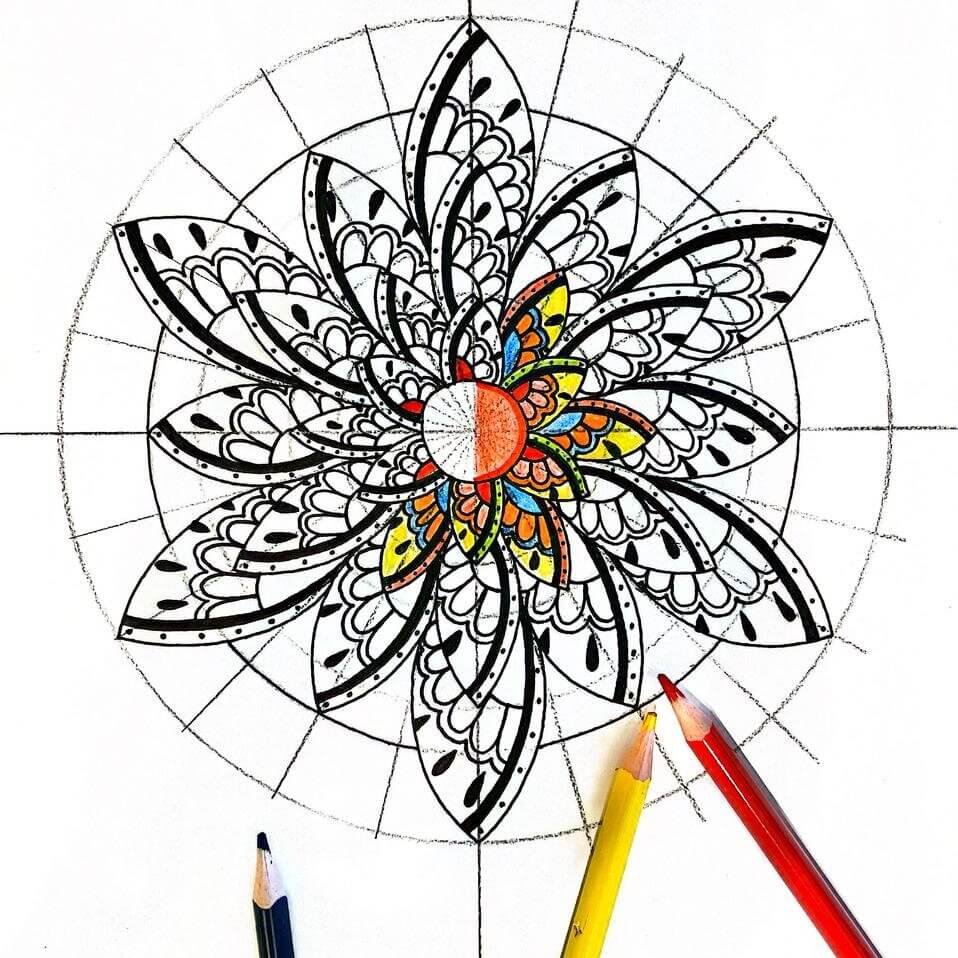
Let’s Start Drawing Our Easy Mandala Art for Beginners
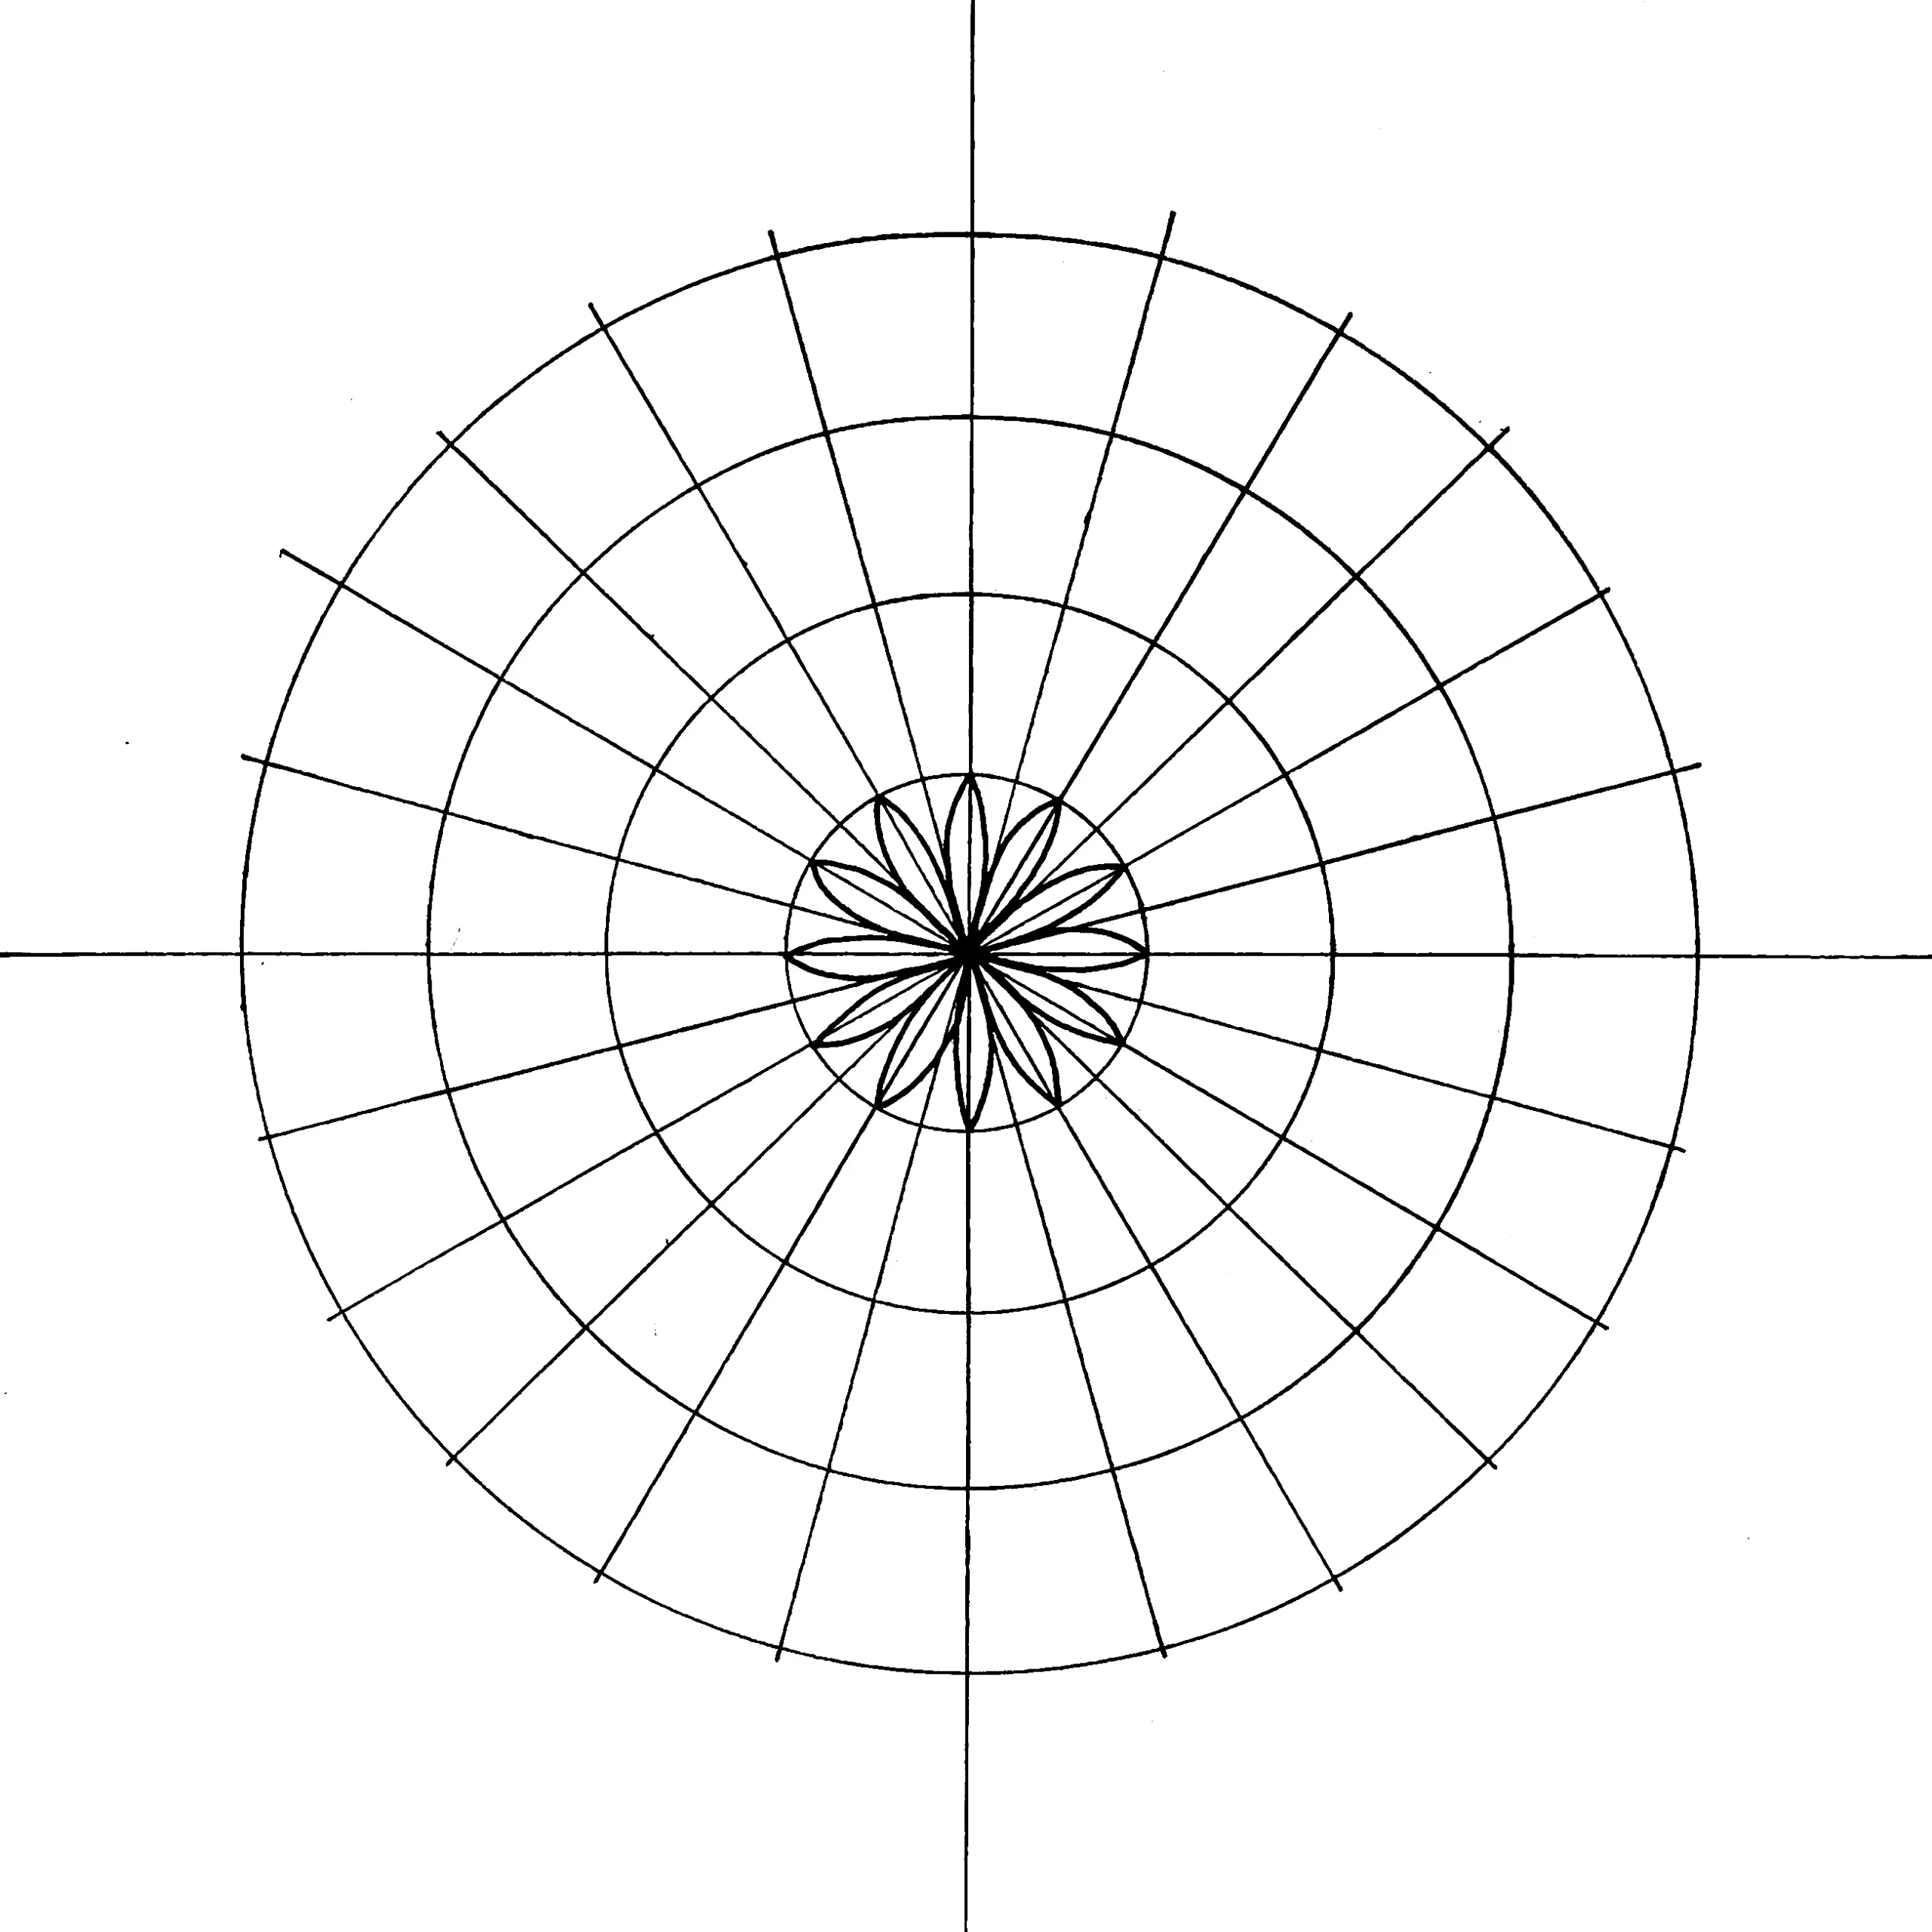
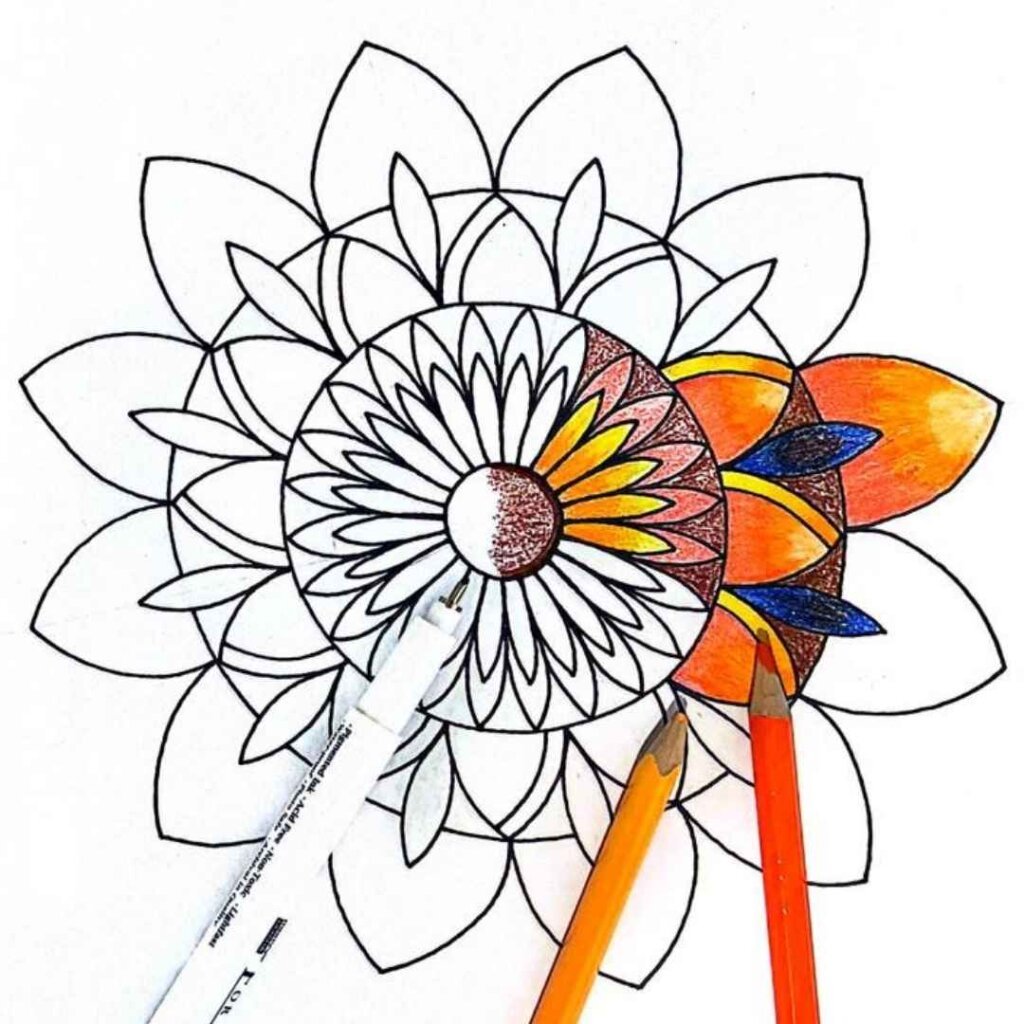
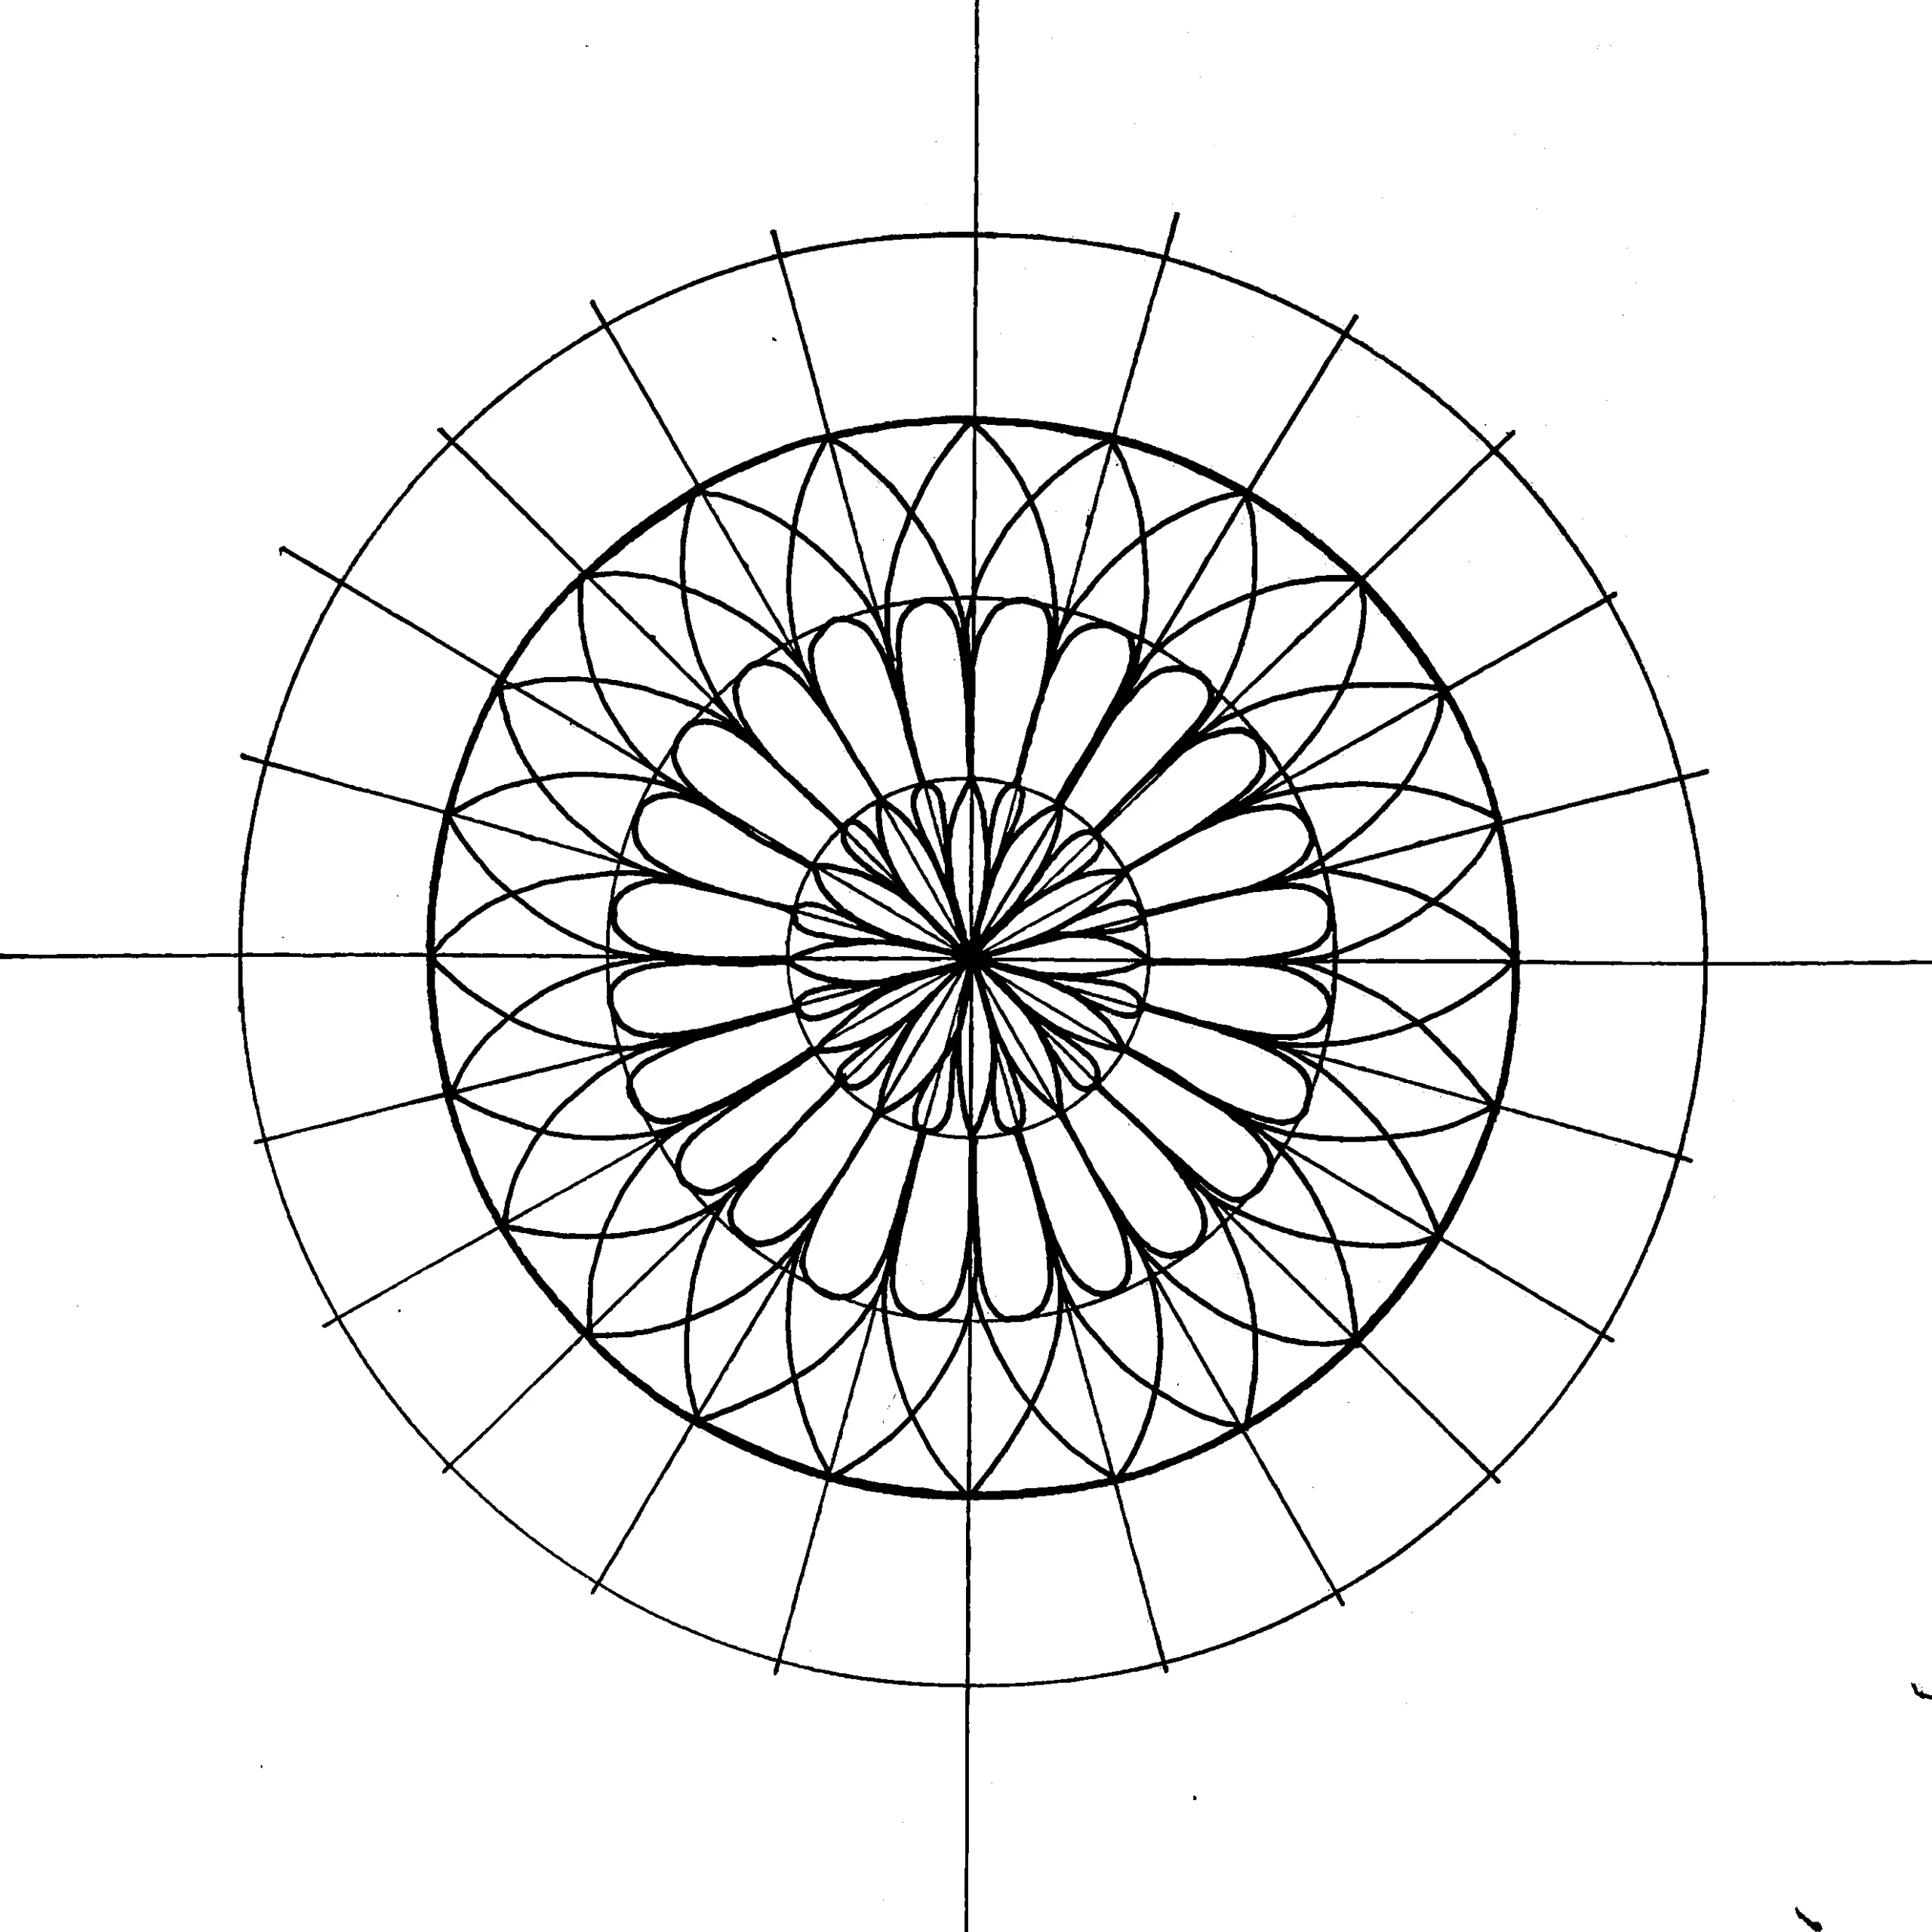
1- Draw a double-pointed petal on each two grid sections.
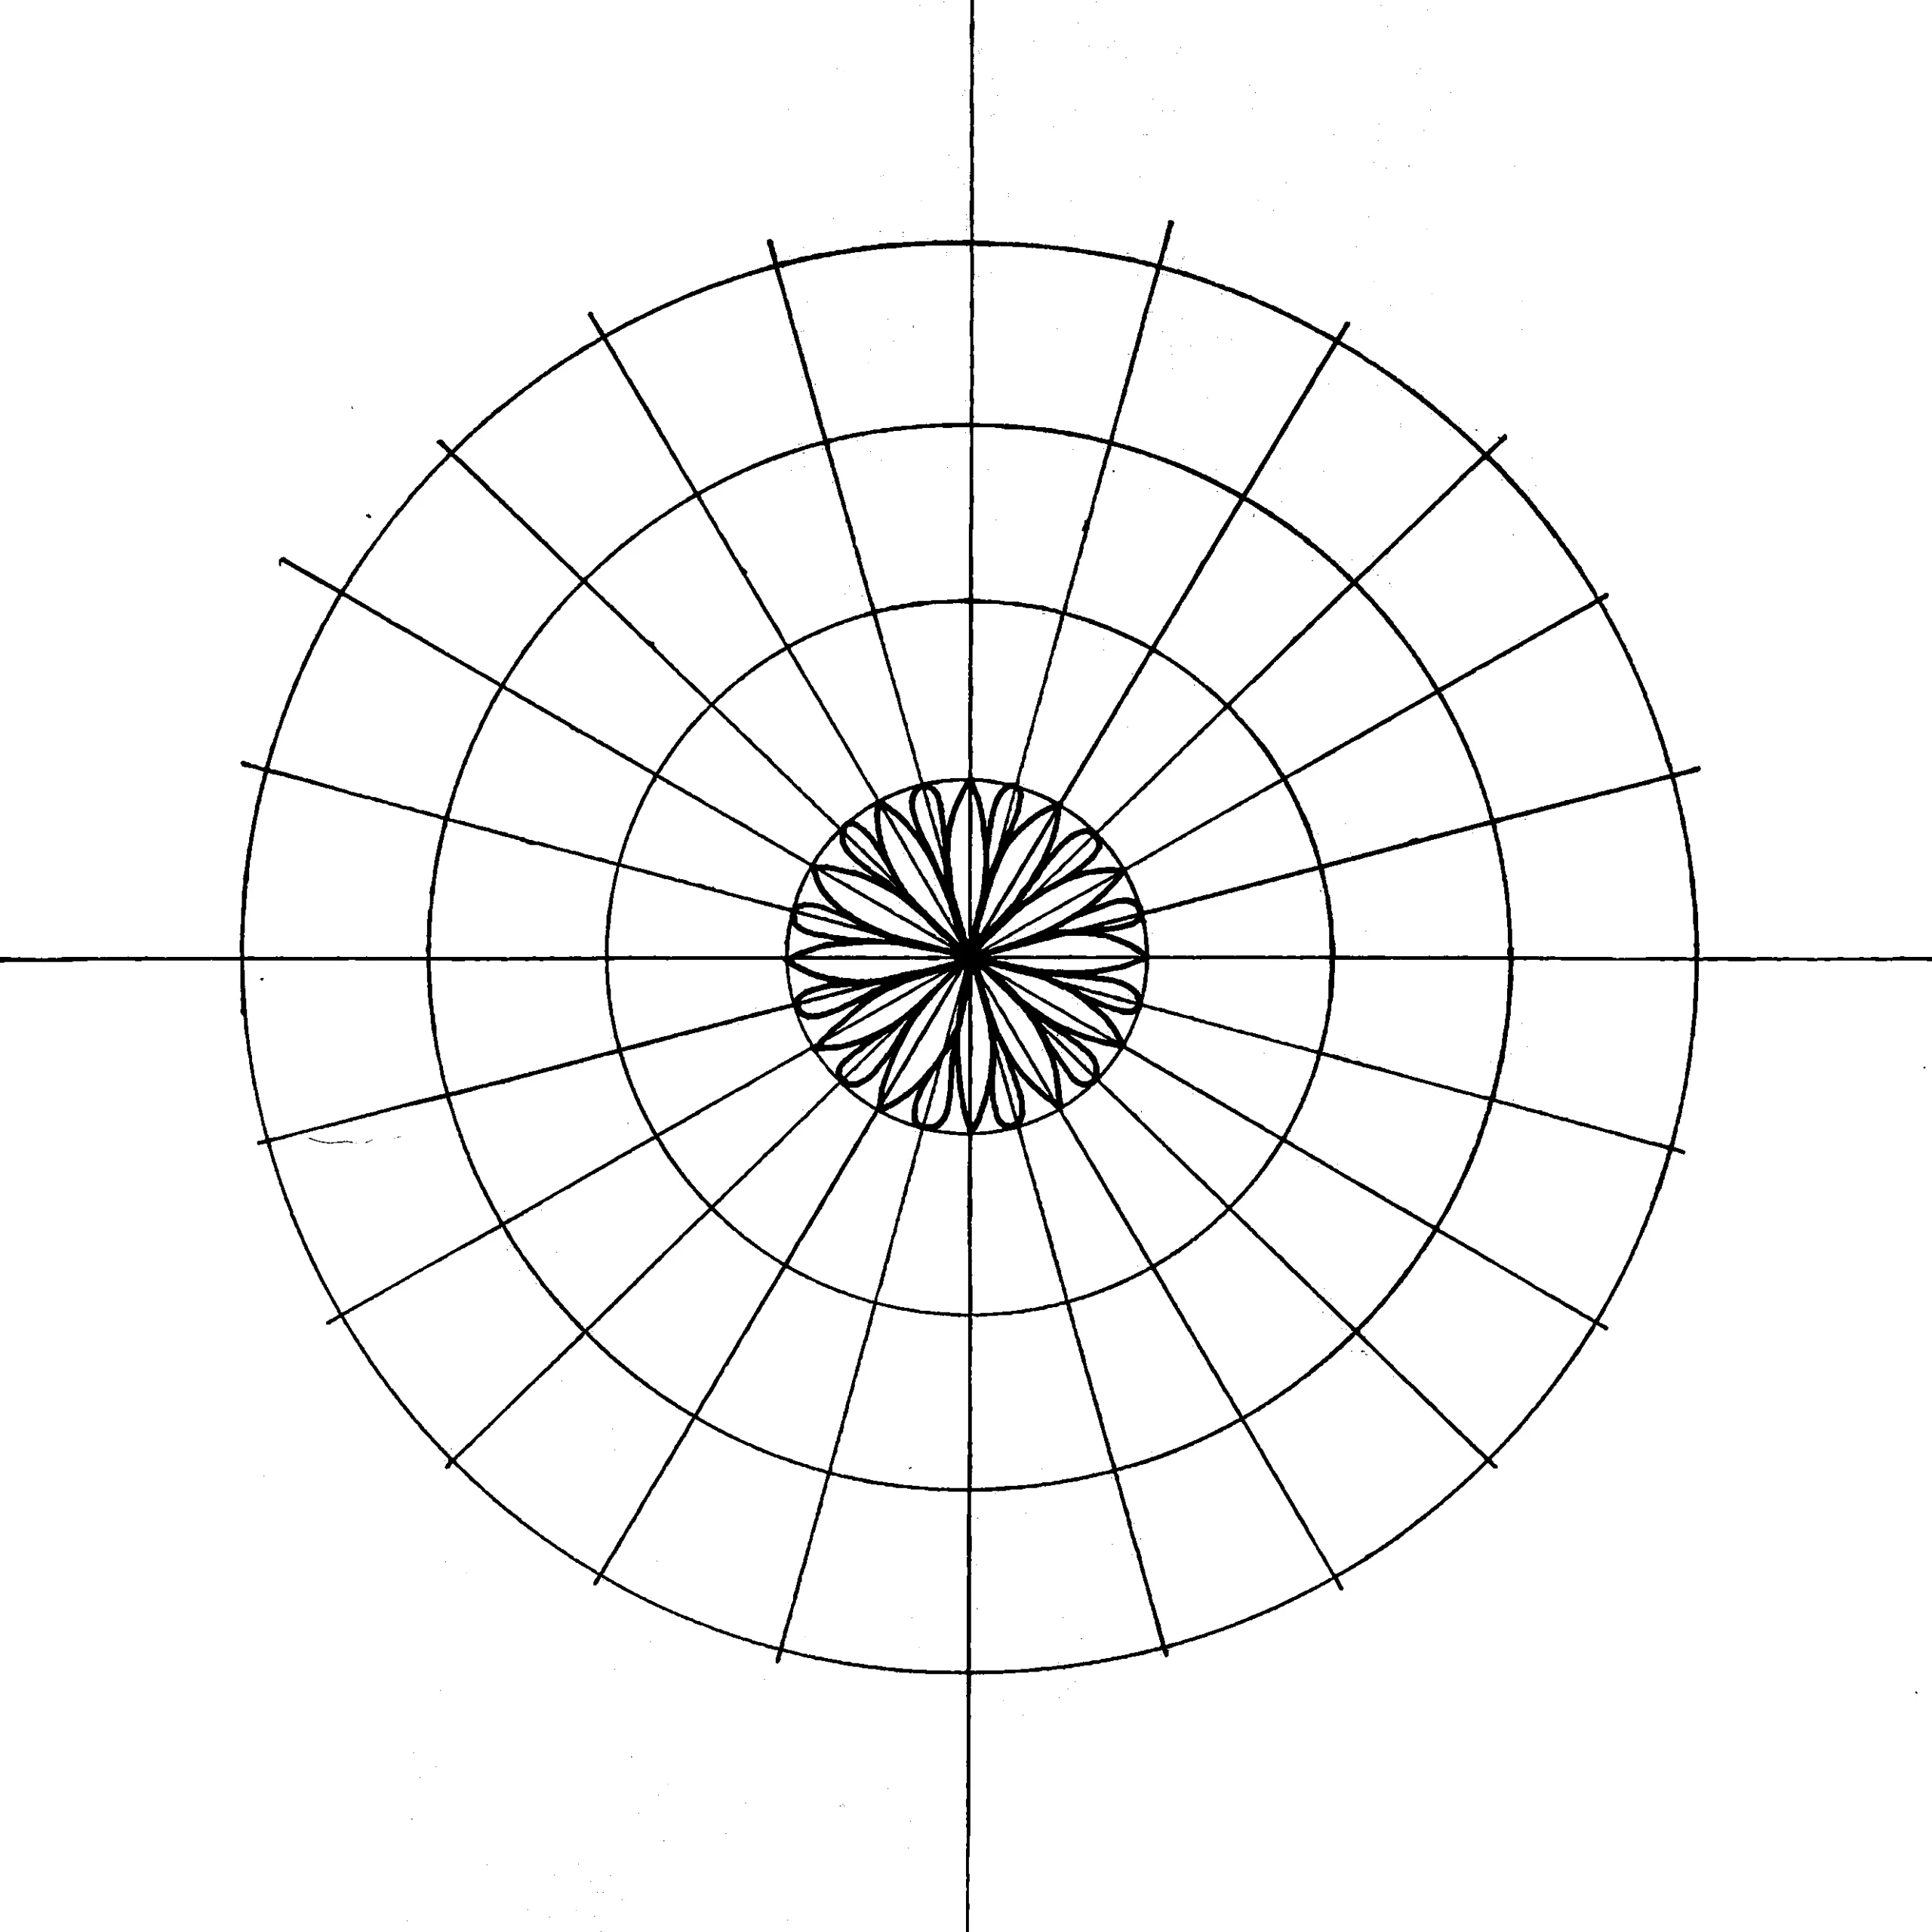
2- Between each two double-pointed petals, draw a reversed tear drop.
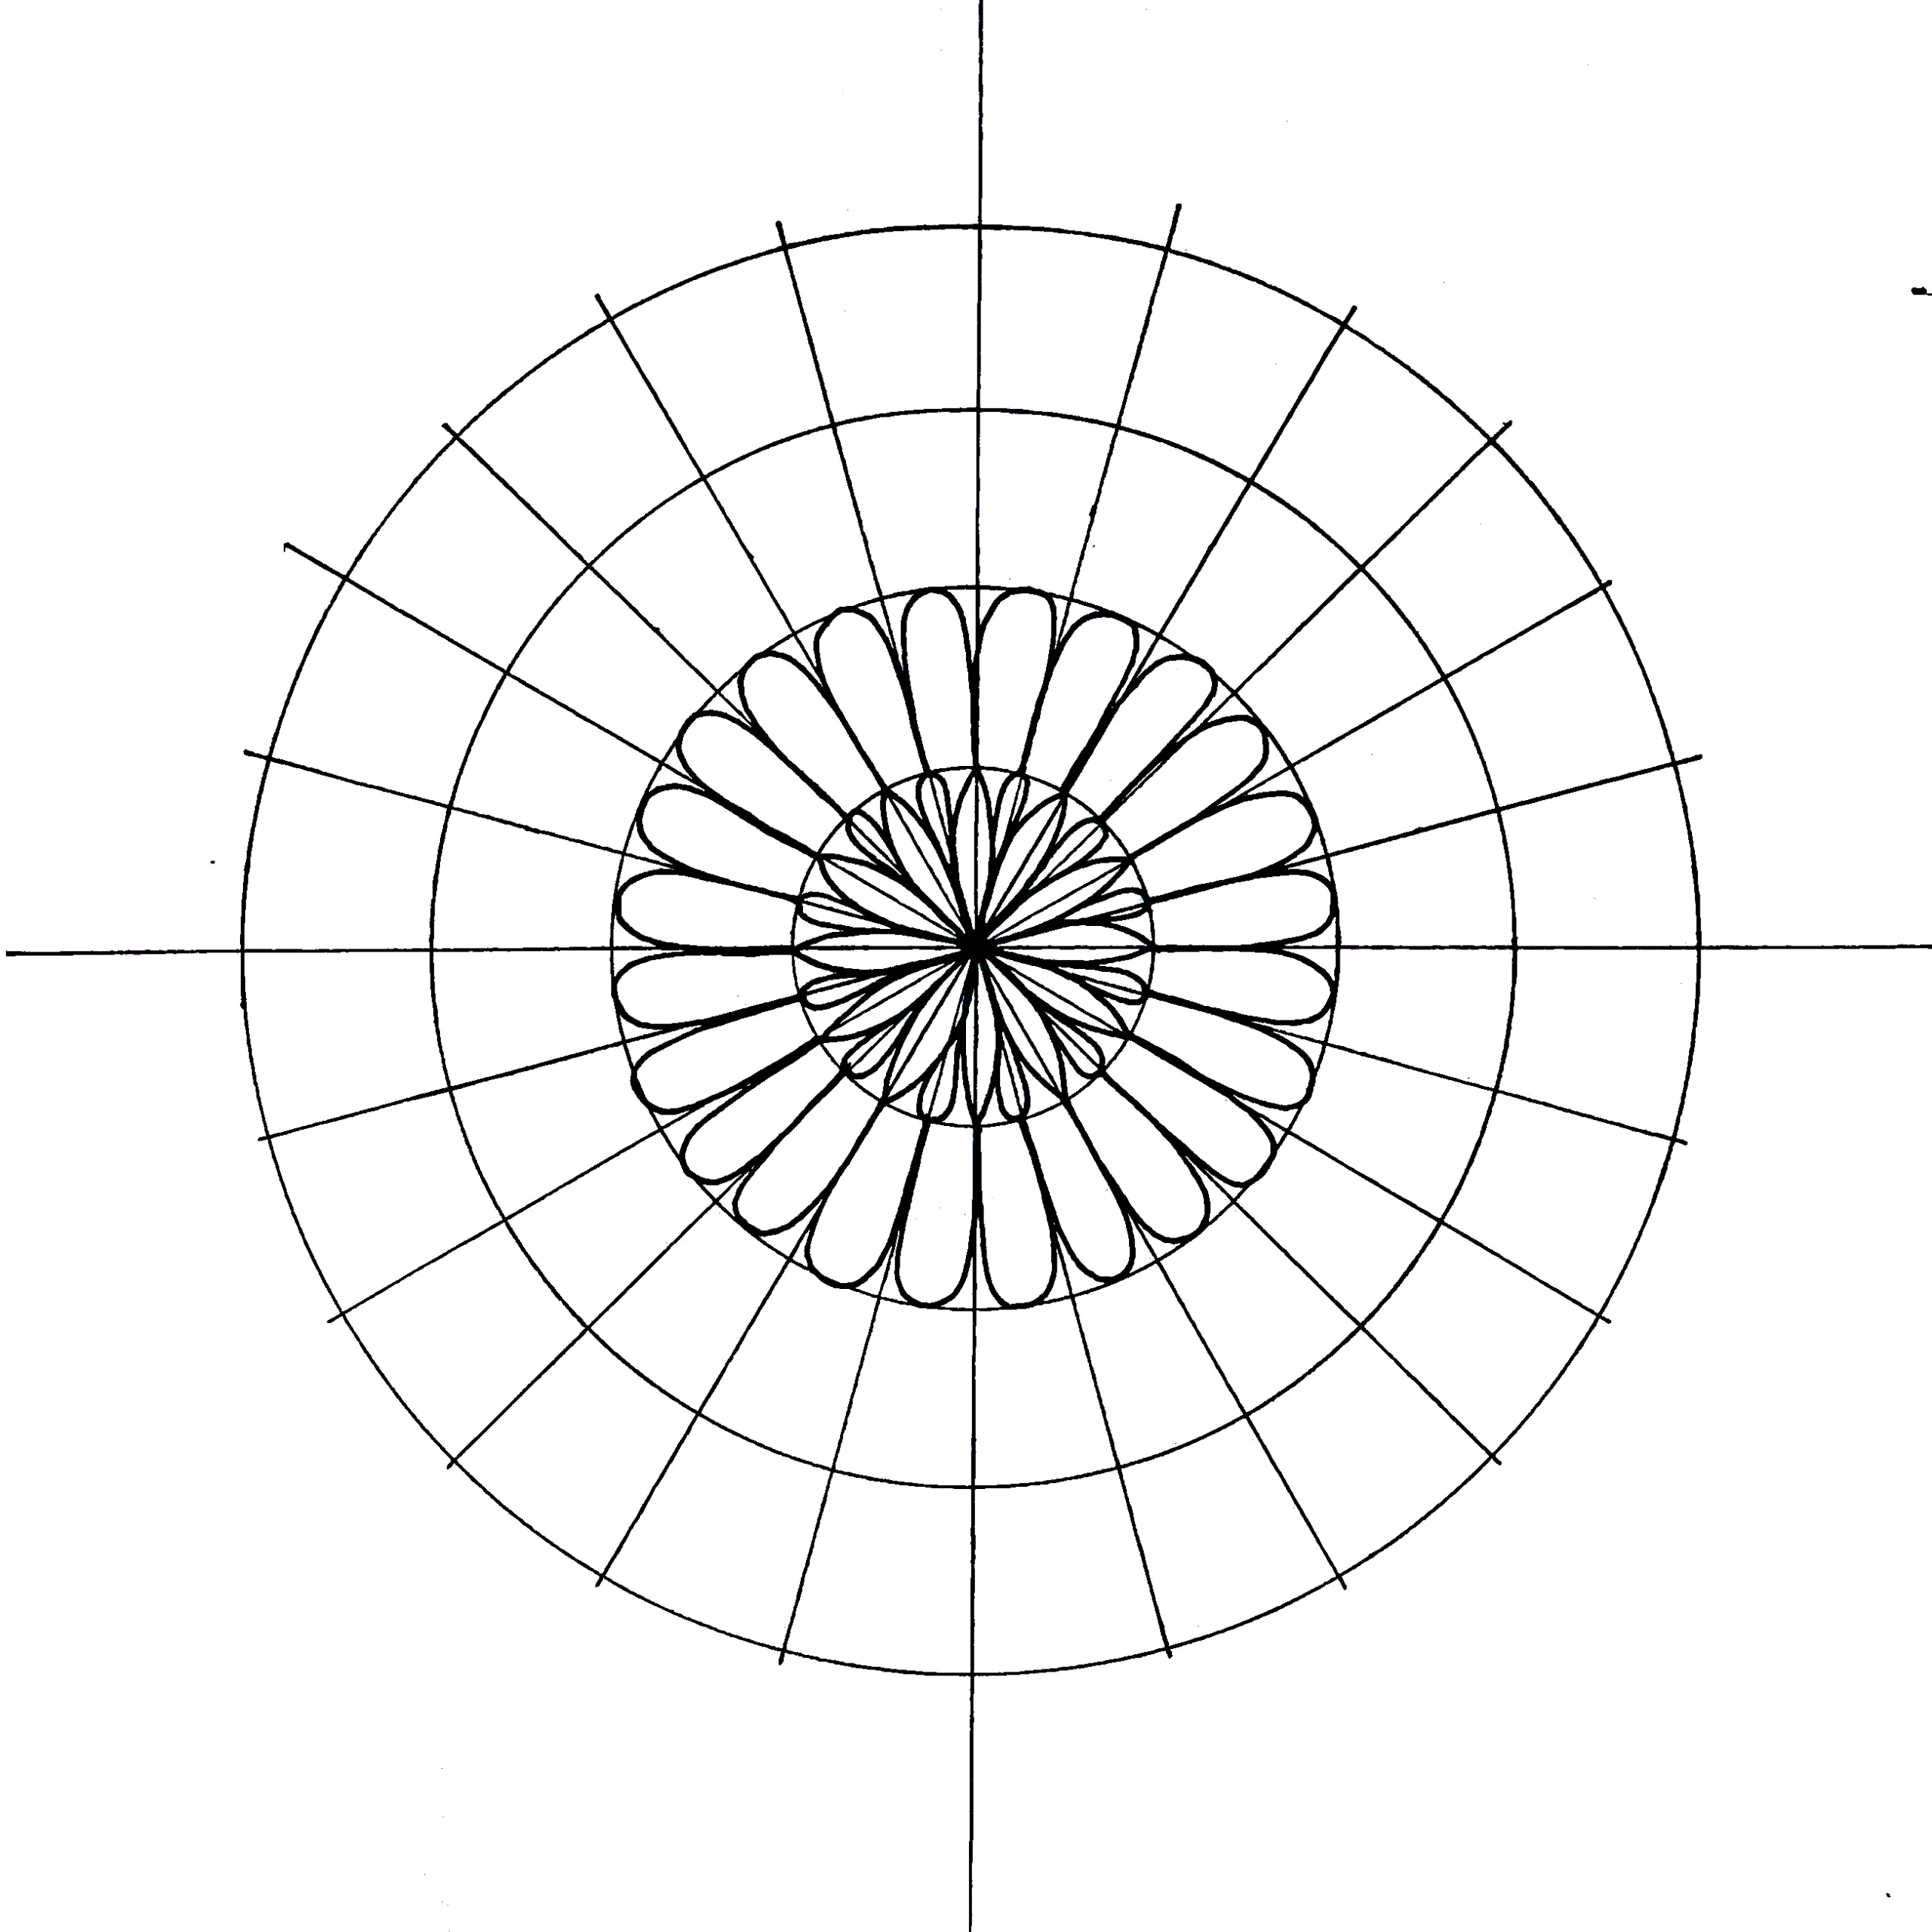
3- On the next row, draw an arc petal
on each grid section.
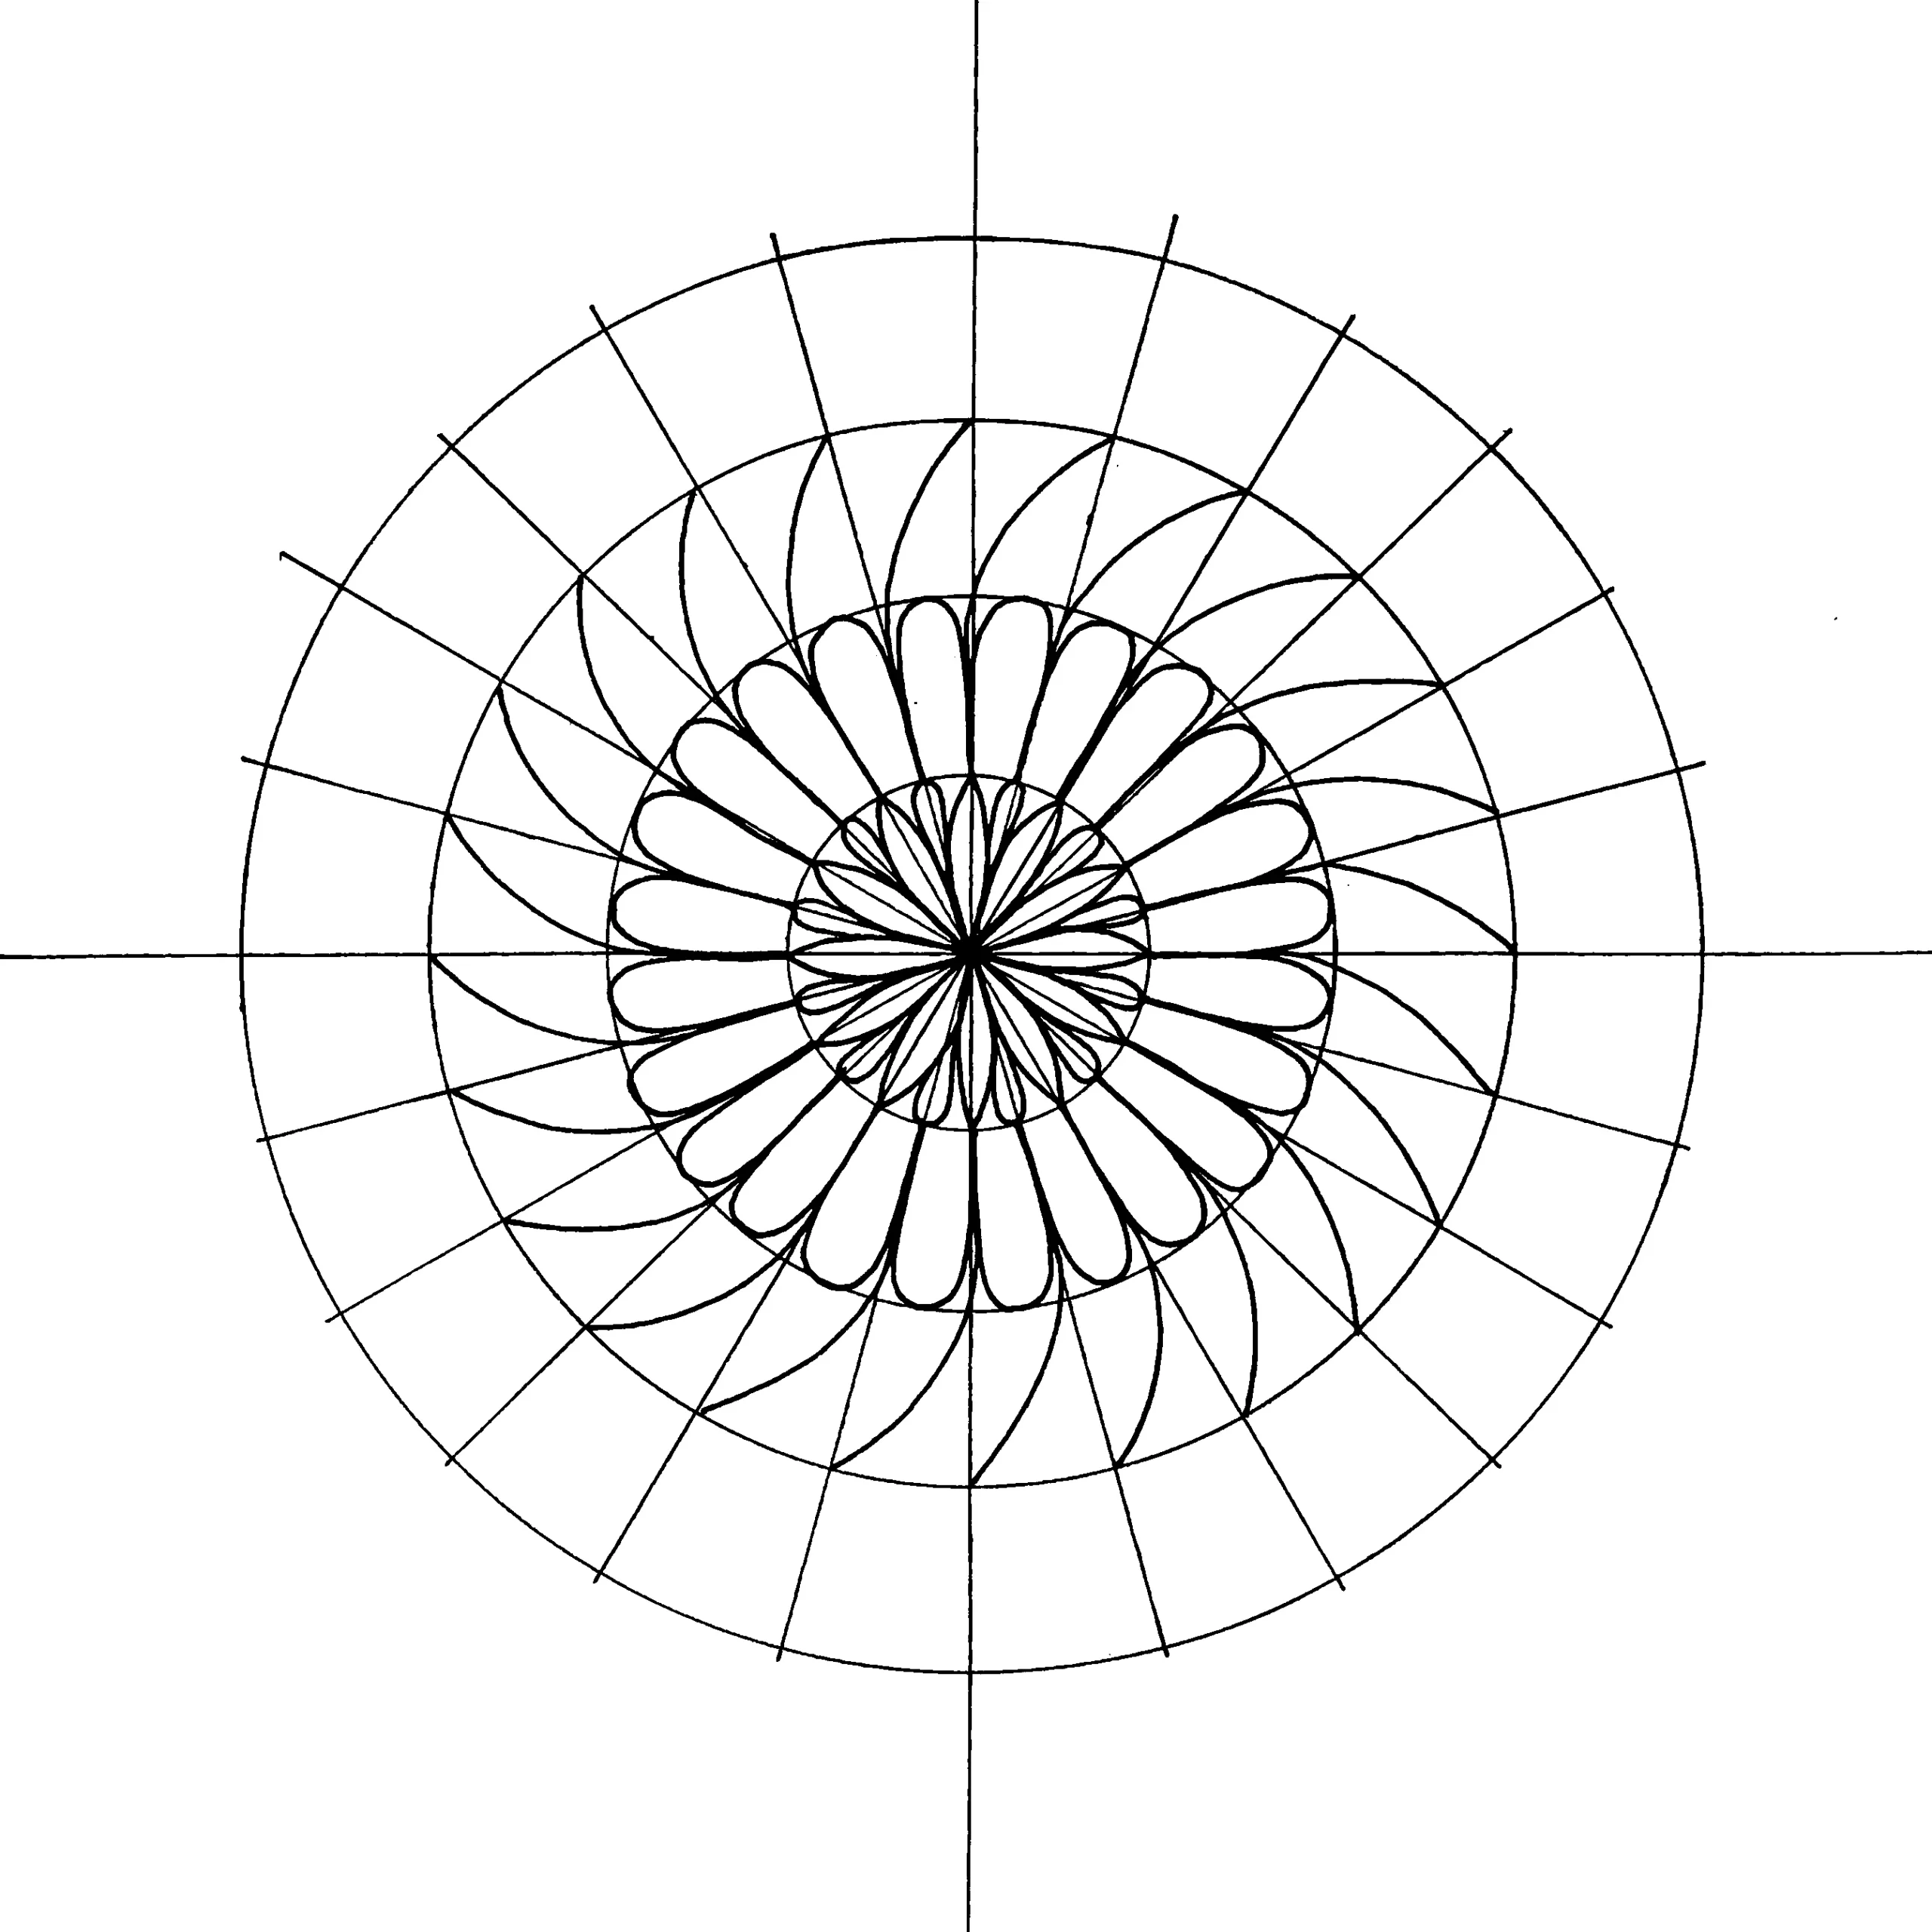
4- Then, draw one curved line in each grid section.
5- Now, draw an opposite curved line, also on each grid section, creating intersected petals.
6- Retrace the outline of the third circle.
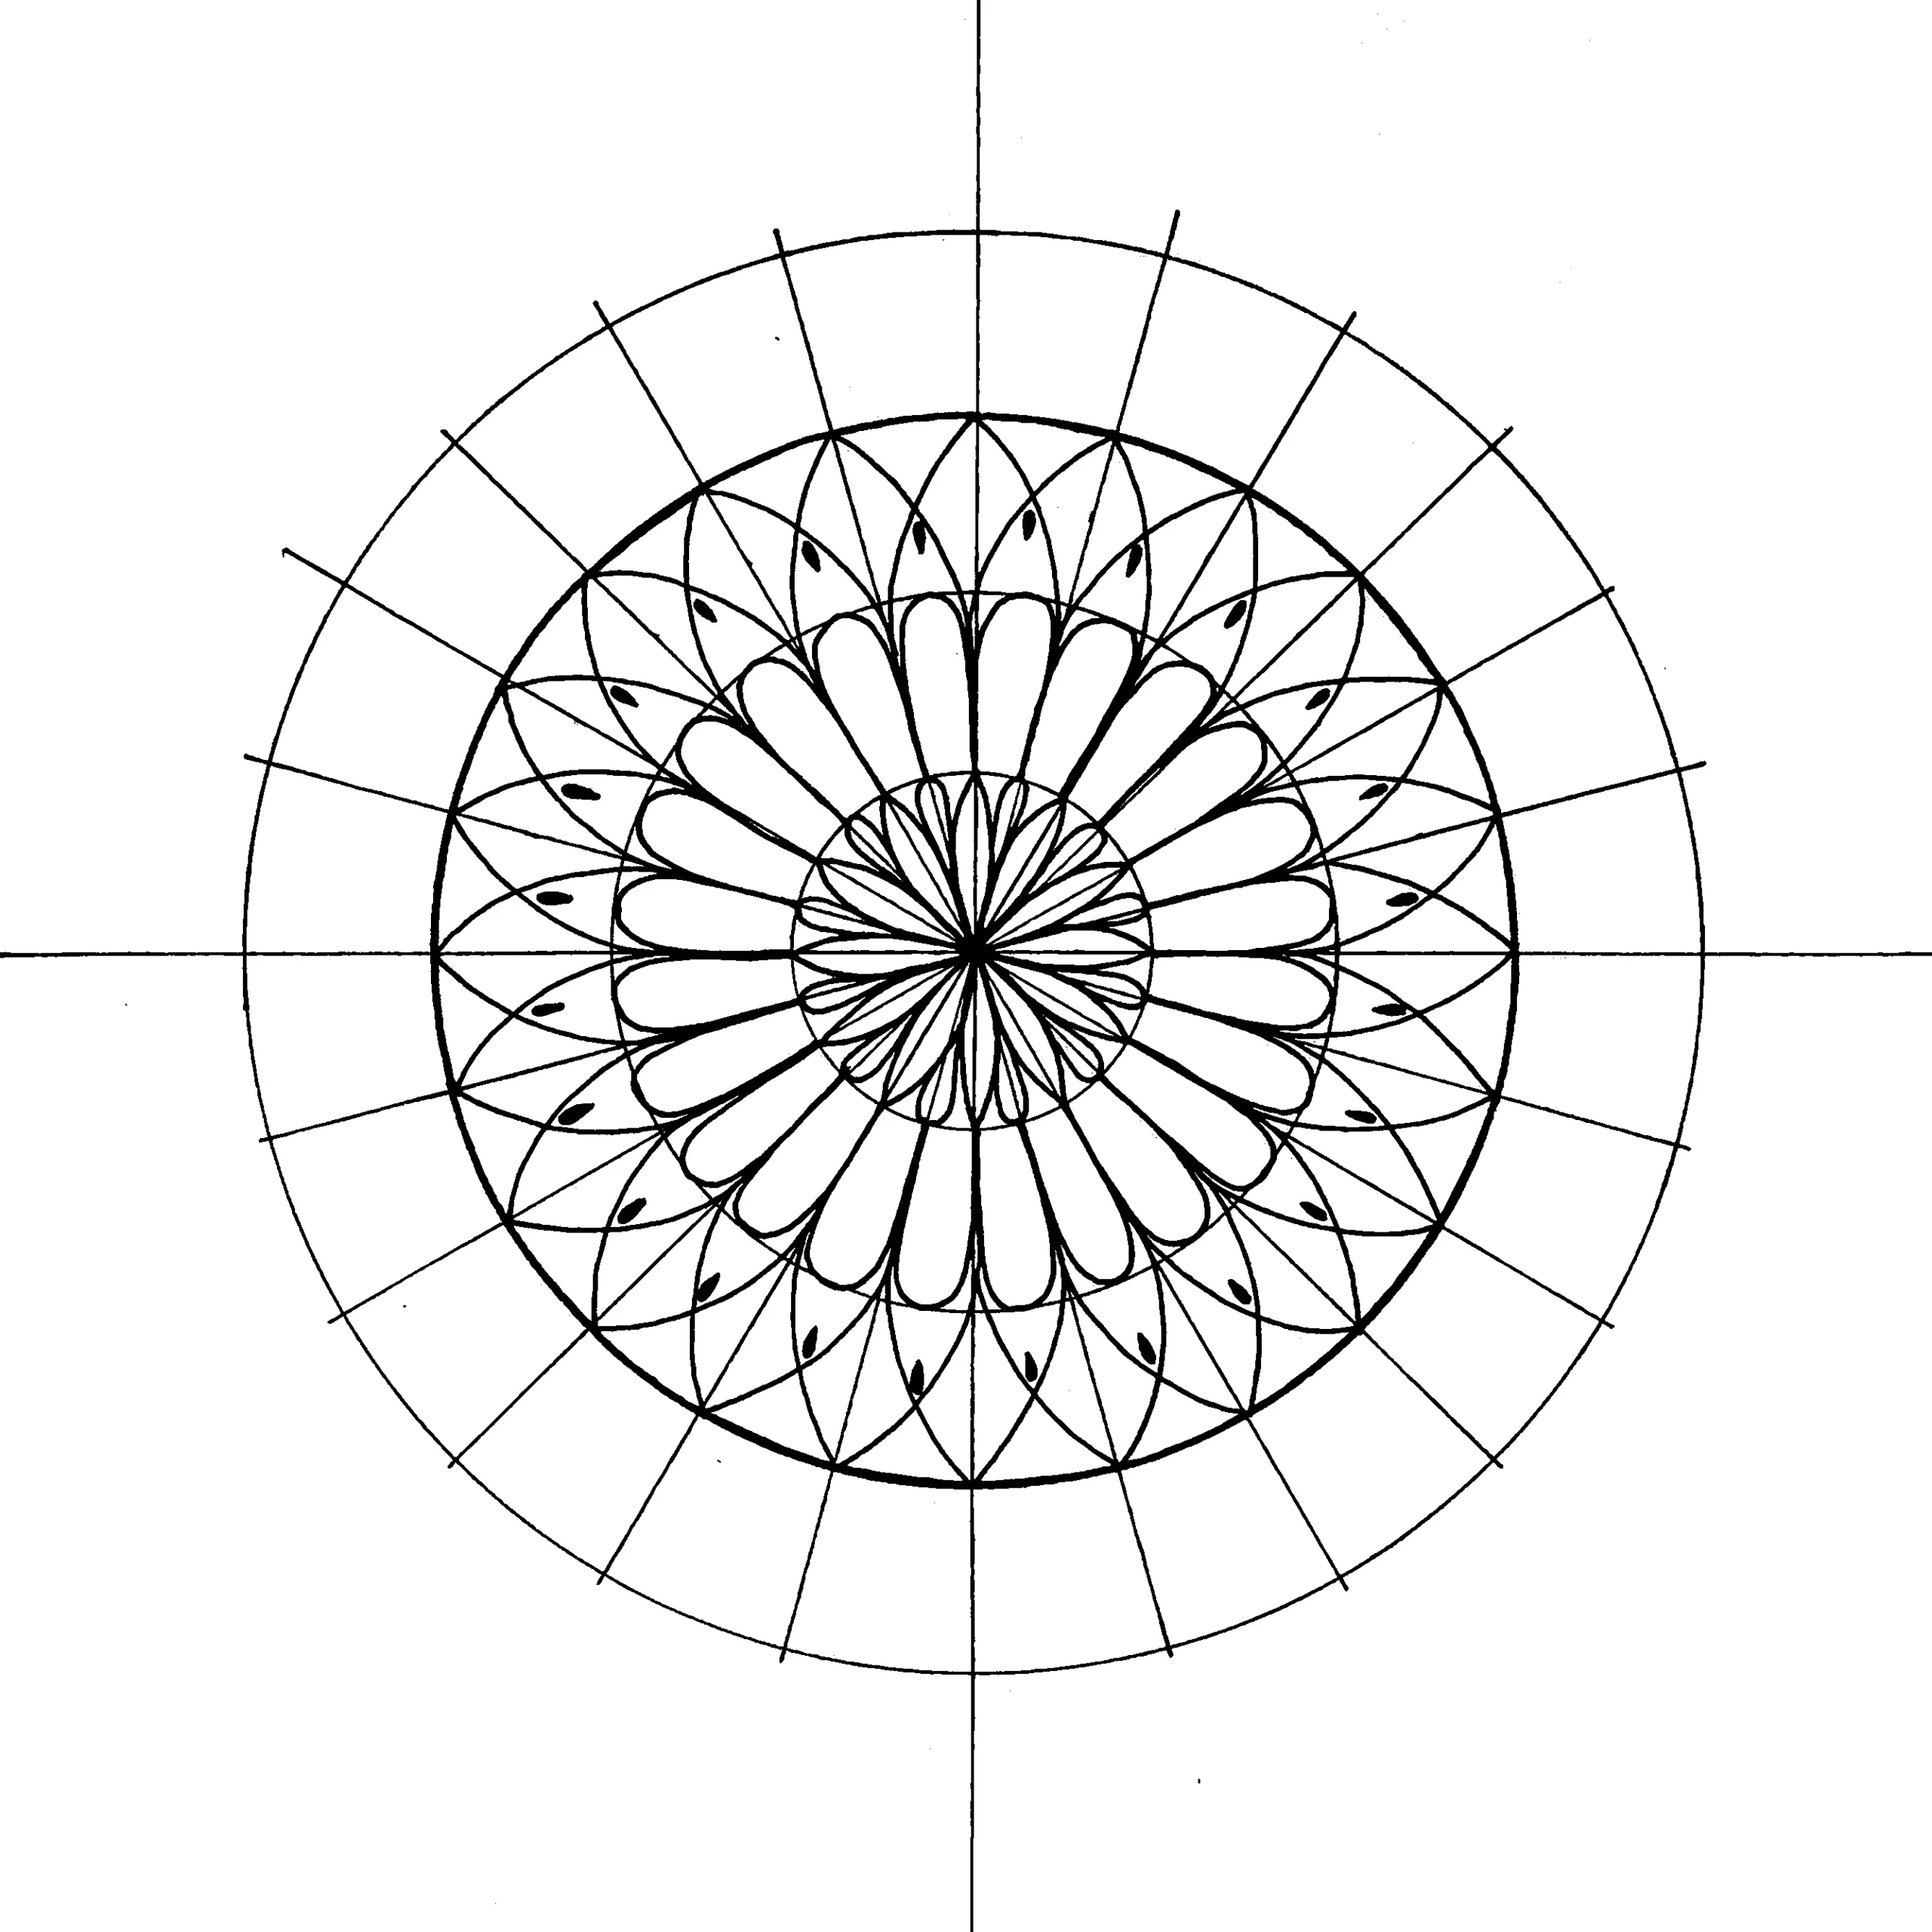
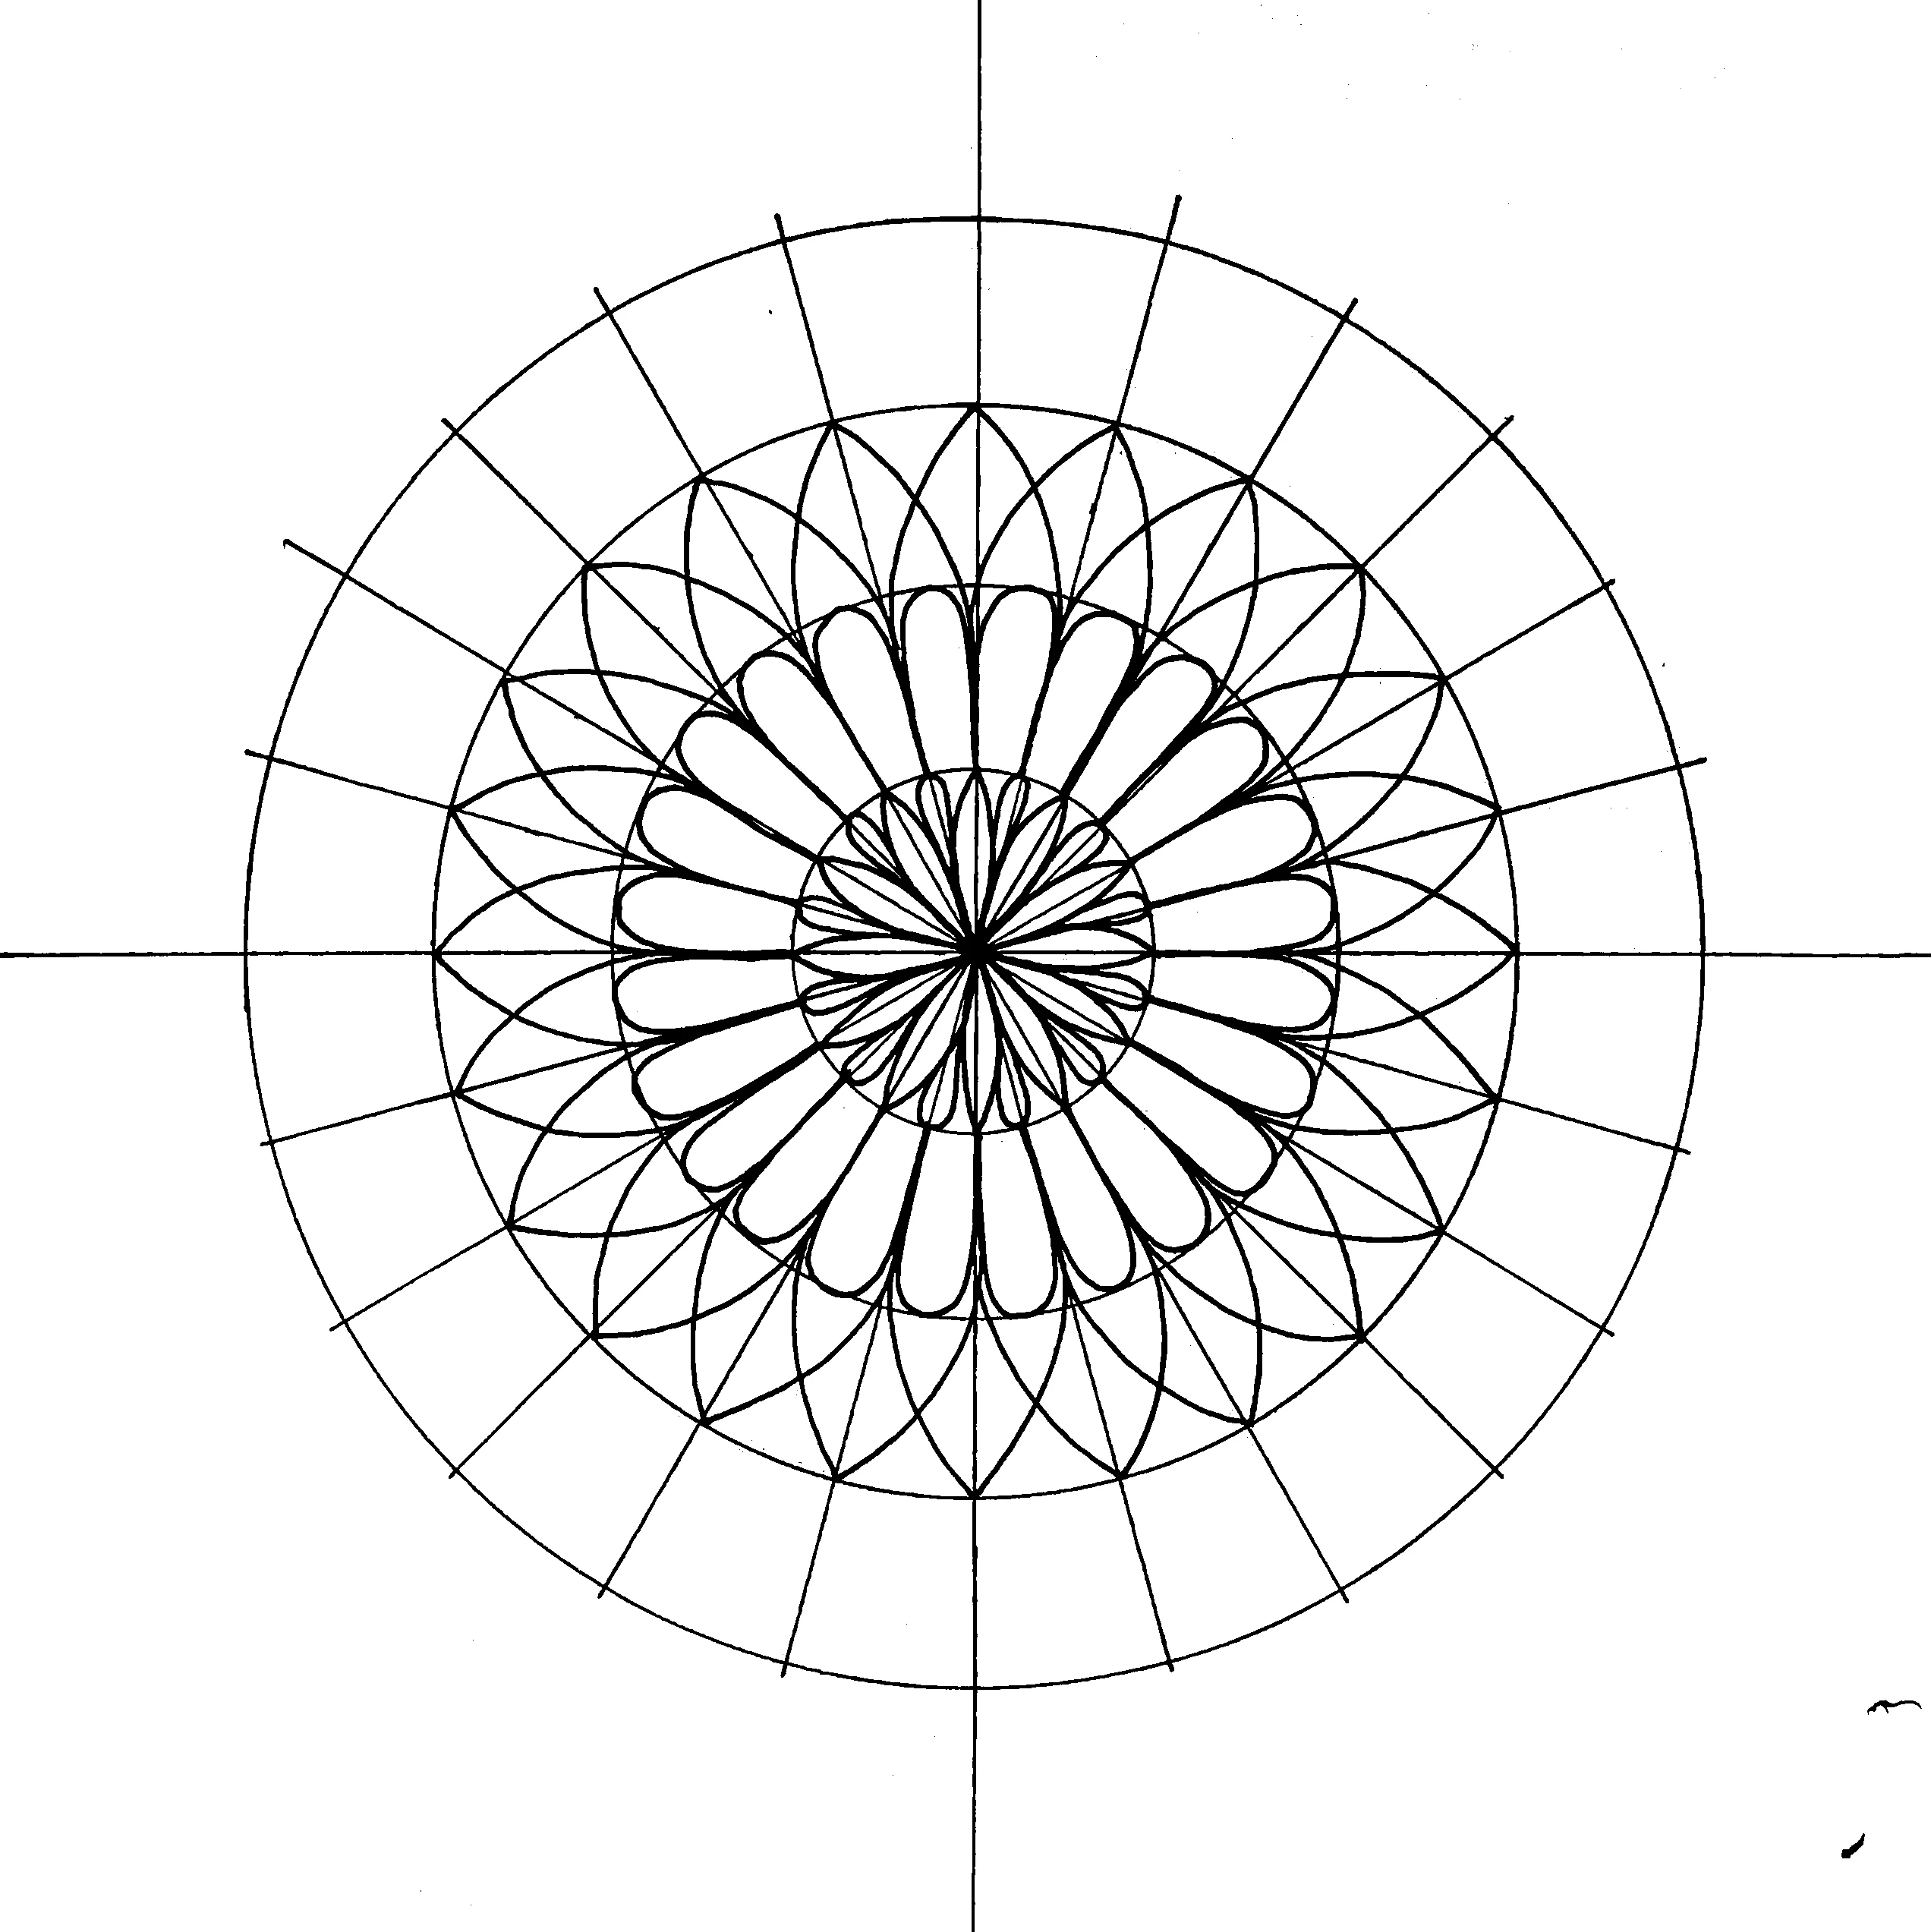
7- In the small petals created by the intersection, draw a black tear drop.
8- In the large petals created by the intersection, draw a line that cuts each petal in the half.
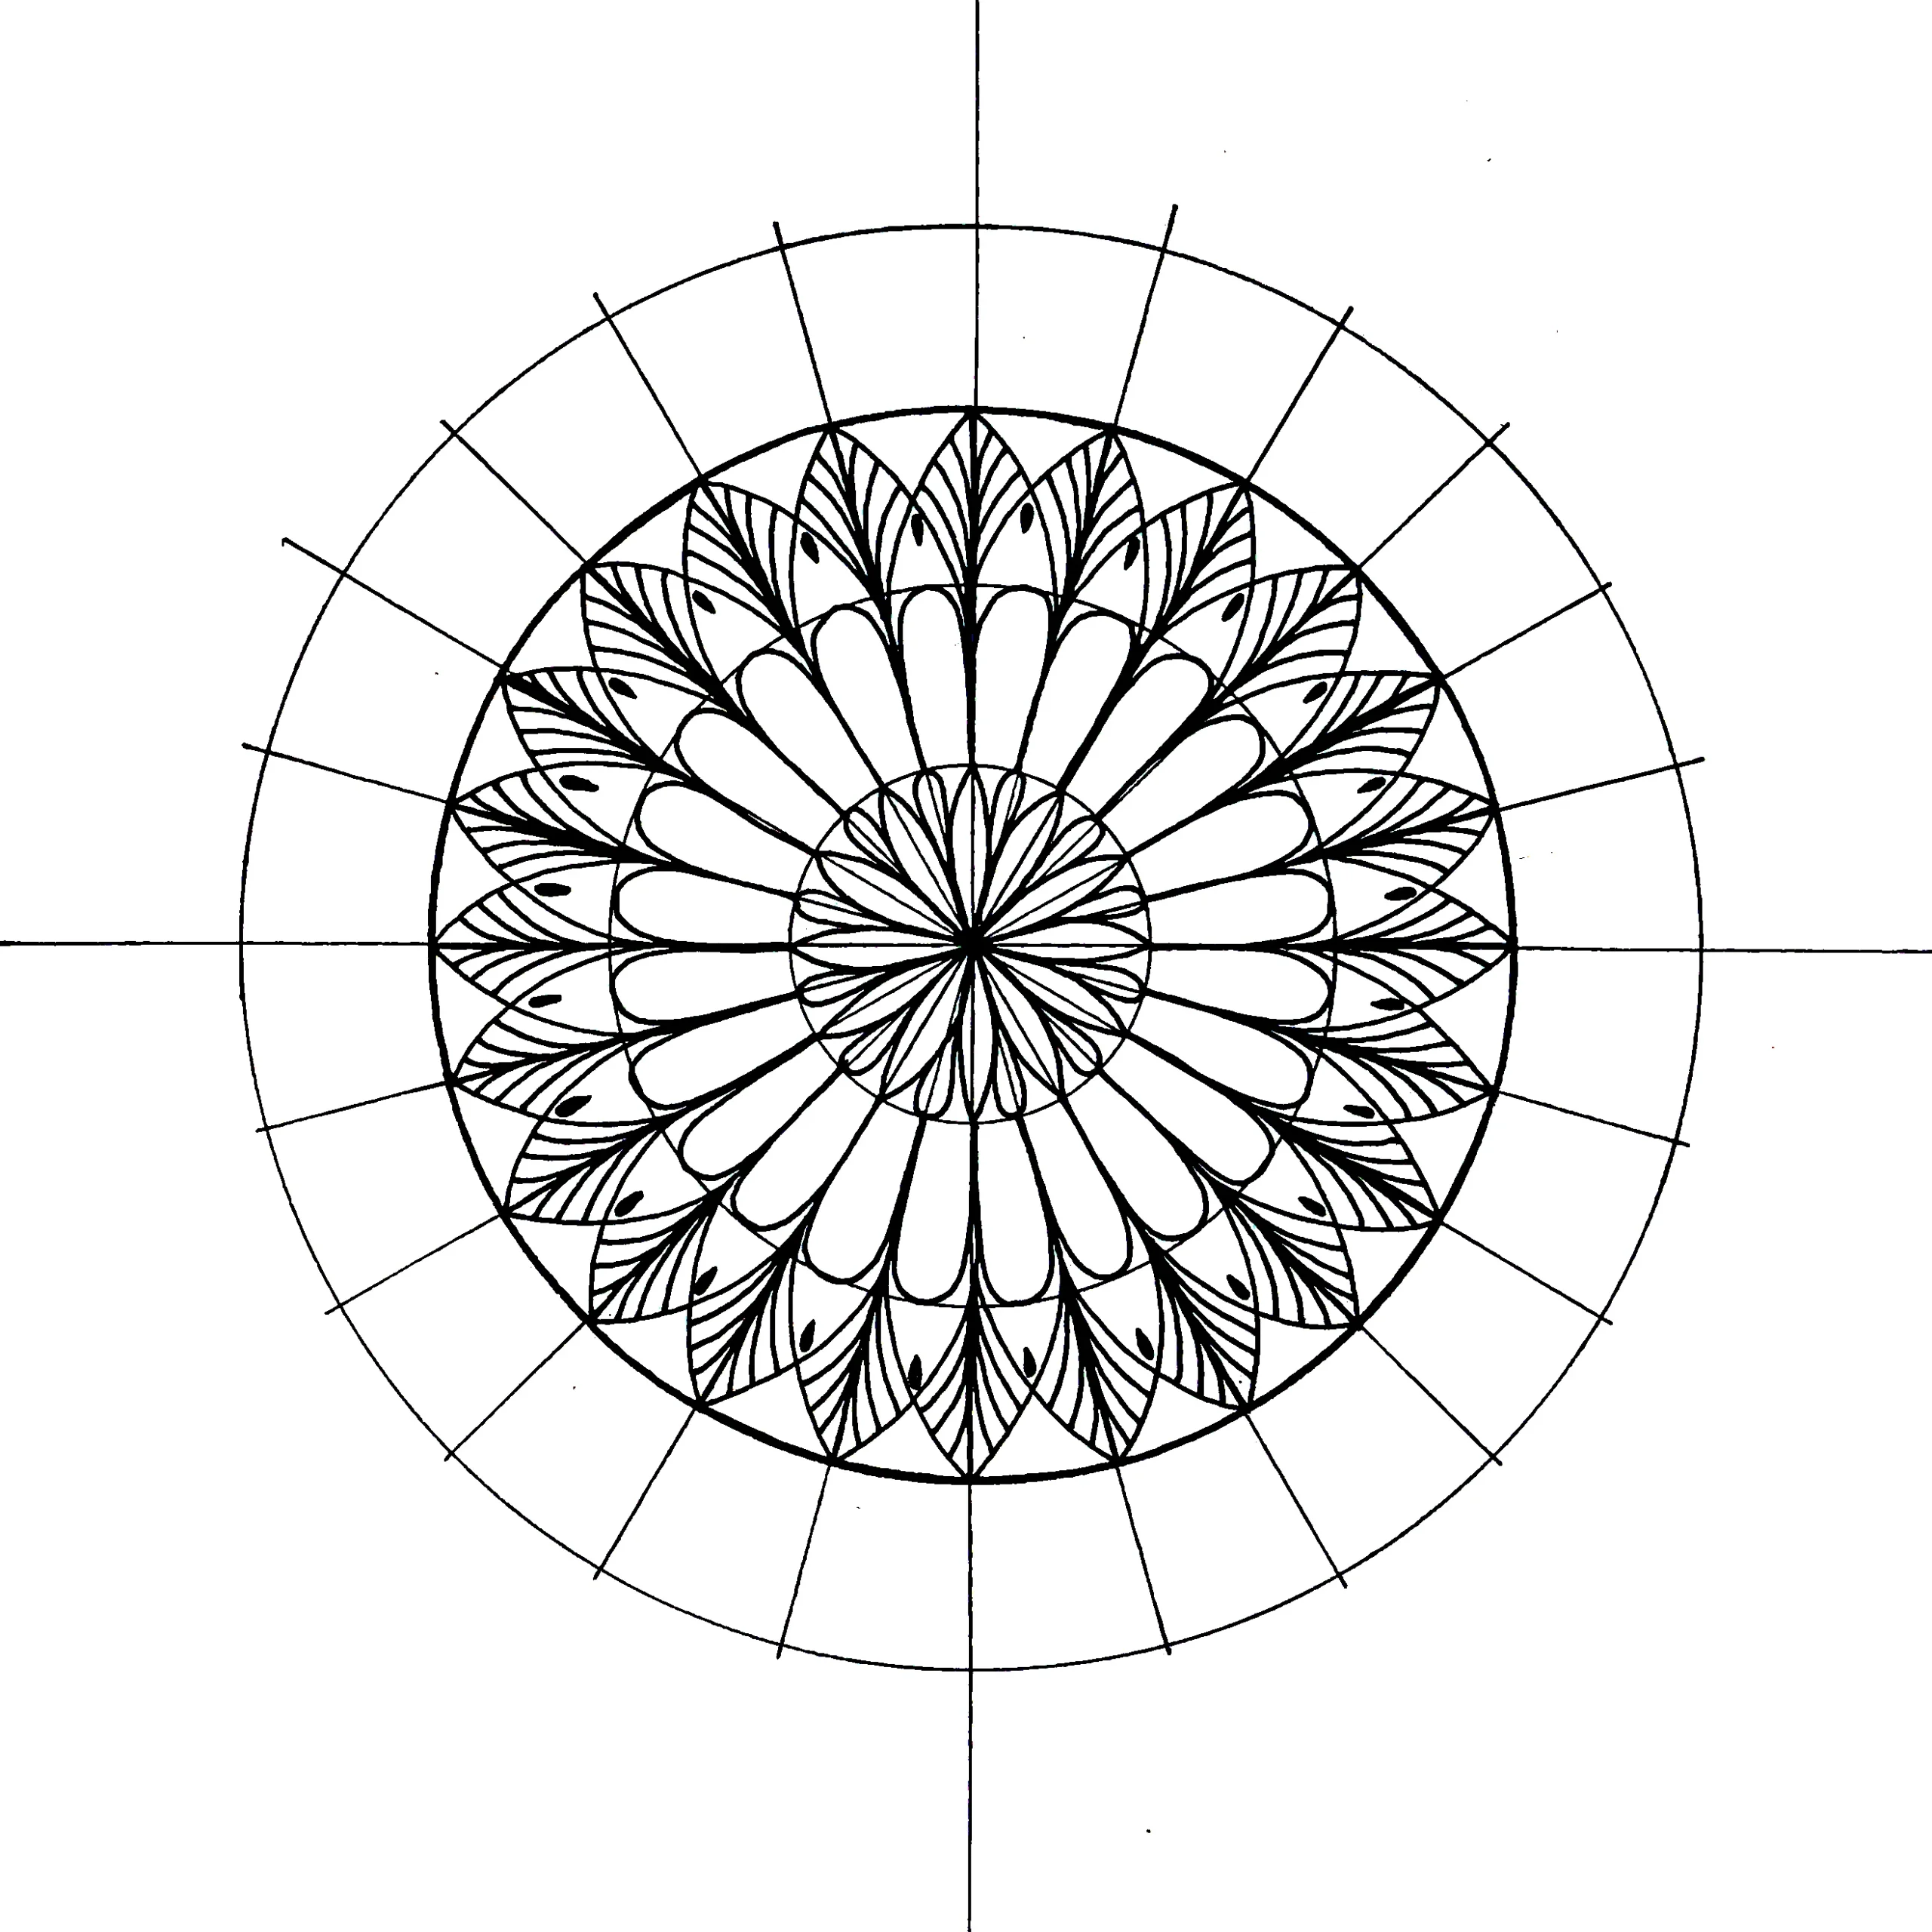
9- In the same large petals, draw four curved lines on each side of the centered line.
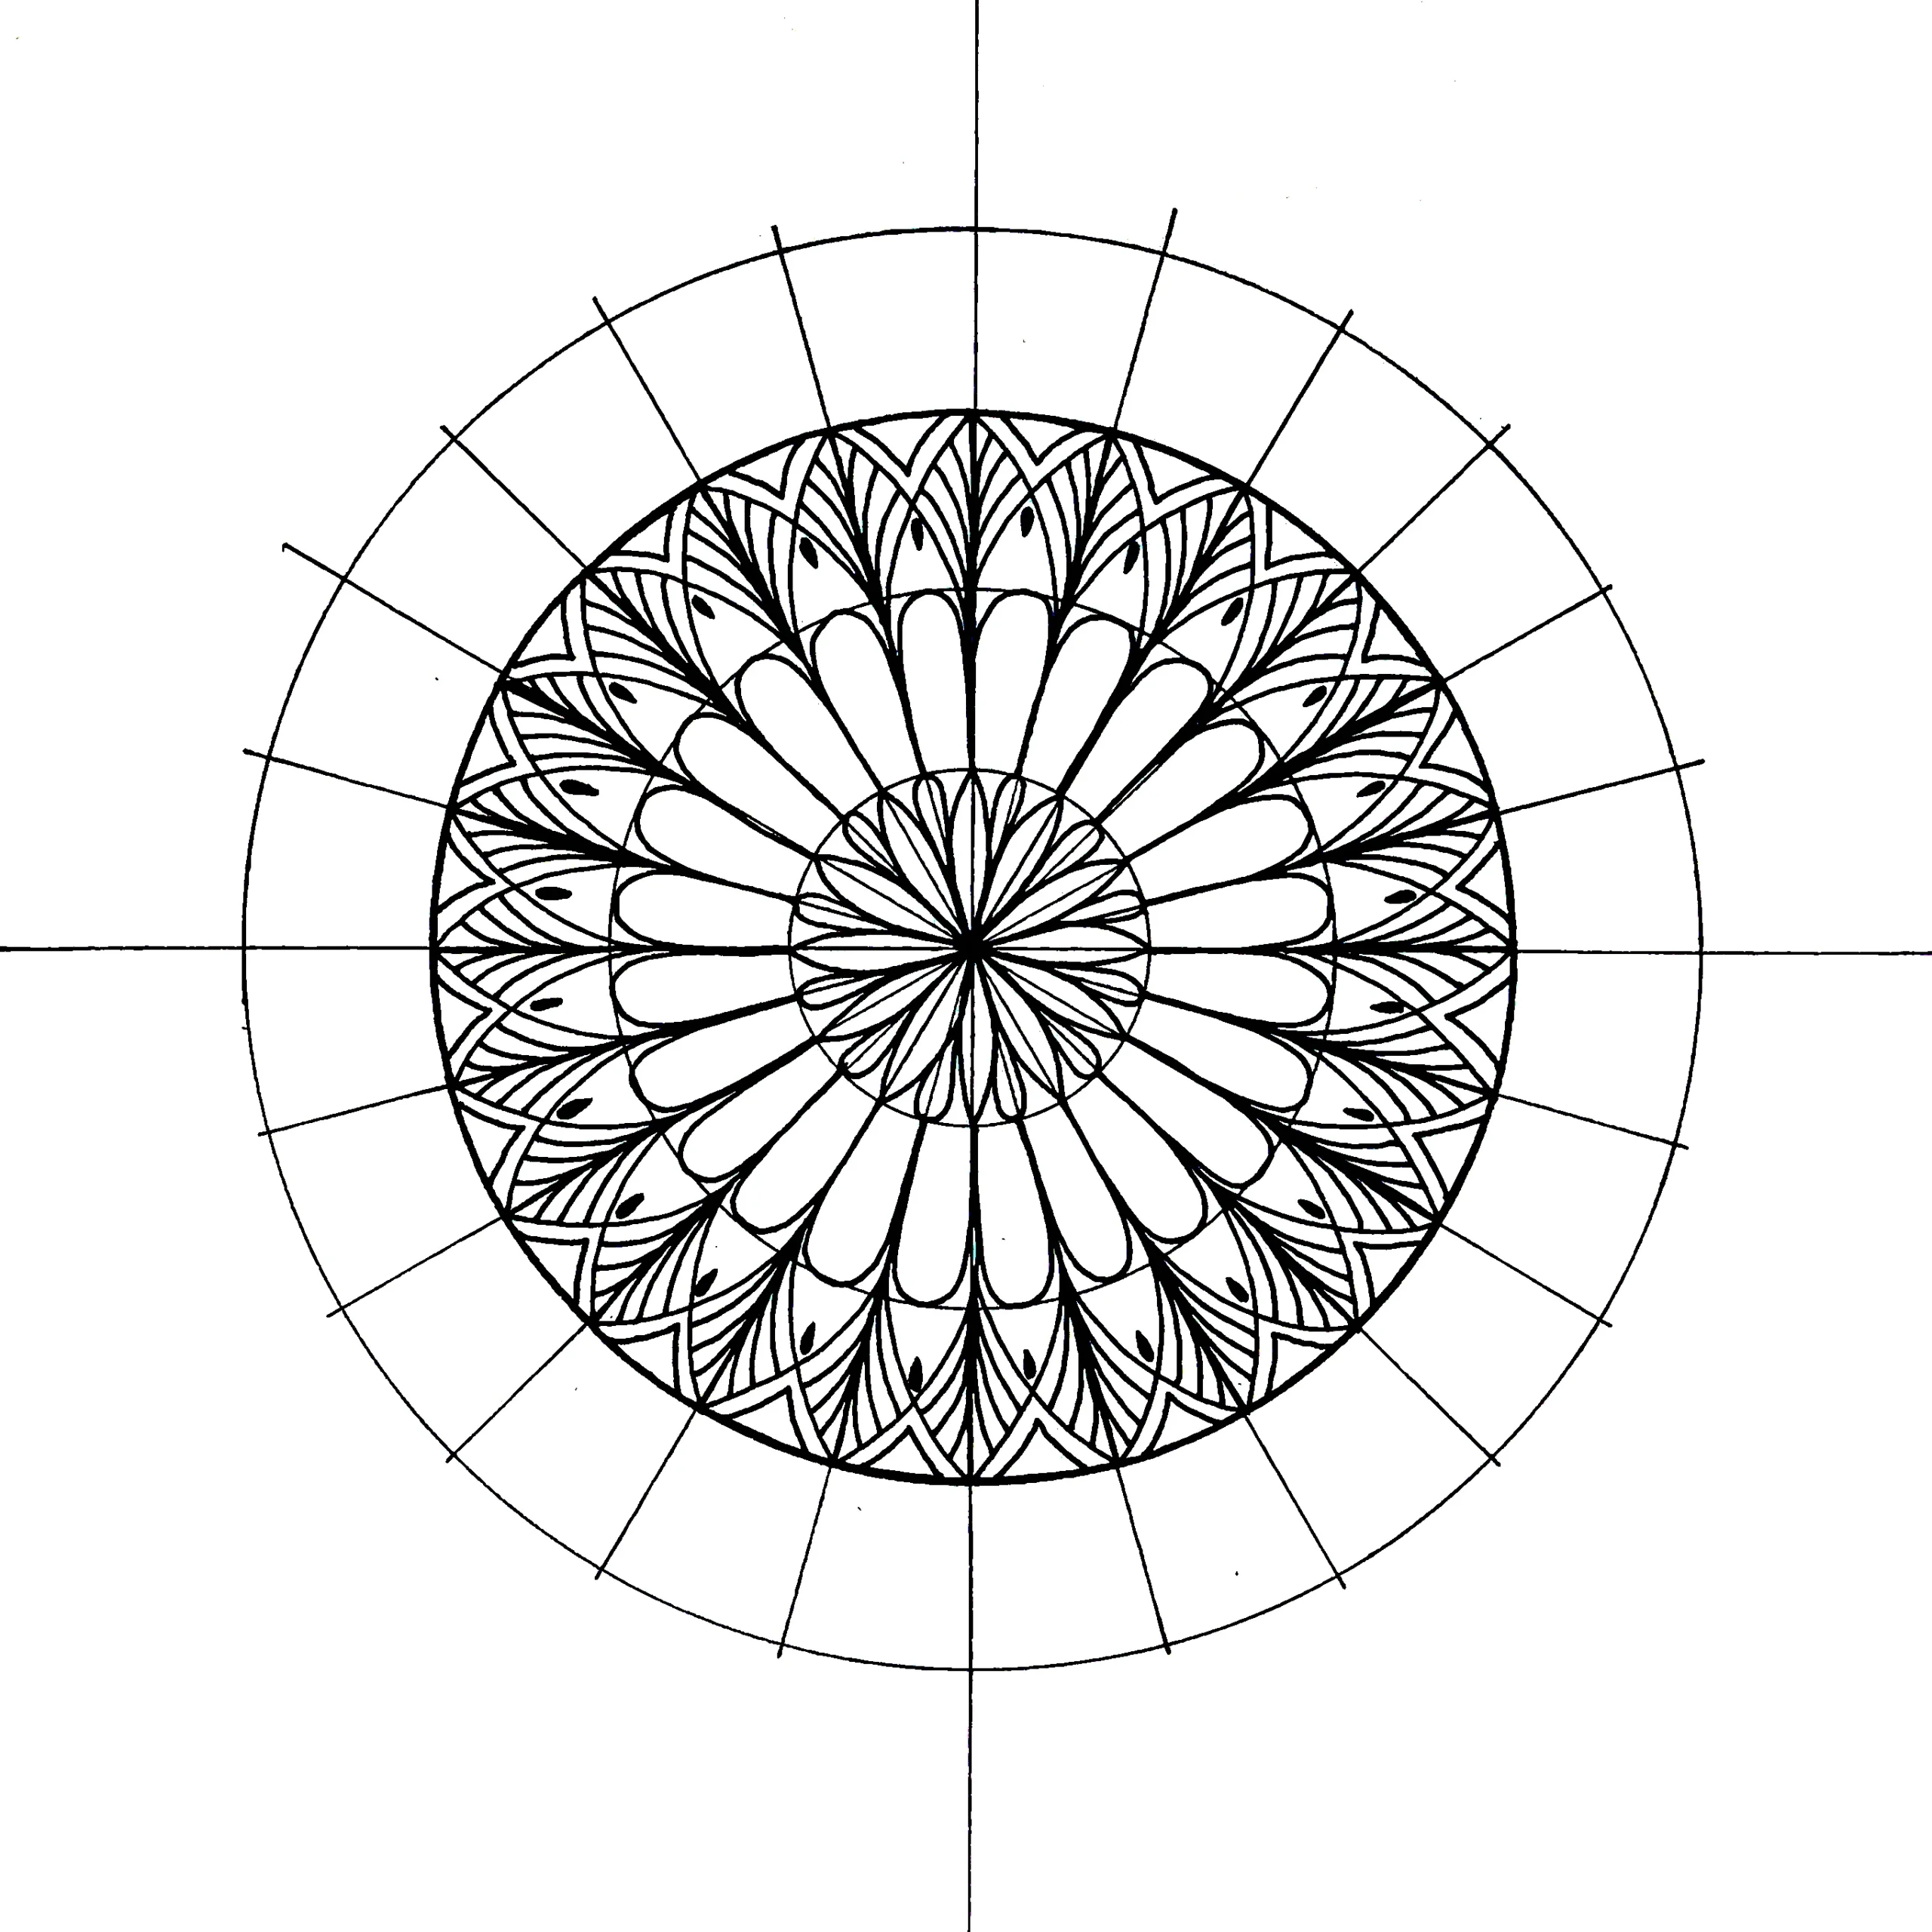
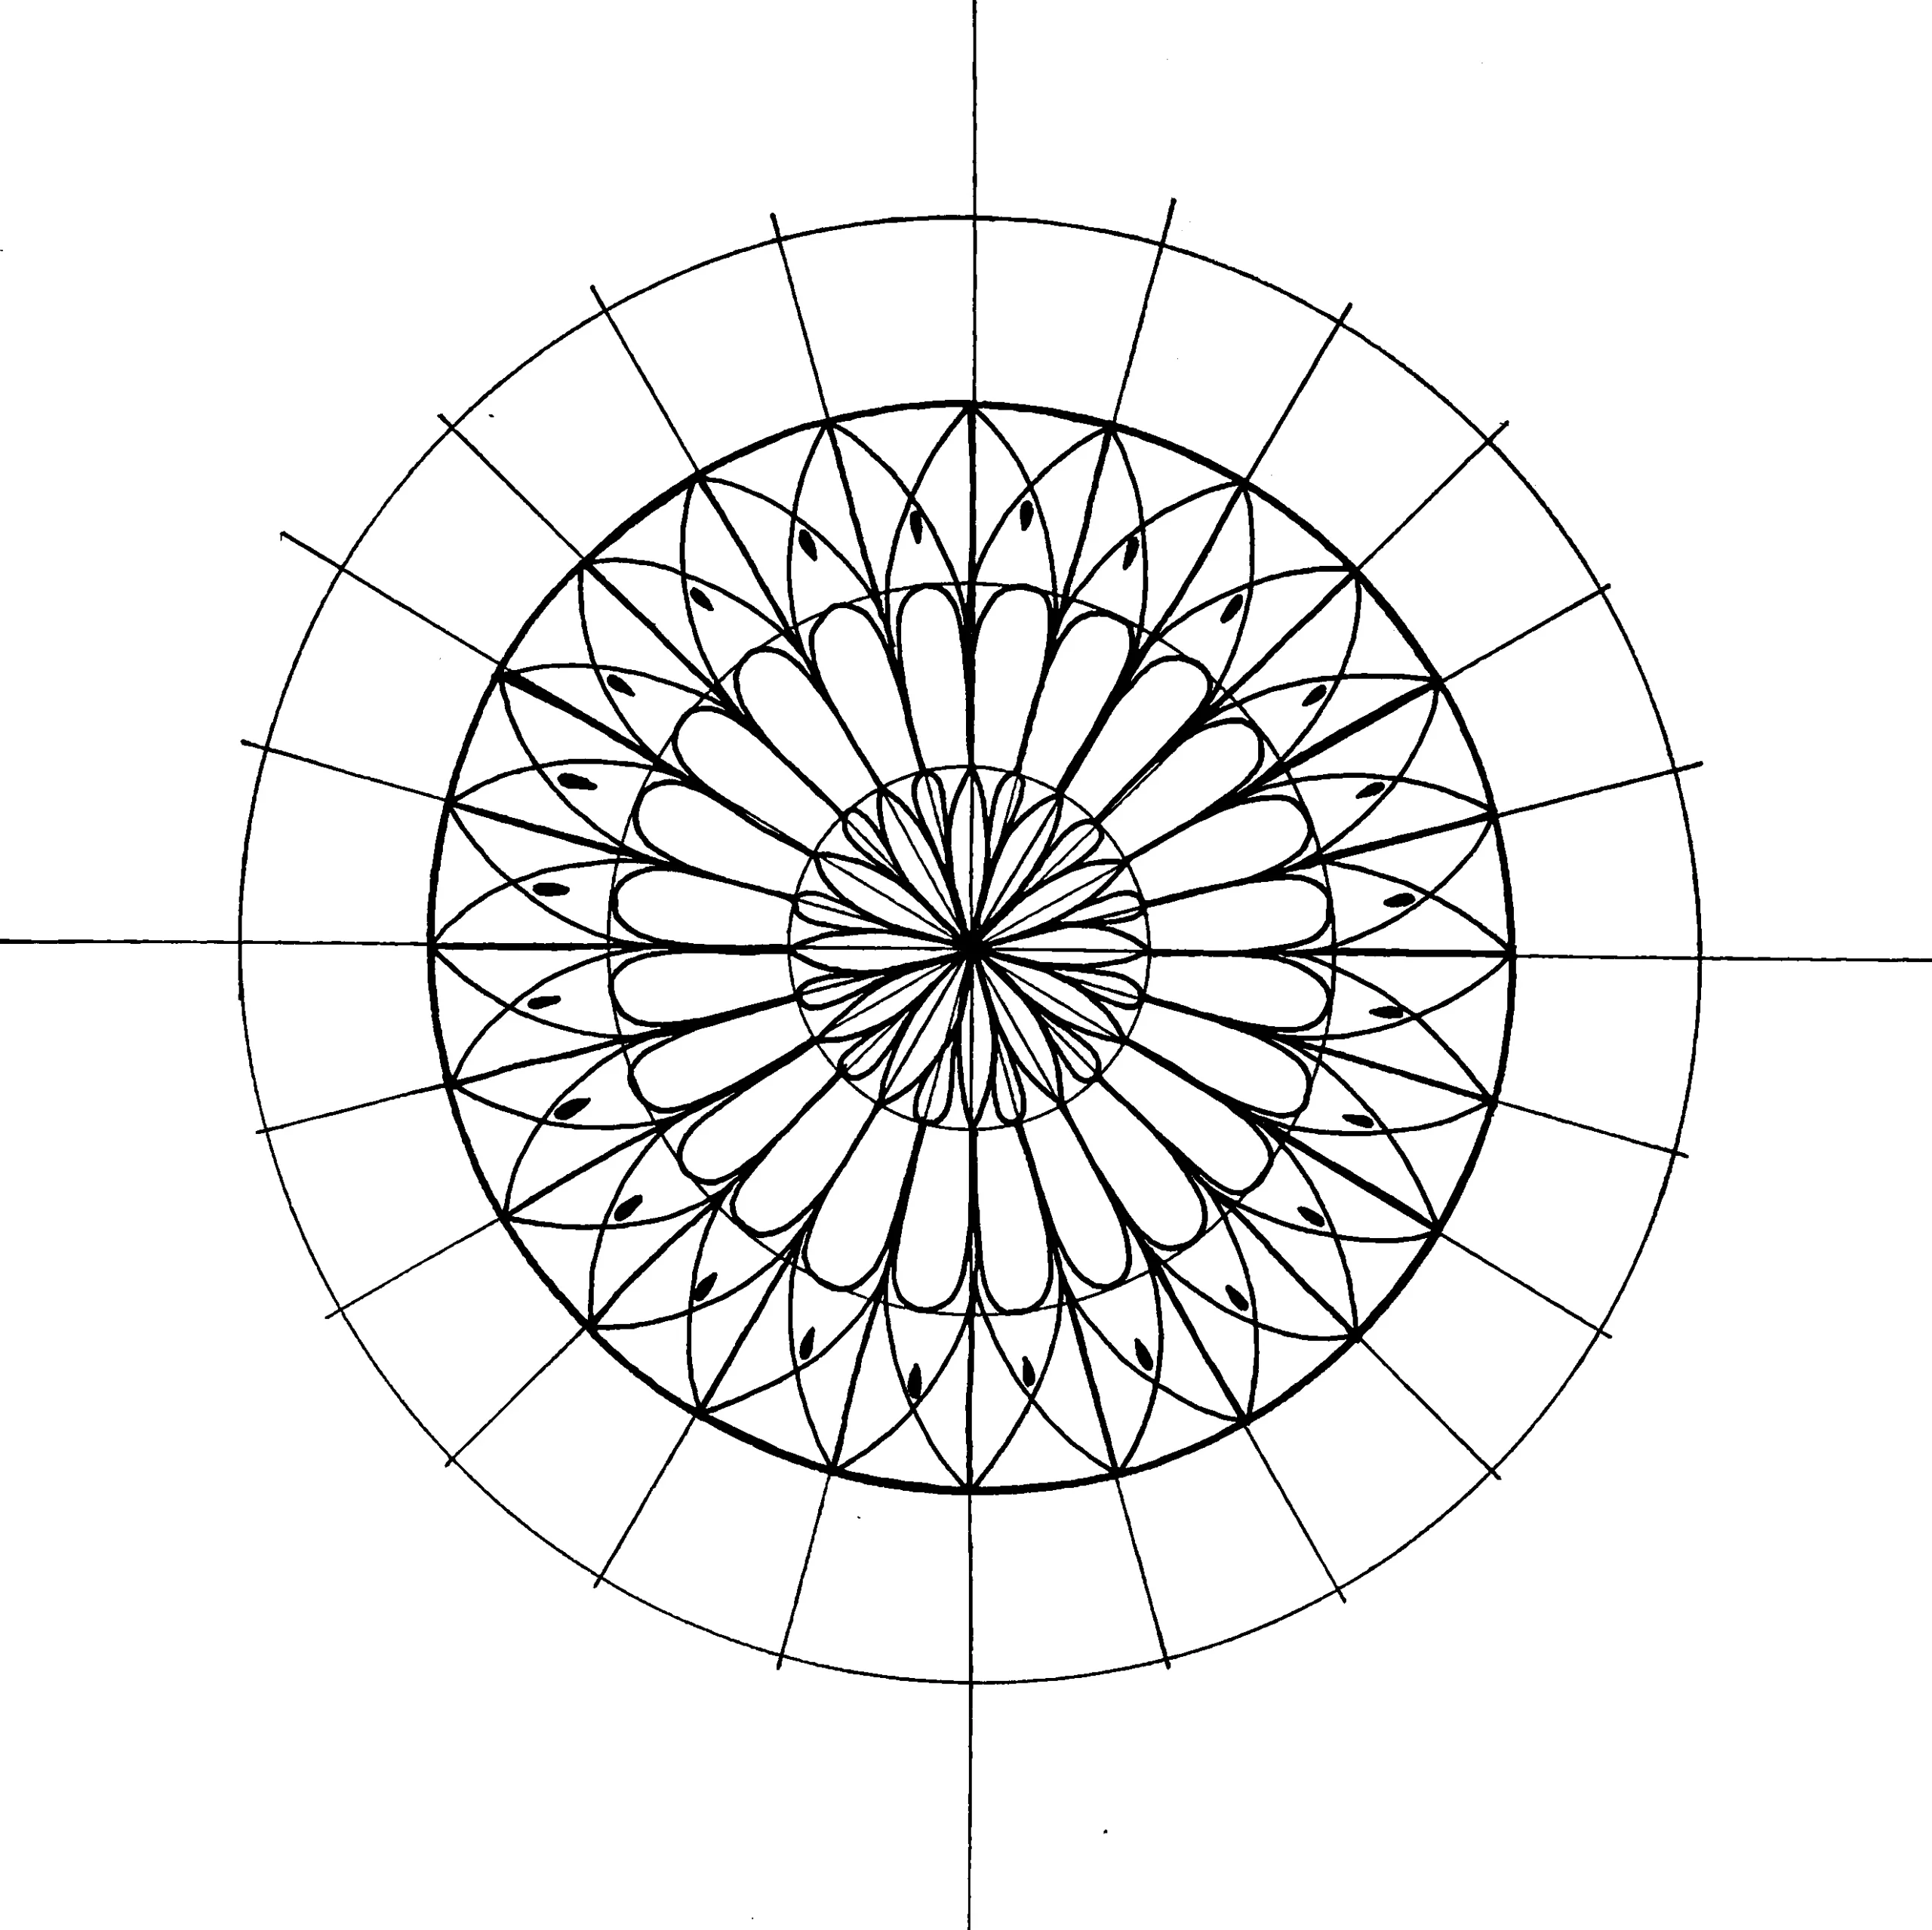
10- In the small space between the petals draw a double outline.
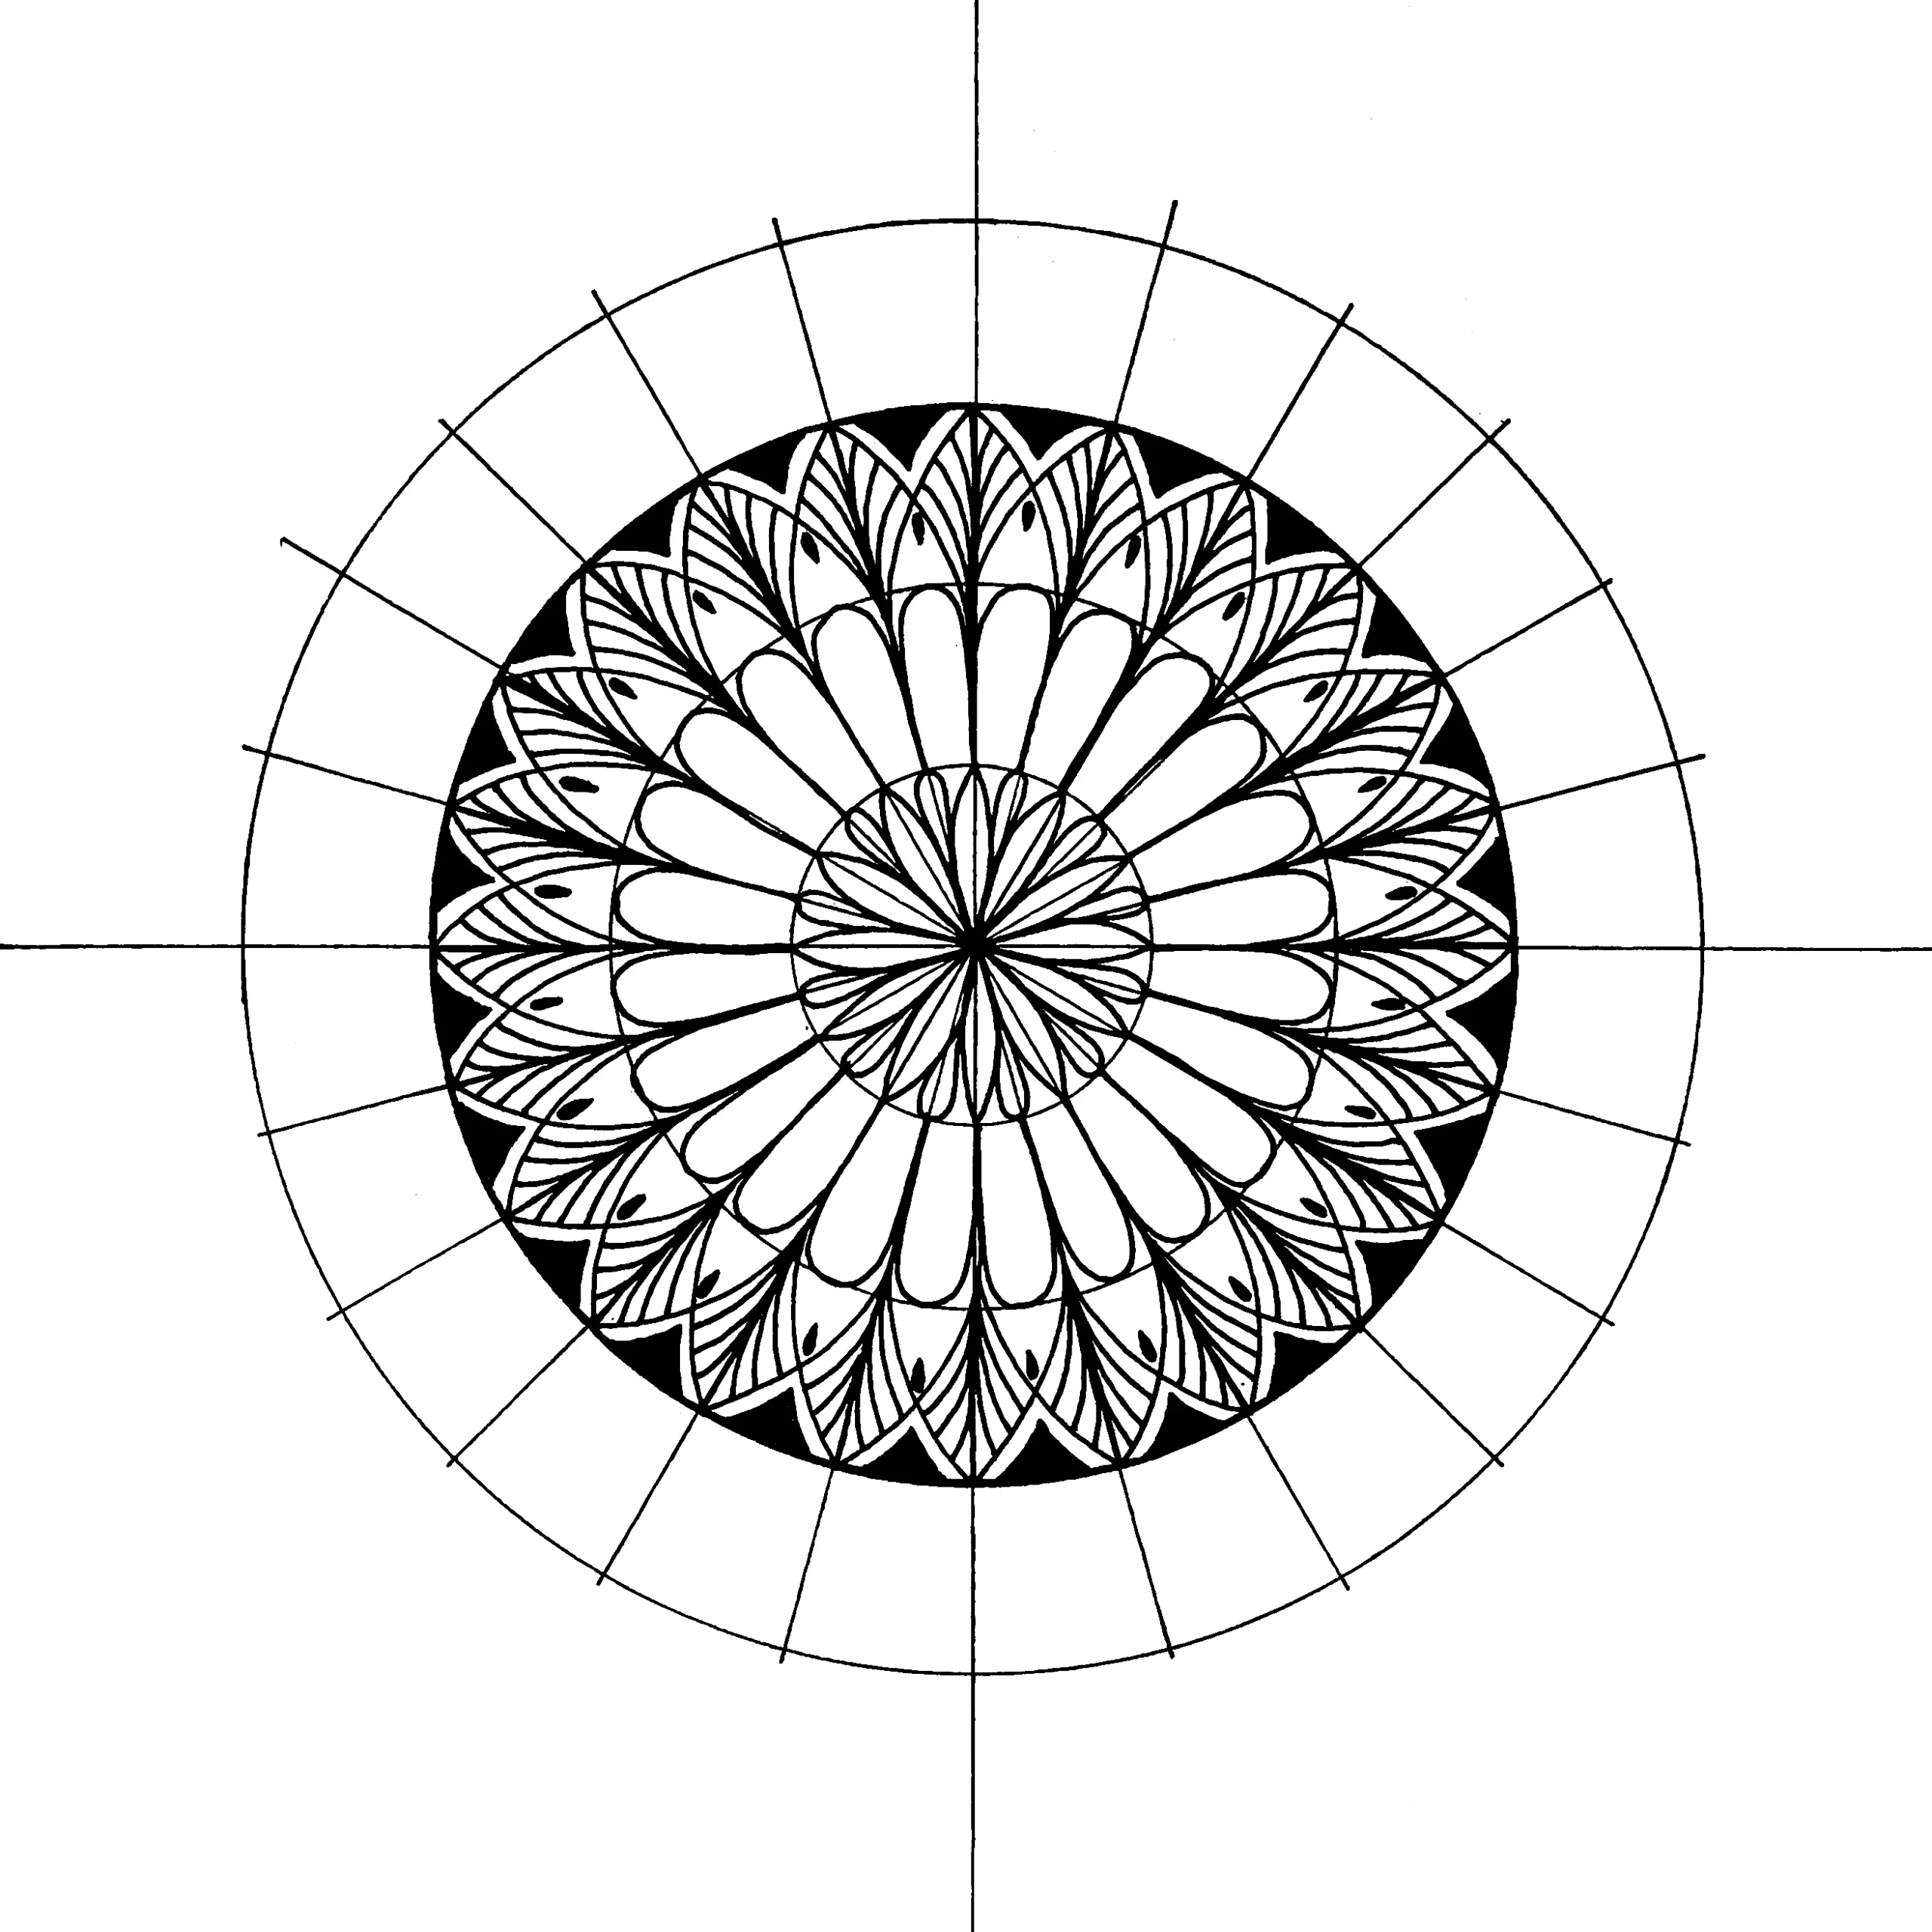
11- Now, color the space created between the circle and the double outline.
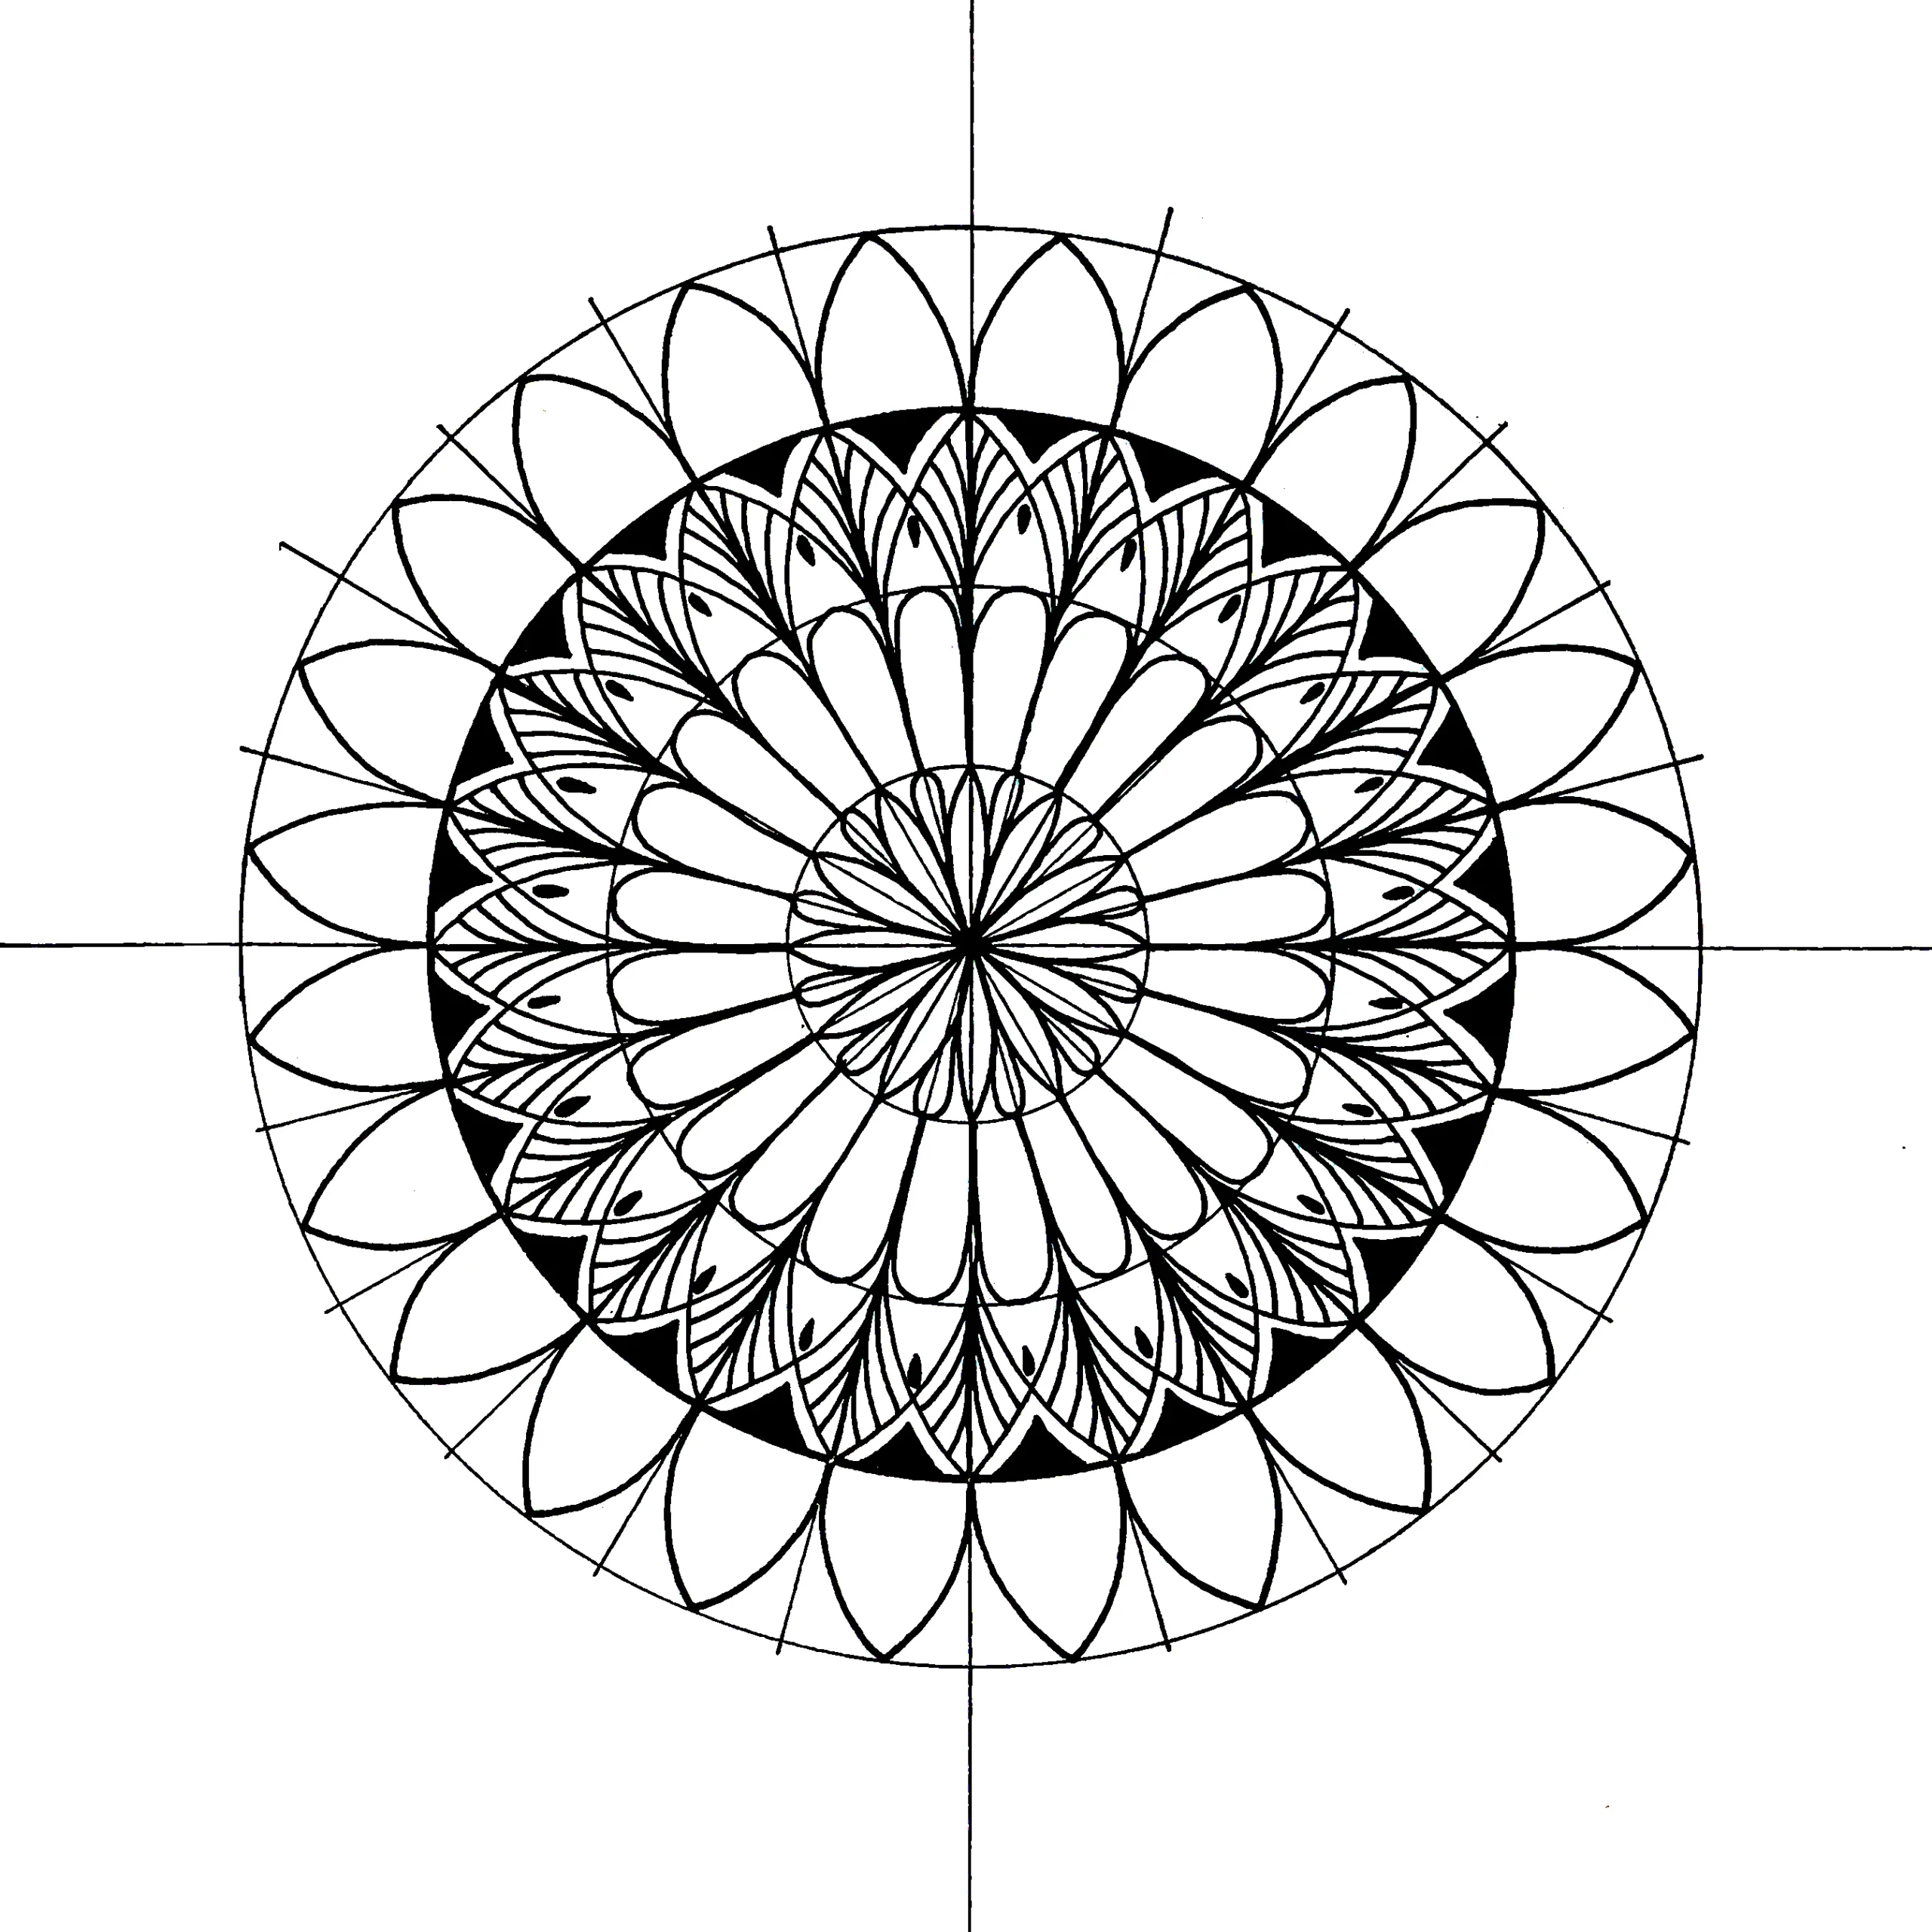
12- In the last row, draw one regular petal on each grid section.
13- Between each petal, draw a tear drop.
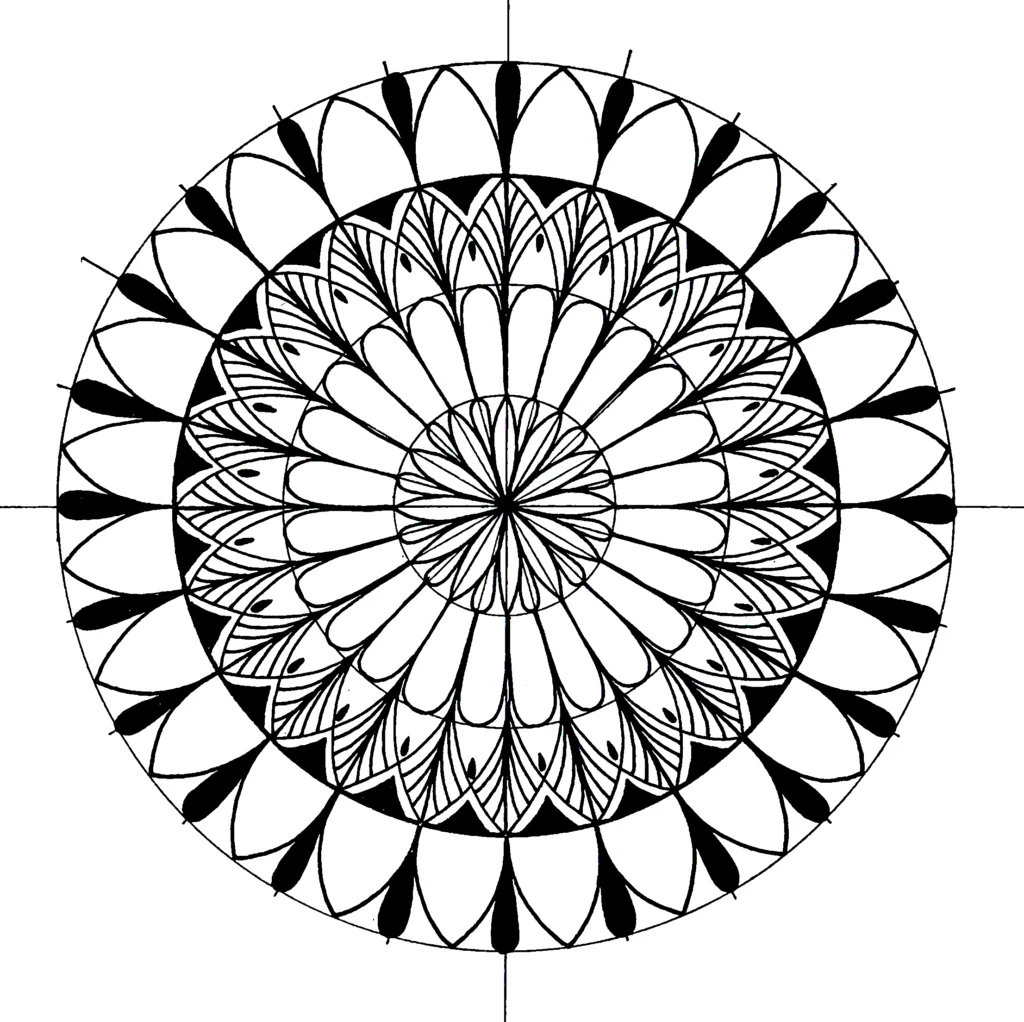
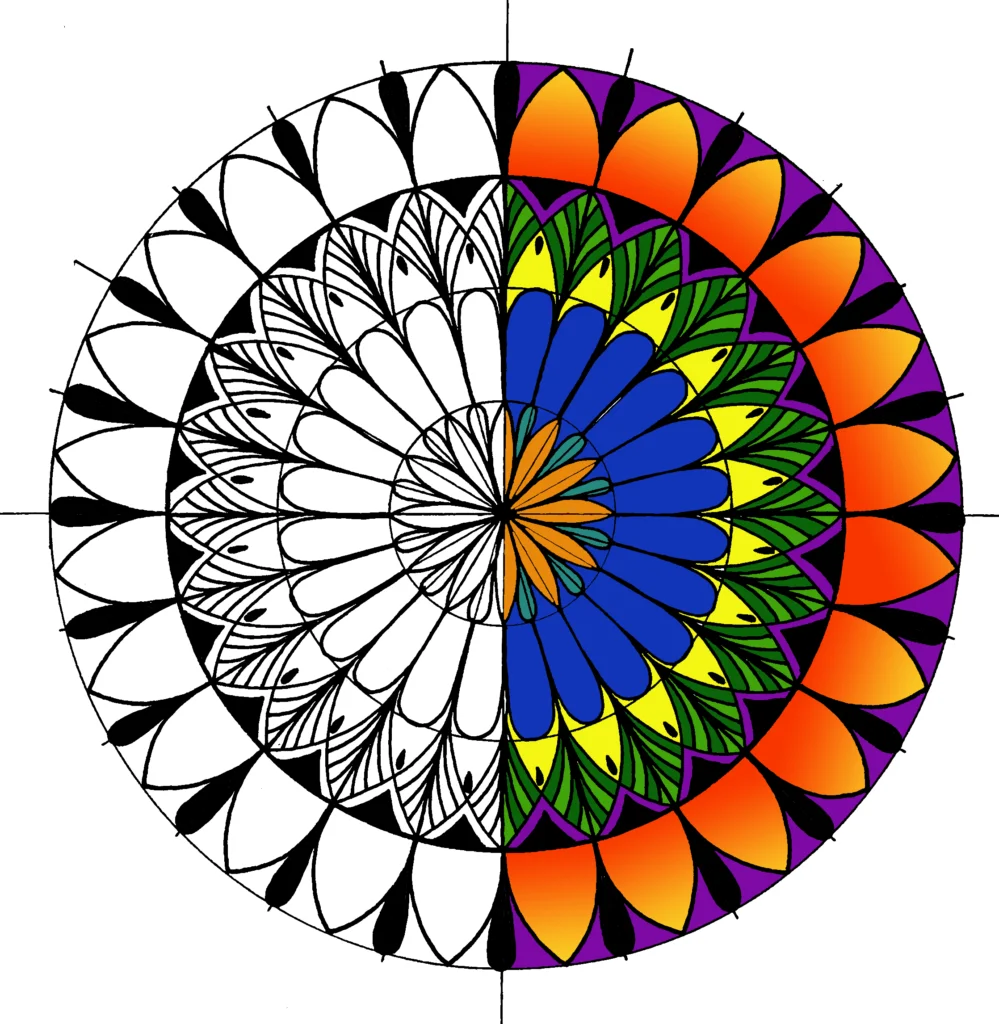
14- Color the tear drops in black.

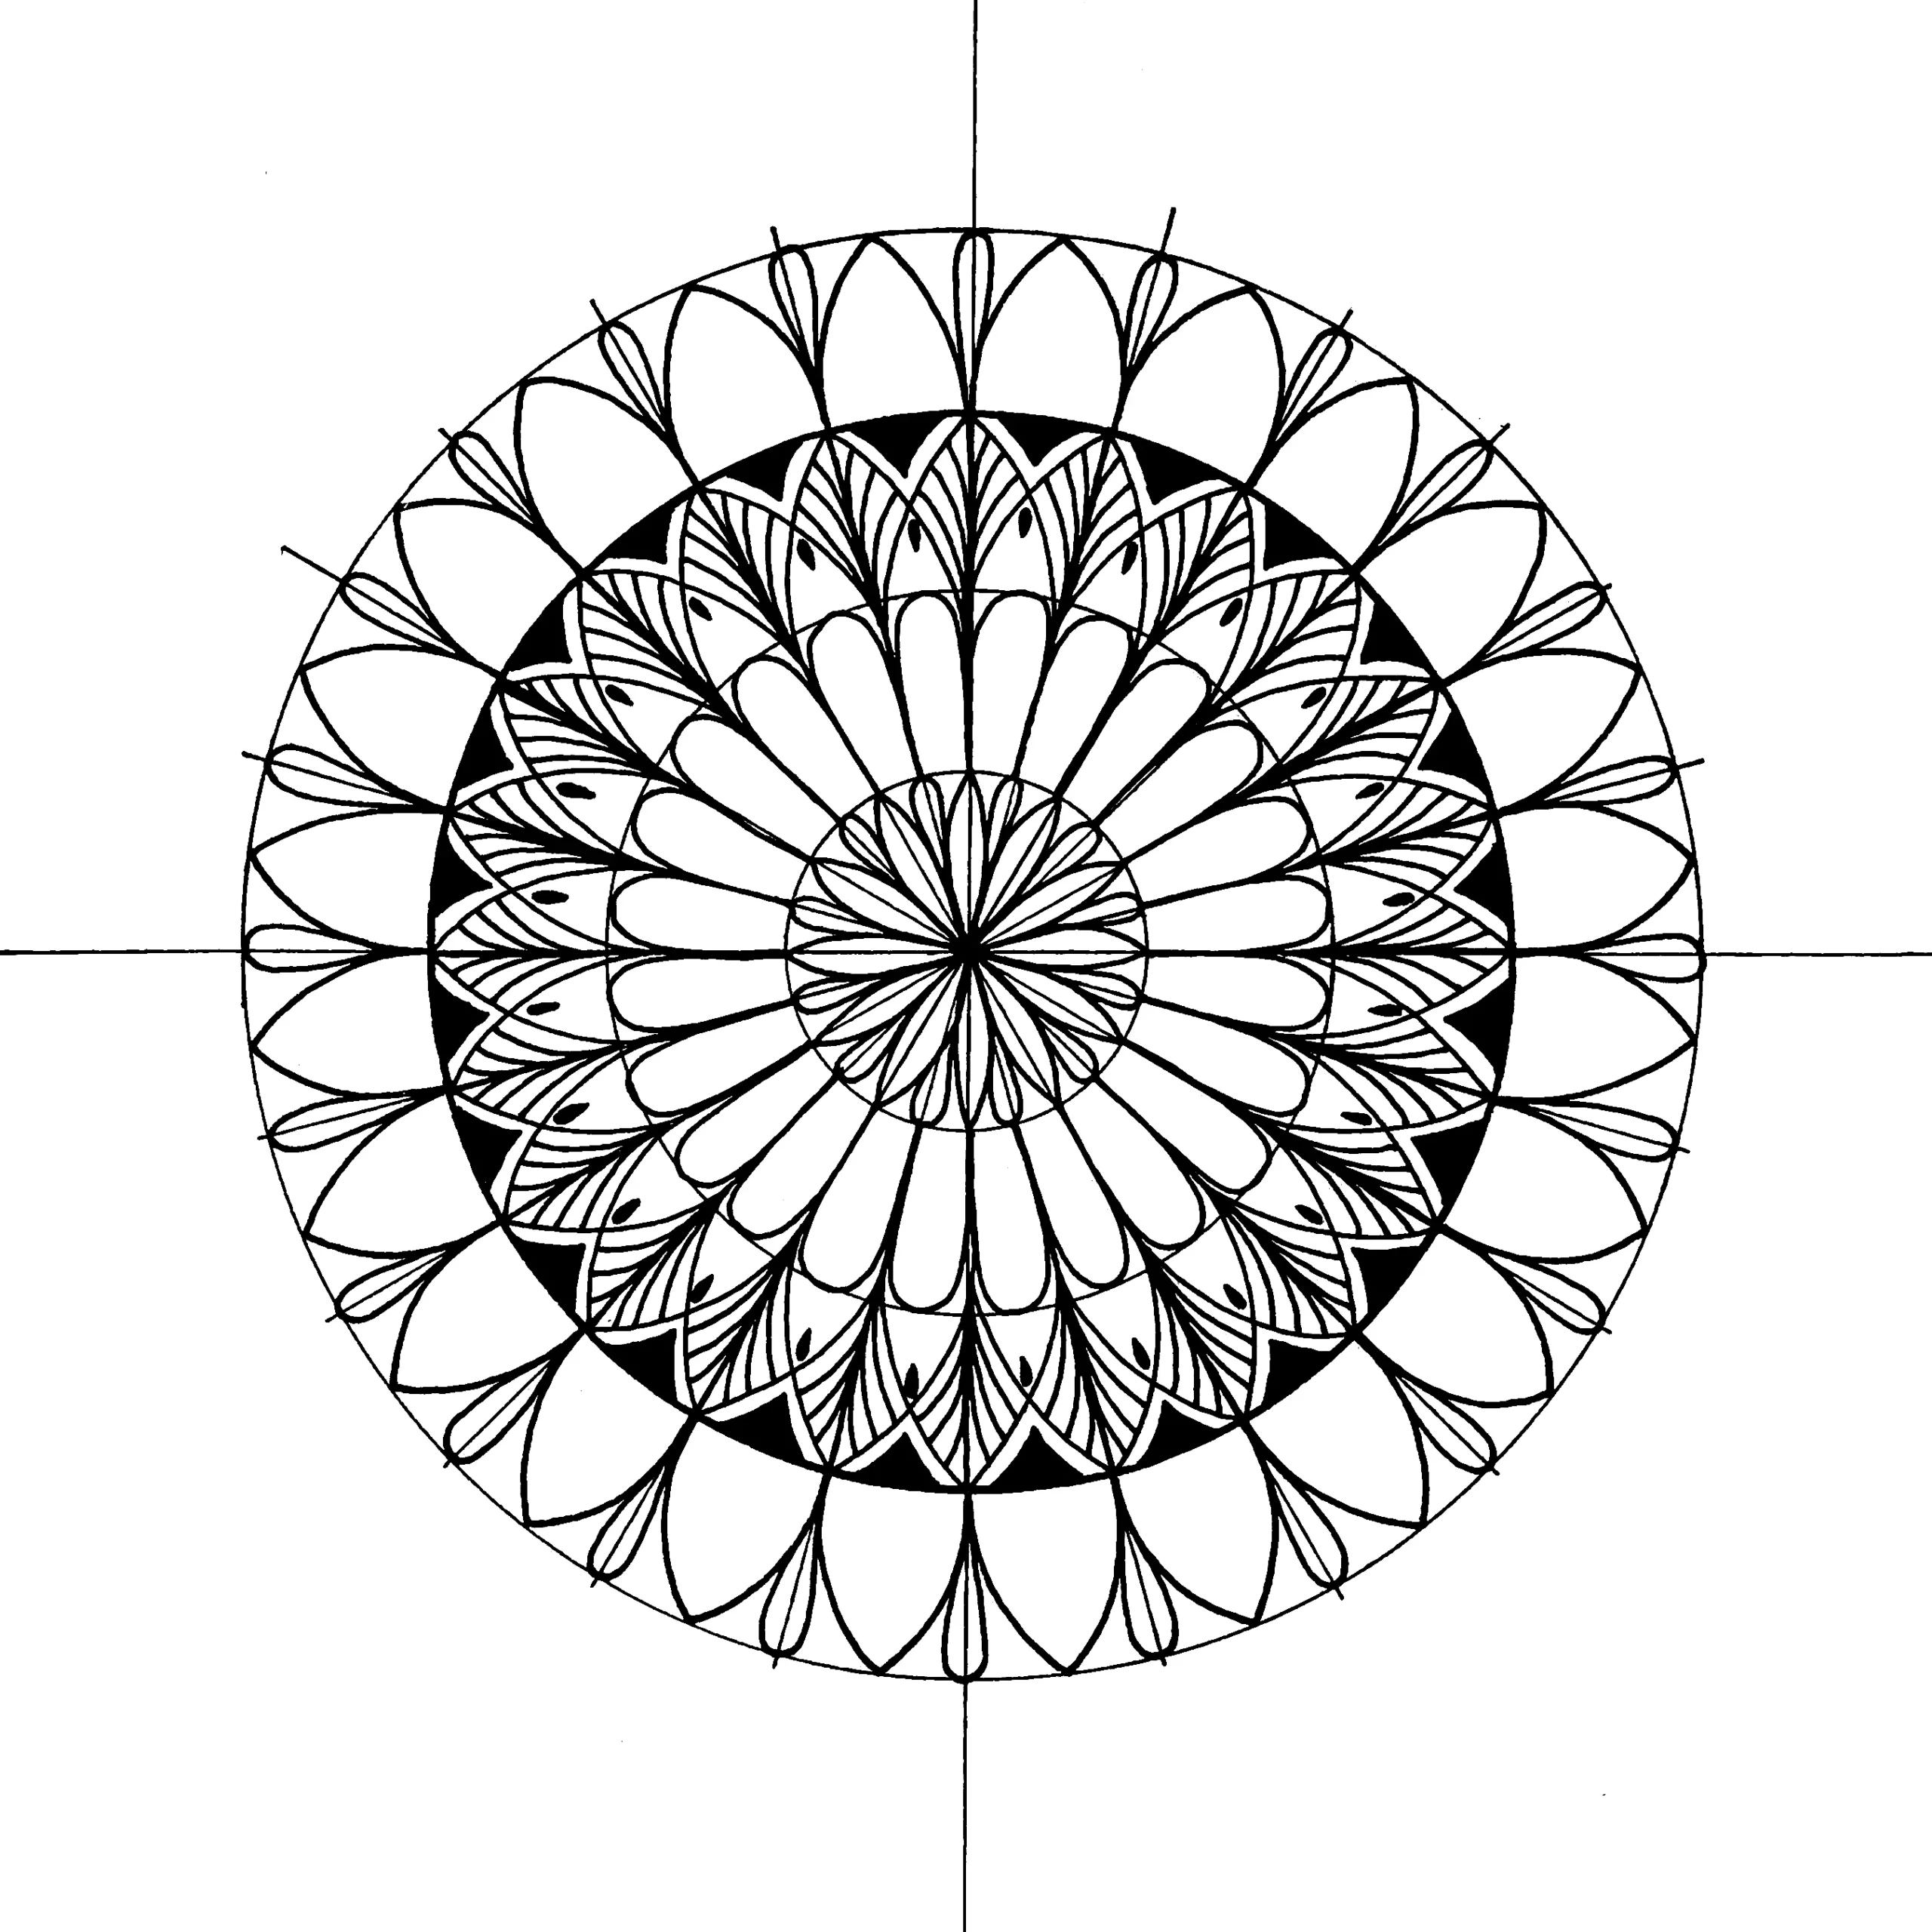
15- Color this beautiful mandala art for beginners the way you like it.
Final Thought
I hope you enjoyed creating this mandala step by step!
So, if you liked this tutorial, let me know in the comments — your feedback inspires me to keep sharing more.
I’d absolutely love to see your final result!
Feel free to tag me or send me a photo on Instagram so I can feature your artwork in my stories.
Looking for your next creative challenge? Try these tutorials next: