Every detailed mandala begins with a few simple lines and shapes. Circles, petals, leaves, teardrops, and arches may look basic on their own. However, when you repeat them around a central point, they create beautiful and balanced patterns. Learning these mandala basic shapes is a great place to start, especially if you are new to mandala drawing. You do not need to memorize complicated designs. Instead, you can practice one shape at a time. Then, you can change its size, direction, or inner details to create something new.
In this helpful list, you will discover the most common shapes used in mandala art. You will also find simple tutorials that show you how to draw and decorate them. With regular practice, these small motifs will become the building blocks of your own original mandalas.
What Are Mandala Basic Shapes?
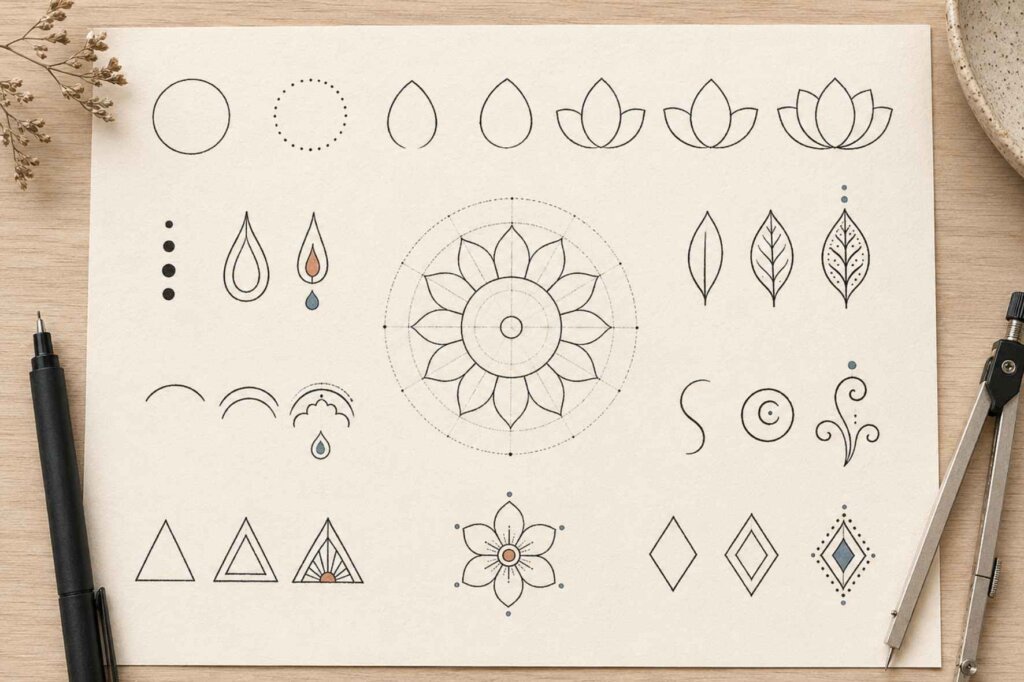
Mandala basic shapes are the simple elements that artists repeat to build a complete design. These elements can include circles, dots, petals, leaves, teardrops, arches, lines, and geometric forms.
A single petal may look very simple. However, when you repeat it evenly around a circle, it becomes a beautiful floral row. In the same way, a group of dots can create a delicate border. Curved lines can add movement, while triangles and diamonds give the design more structure.
You can also change each shape in many ways. For example, you can make it wider, longer, smaller, or slightly curved. You can add a double outline or decorate the inside with dots and lines. Therefore, even one basic motif can lead to many original patterns.
You do not need to draw every shape perfectly. Small differences are a natural part of hand-drawn art. As you continue practicing, your lines will become steadier and your spacing will improve.
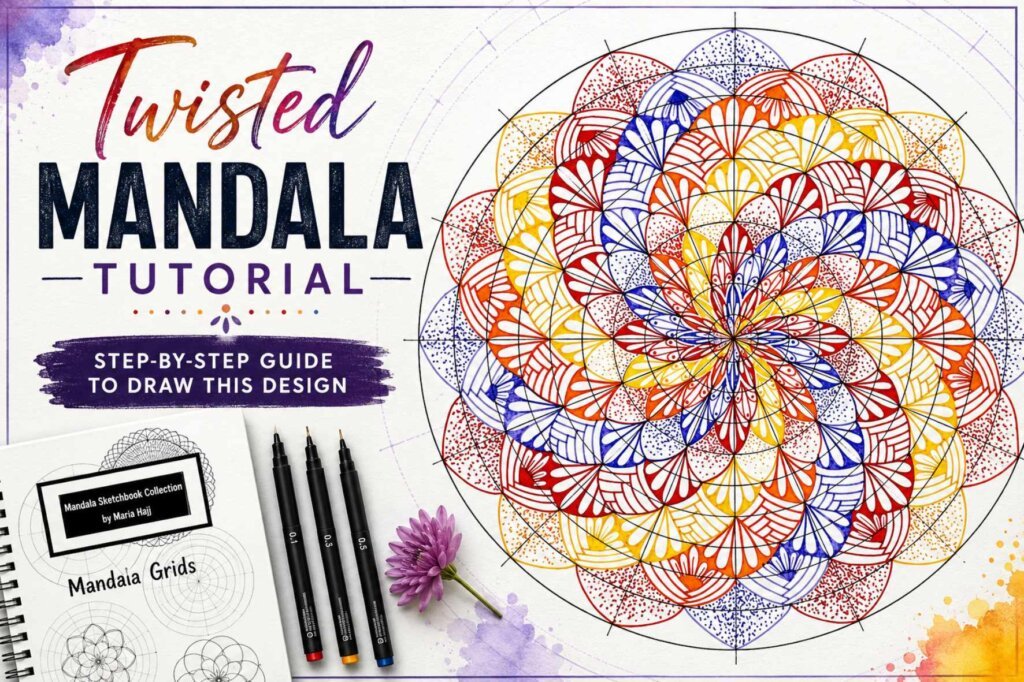
Once you understand these mandala basic shapes, creating a complete mandala becomes much easier. Instead of looking at the design as one complicated drawing, you will begin to see it as several simple shapes arranged in balanced rows. You can check this tutorial of a very simple mandala design created with basic shapes.
Materials You Need to Practice Mandala Shapes
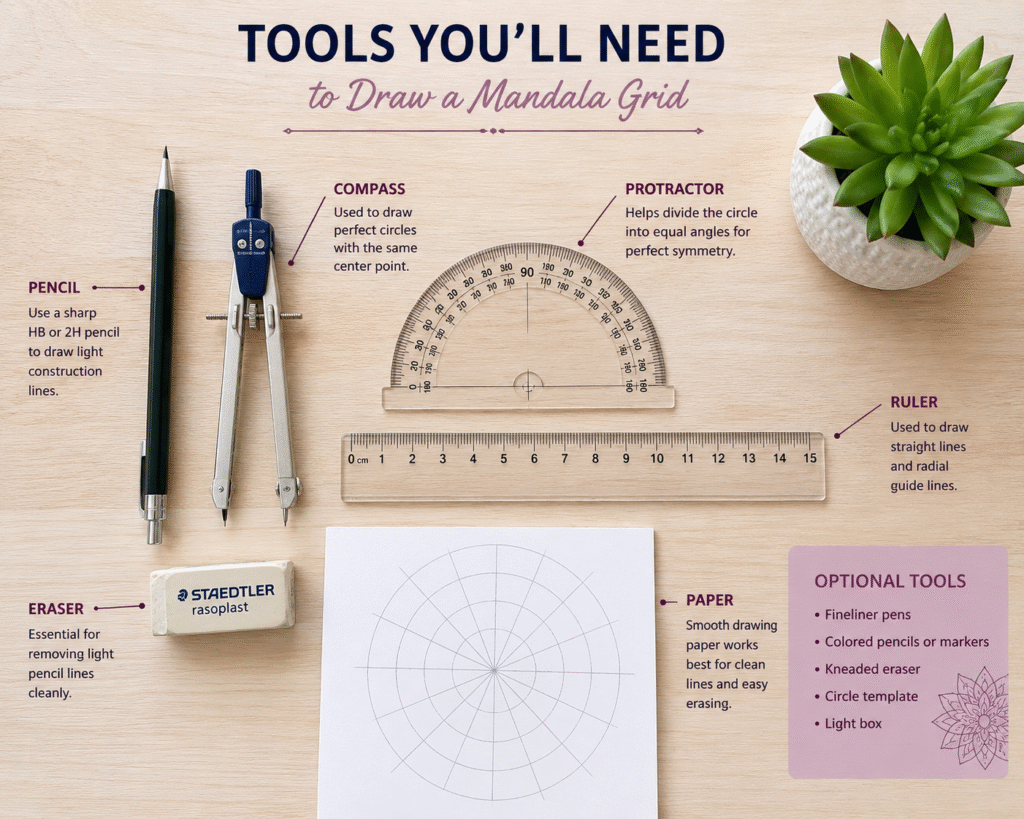
You do not need many supplies to practice mandala basic shapes. A few simple drawing tools are enough to help you create clean lines and balanced patterns.
Start with a pencil and eraser. A pencil allows you to sketch each shape lightly before outlining it. Choose an eraser that removes pencil marks without damaging the paper.
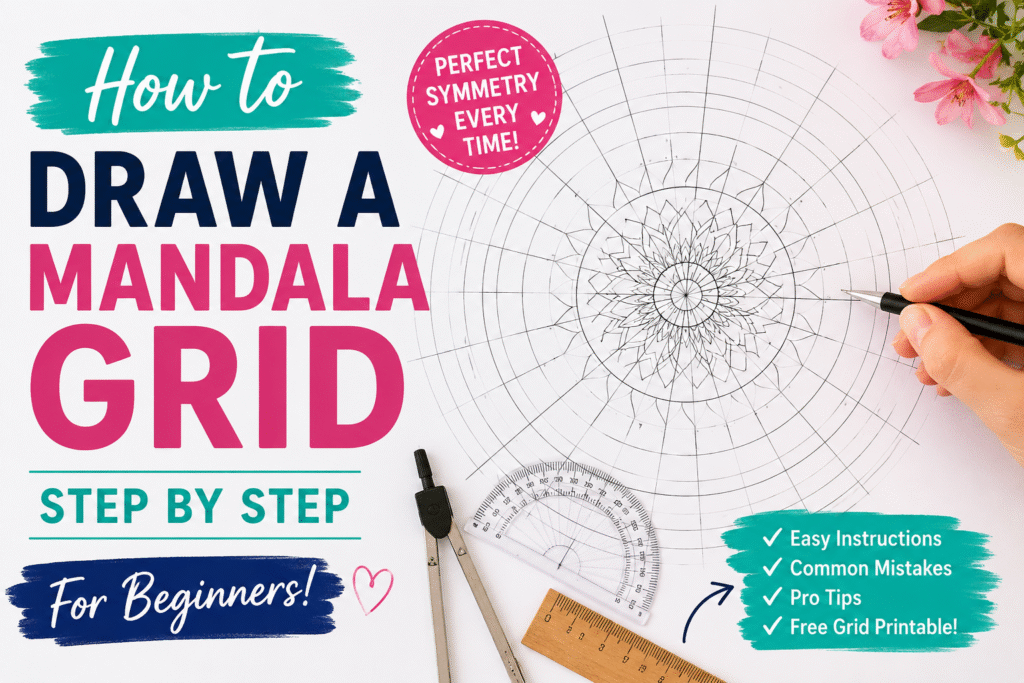
You will also need a ruler, drawing compass, and protractor. The compass helps you draw circles and create guidelines for different rows. Meanwhile, the ruler and protractor help you divide the mandala evenly.
Fine-tip pens are useful for outlining and adding small details. You can use different nib sizes for thin lines, bold outlines, dots, and stippling. However, one fine black pen is enough when you are just beginning.
Finally, choose smooth paper that works well with your pens. Plain paper is suitable for freehand practice, while dotted or squared paper can help you control the size and spacing of each shape.
As your confidence grows, you can explore more mandala drawing tools and experiment with colored pens, pencils, or markers. For now, keep your supplies simple and focus on practicing each shape slowly.
How to Practice Mandala Basic Shapes
Before drawing a complete mandala, practice each shape on its own. This simple exercise will help you control your lines, spacing, and proportions.
Begin by drawing the same shape several times in a straight row. For example, practice a row of circles, petals, or teardrops. Try to keep them similar, but do not worry if they are not perfectly identical.
Next, draw the shape in different sizes. Make one small, one medium, and one large. You can also change its width, length, or direction. These small changes will show you how one basic shape can create many different motifs.
Once you feel comfortable, repeat the shape around a circle. Lightly draw a circular guideline, then place the motifs beside one another. This exercise will help you understand repetition and symmetry.
You can also decorate the inside of each shape. Add dots, curved lines, smaller petals, double outlines, or stippling. Keep the first designs simple. Then, gradually add more details as your hand becomes steadier.
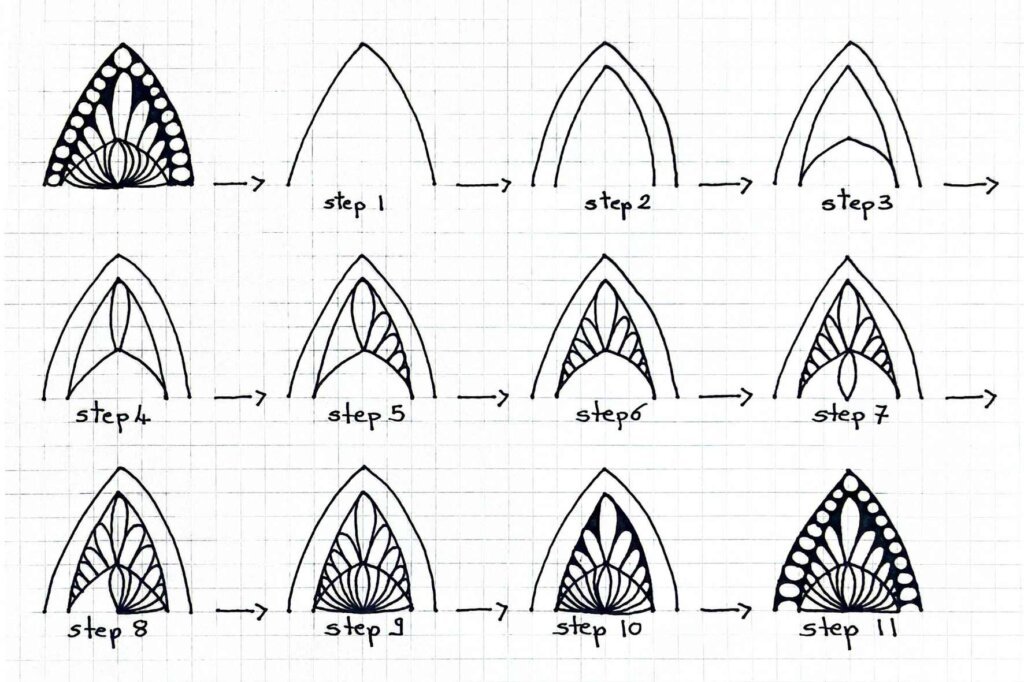
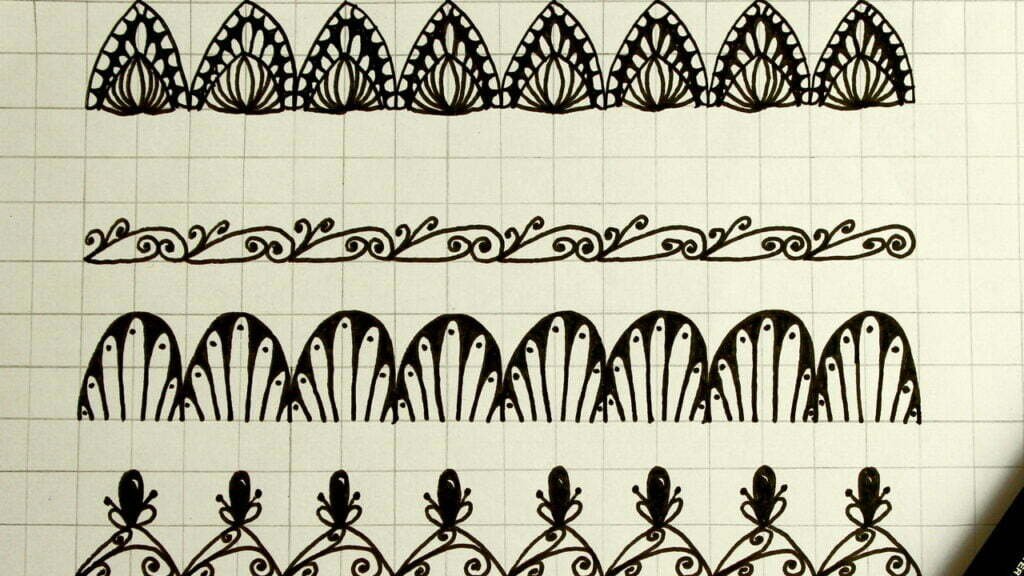
If you are ready to combine the shapes, follow my tutorial on How to Easily Draw Four Mandala Patterns. It demonstrates how simple motifs can become beautiful patterns through repetition and small decorative changes.
Regular practice is more helpful than trying to draw one perfect design. Even ten minutes of practice can improve your confidence and make the next mandala easier to create.
A Helpful List of Mandala Basic Shapes
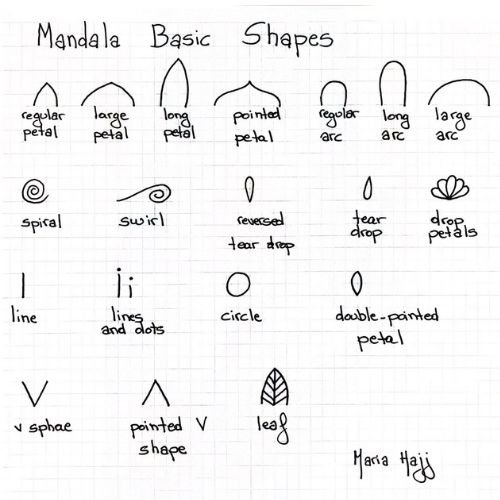
The shapes in the image above are some of the motifs I use most often when drawing mandalas. They may look simple on their own. However, repeating and combining them can produce countless patterns.
You do not need to learn every shape at the same time. Begin with circles, lines, arcs, and regular petals. Once these feel comfortable, practice the longer, larger, and more pointed variations.
Basic Petal Shapes
Petals appear in many floral mandalas. Changing their size or tip can completely change the style of a pattern.
The basic petal shapes shown in the guide include:
- Regular petal
- Large petal
- Long petal
- Pointed petal
- Double-pointed petal
A regular petal has a soft and balanced form. A large petal can fill wider spaces, while a long petal helps extend the design outward. Pointed petals create sharper patterns. Meanwhile, a double-pointed petal can connect two rows or decorate narrow spaces.
Arcs in Different Sizes
An arc is a simple curved line. It is one of the most useful mandala basic shapes because it can become a border, part of a petal, or a decorative layer.
The image shows three common variations:
- Regular arc
- Long arc
- Large arc
You can draw several arcs beside one another to create scallops. You can also place one arc inside another to form a double outline. Changing the width and height will help you fit the curve into different areas.
Spirals and Swirls
Spirals and swirls add movement to a mandala. Although the two shapes are similar, they can create different effects.
A spiral begins at the center and curves outward. A swirl has a looser curve and may stretch in one direction. Both shapes work well inside petals, around the center, or near the outer border.
Practice drawing them in both directions. This will make it easier to create balanced patterns on opposite sides of the mandala.
Teardrops and Drop Petals
A teardrop has a rounded base and a narrow tip. You can draw it upright, upside down, or at an angle.
The guide includes:
- Small teardrop
- Regular teardrop
- Drop petals
Drop petals combine several small teardrop shapes to create a tiny flower. You can use this motif between larger petals or as a decorative filler.
Lines, Dots, and Circles
Lines, dots, and circles are among the simplest elements in the guide. However, they play an important role in mandala drawing.
A single line can divide a motif or add texture. Several lines can fill a petal or leaf. You can also combine lines with dots to make a small decorative border.
Circles can form the center of a mandala. Smaller circles and dots are useful for filling spaces and separating repeated shapes.
V Shapes
The guide also includes two useful V-shaped motifs:
- Regular V shape
- Pointed V shape
The regular V shape is wider and more open. The pointed version is taller and narrower. You can repeat these shapes around a circle to form stars, crowns, or geometric borders.
Leaves
A leaf begins with a simple pointed outline. You can leave it empty or add a central line with smaller diagonal lines on both sides.
Leaves bring a natural touch to floral mandalas. You can draw them alone, arrange them in pairs, or place them between larger petals.
These mandala basic shapes are only starting points. You can stretch them, rotate them, decorate their interiors, or place one shape inside another. With practice, even this small collection can help you create many original mandala patterns.
How One Basic Shape Creates Many Variations
You do not need to learn hundreds of different motifs. One simple shape can produce many variations when you change its size, outline, direction, or internal details.
A petal is a good example. Start with a regular petal made from two curved lines that meet at the top and bottom. Once you can draw this shape, you can transform it in several ways.
Change the Size and Proportions
Make the petal wider to create a large, rounded shape. This variation works well when you need to cover a wide space.
You can also stretch the same petal upward. A long petal helps the mandala expand outward and gives the design a more delicate appearance.
Change the Tip
A rounded tip creates a soft floral pattern. In contrast, a pointed tip makes the design look sharper and more structured.
You can also create a double-pointed petal by allowing both ends to meet at a point. This shape fits well between larger motifs and inside narrow rows.
Change the Direction
Turn a petal upside down or place it at an angle. Although the outline stays the same, the new direction changes the movement of the pattern.
You can also overlap two petals or place a smaller petal inside a larger one. These simple changes add depth without introducing a completely new shape.
Add Interior Details
An empty petal can become more decorative when you add:
- A double outline
- Straight or curved lines
- Dots or stippling
- A smaller petal
- A teardrop
- A spiral
- A simple leaf pattern
Begin with one detail so the motif remains clear. Then, combine two decorations when you feel more confident.
The same method works with other mandala basic shapes. You can lengthen a teardrop, widen an arc, decorate a circle, or add a central line to a leaf. Therefore, a small collection of shapes can lead to many original mandala patterns.